Foxit PDF SDK简介
Foxit PDF SDK
Foxit PDF SDK提供高性能的开发库,帮助软件开发人员使用最流行的开发语言和环境在不同平台 (包括Windows、Mac、Linux、Web、Android、iOS 和 UWP) 的企业版、移动版和云应用程序中添加强大的PDF功能。
使用Foxit PDF SDK的应用开发人员可以利用Foxit强大、标准化的PDF技术安全地显示、创建、编辑、批注、格式化、管理、打印、共享,搜索PDF文档,以及填写PDF文档。此外,Foxit PDF SDK包括一个内置可嵌入的PDF Viewer,使得开发过程更加简单和快速。有关更多详细信息,可以访问网站https://developers.foxitsoftware.cn/pdf-sdk/。
在本指南中,我们将重点介绍Foxit PDF SDK for iOS 平台。
Foxit PDF SDK for iOS
您是否曾经为PDF规范的复杂性而感到不知所措?您是否曾经为被要求在有限的时间内构建一个功能齐全的PDF应用而感到迷茫。如果您的答案是”Yes”, 那么恭喜您!您找到了在业界中快速将PDF功能集成到应用程序中的优选方案。
Foxit PDF SDK for iOS 致力于帮助开发人员快速将强大的Foxit PDF技术集成到他们自己的移动端应用程序中。通过Foxit 开发包,即使是对PDF了解有限的开发人员也可以在iOS 或者 macOS平台上用几行代码快速构建一个专业的PDF 阅读器。
为什么选择Foxit PDF SDK for iOS
Foxit 是领先的PDF软件解决方案供应商,专注于PDF显示、编辑、创建、管理以及安全方面。Foxit PDF SDK 开发库已在当今许多知名的应用程序中使用,并且经过长期的测试证明Foxit PDF SDK的质量、性能和功能正是业界大部分应用程序所需要的。
Foxit PDF SDK for iOS 提供了快速PDF阅读和iOS/macOS设备的操作控制。选择Foxit PDF SDK for iOS的几大理由:
易于集成
开发人员可以通过几行代码无缝的将SDK集成到他们自己的应用程序中。
设计完美
Foxit PDF SDK for iOS拥有简单、干净和友好的风格,并且提供了最好的用户体验。
灵活定制
Foxit PDF SDK for iOS 提供了应用层用户界面的源代码,可以帮助开发人员对应用程序的功能和界面外观进行灵活定制。
移动平台上的鲁棒性
Foxit PDF SDK for iOS 提供了OOM (内存溢出) 恢复机制,以确保应用程序在内存有限的移动设备上运行时仍然具备较高的鲁棒性。
基于福昕高保真的PDF渲染引擎
Foxit PDF SDK的核心技术是基于世界众多知名企业所信赖的福昕PDF引擎。福昕强大的PDF引擎可快速解析和渲染文档,不受设备环境的约束。
优秀的技术支持
福昕对自己的开发产品提供了优秀的技术支持,当您在开发关键重要的产品时,可以提供高效的帮助和支持。福昕拥有一支PDF行业优秀的技术支持工程师团队,同时将定期地进行版本更新发布,通过添加新的功能和增强已有的功能来提升用户体验。
Foxit PDF SDK for iOS的主要框架
Foxit PDF SDK for iOS 由三个元素组成,如下图所示。Foxit PDF SDK的所有移动平台版本共享此结构,这样便于在您的应用程序中集成,以及支持多种手机操作系统和框架。
备注:从7.3版本开始,Foxit PDF SDK for iOS提供了一个新的发布包,可以支持使用Mac Catalyst构建Mac版本的app。
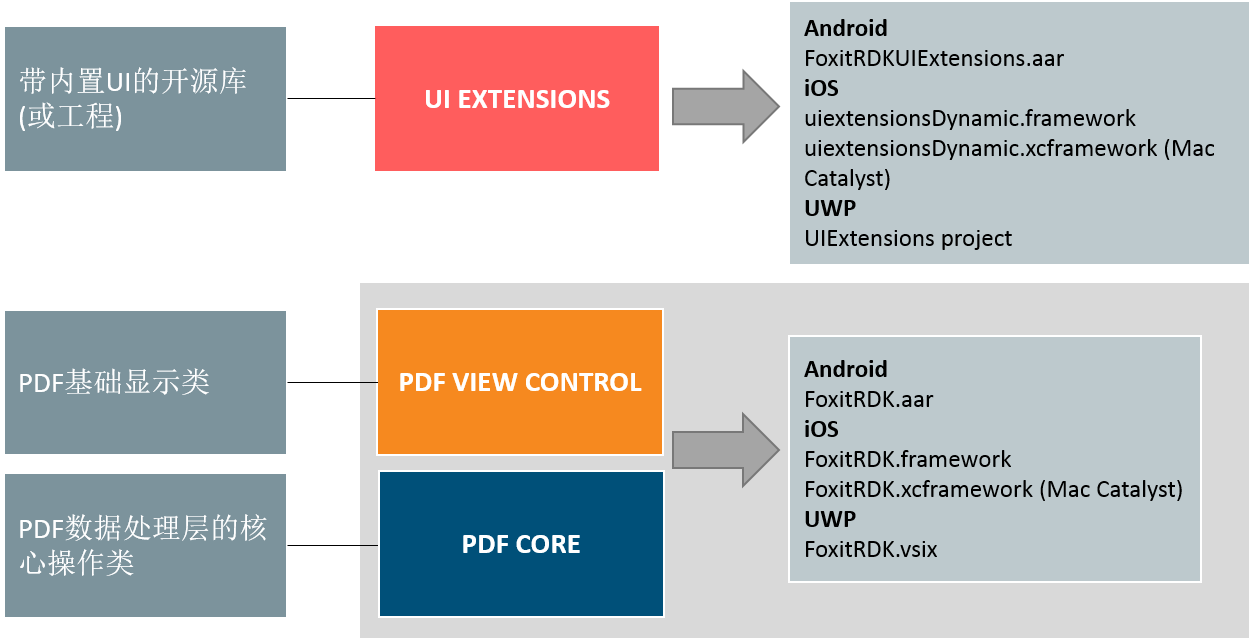 Foxit PDF SDK for Android, iOS, UWP的三种组成元素
PDF Core API
PDF Core API 是SDK的核心部分,建立在福昕强大的底层PDF技术上。它提供了PDF基础功能操作相关的函数,包含了PDF View控件和UI Extensions组件中使用到的PDF核心处理功能,以确保应用程序达到高的性能和效率。该API 可单独用于文档的渲染、分析、文本提取、文本搜索、表单填写、数字签名、压感笔迹 (PSI) 、证书和密码加密、注释的创建和管理等等。
PDF View Control
PDF View控件是一个工具类,根据开发人员的需求提供开发人员与渲染的PDF文档进行交互所需要的功能接口。以福昕享有盛誉且使用广泛的PDF渲染技术为核心,View Control支持快速高质量的渲染、缩放、滚动和页面导览功能。该View控件继承于平台相关viewer的类,例如iOS平台的UIView, 并且允许进行扩展来满足特定用户的需求。
UI Extensions 组件
UI Extensions 组件是一个带内置UI的开源库,支持对内置的文本选择,标记注释、大纲导航、阅读书签、全文检索、填表、文本重排、文档附件、数字/手写签名、文档编辑和密码加密等功能进行自定义。UI Extensions组件中的这些功能是通过使用PDF core API和PDF View Control来实现的。开发人员可以利用这些已有的UI实现快速构建一个PDF阅读器,同时可以根据需要灵活自定义其UI界面。
从4.0版本开始,Foxit PDF SDK for iOS对UI Extensions 组件做了一个重大的改变和优化。将基础的UI实现都封装到FSPDFReader类中,比如面板控件、工具栏设置、以及预警视图对话框等。因此,构建一个功能齐全的PDF阅读器变得越来越简单和容易。此外,用户可以通过一个配置文件灵活自定义他们需要的功能。
从5.0版本开始, Foxit PDF SDK for iOS移除了FSPDFReader类,将FSPDFReader类中封装的APIs移到了UI Extensions组件中。内置UI中的任何元素都可以通过API来进行自定义。该版本还为开发人员提供了更高级的APIs和更强大的配置文件来对UI元素进行自定义,比如显示/隐藏某个特定的面板、top/bottom toolbar、top toolbar中的菜单项,以及View setting bar和More Menu view中的菜单项。
UI Extensions组件概述
UI Extensions组件采用module机制,将每个功能细化成一个module。当加入UI Extensions时,所有的modules除了LocalModule(用于文件管理)会被默认自动加载。用户可以通过实现Module接口类来自定义module,然后调用UIExtensionsManager#registerModule在当前UIExtensions Manager中进行注册。如果不需要使用时,可以调用UIExtensionsManager#unregisterModule进行反注册。
UIExtensionsManager包含了主框架UI,如top/bottom toolbar, 以及各个模块之间共享的UI组件。同时,各个功能模块也可以通过UIExtensionsManager来进行单独加载。功能模块在加载的时候会对主框架UI进行适配和调整,并且建立起消息事件响应的联系。各个功能模块可能包含了其模块特有的UI组件,同时也会有自己独立的消息事件处理逻辑。UIExtensionsManager也会负责将从View Control组件接收到的消息和事件分发到各个功能模块中去。下面的图片讲述了UIExtensionsManager和modules之间的详细关系。

UIExtensionsManager和 modules之间的关系
Tool handler与annotation handler处理来自PDFViewCtrl的触屏、手势等事件。当触屏和手势事件触发时,PDFViewCtrl会将相应的事件传递给UIExtensionsManager:
a)如果当前存在tool handler, UIExtensionsManager会将相应的事件传递给当前的tool handle,然后事件处理过程结束。
b)如果当前有选择annotation,UIExtensionsManager会将相应的事件传递给当前所选择的annotation对应的annotation handler,然后事件处理过程结束。
c)如果当前不存在tool handler,也没有选中的annotation,那么UIExtensionsManager会将相应的事件传递给selection tool handler。Text Selection tool用于文本选择相关事件的处理,例如选择一段文本添加highlight annotation。Blank Selection tool用于空白处相关事件的处理,例如在空白处添加Note annotation。
备注:Tool Hander和Annotation Handler不会同时响应事件。Tool Handler主要用于annotation的创建(目前不支持Link Annotation的创建)、signature的创建和文本选择。Annotation Handler主要用于annotation的编辑以及表单填写。下图讲述了Tool Handler和Annotation Handler之间的事件响应流程。
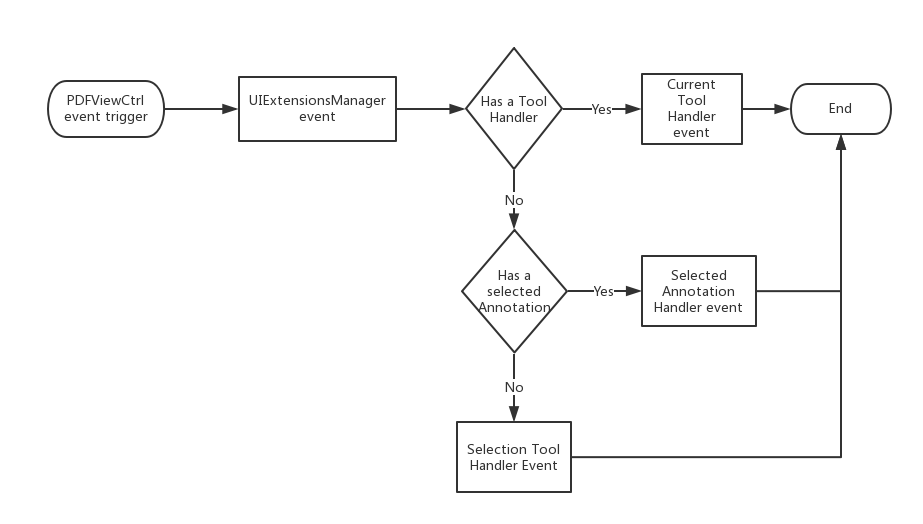
Tool Handler和Annotation Handler之间的事件响应流程
Foxit PDF SDK for iOS的主要功能
Foxit PDF SDK for iOS包括了一些主要的功能,用来帮助应用程序开发人员在快速实现他们所需要的功能的同时减少开发成本。
备注:从7.1版本开始,Foxit PDF SDK for iOS支持iOS 13的新特性Dark Mode。工具条框架中的所有内置控件可以调整其外观来无缝地匹配当前系统的外观。
| 功能 | 描述 |
| PDF Document | 打开和关闭文件,设置和获取metadata。 |
| PDF Page | 解析、渲染、阅读、编辑文档页面。 |
| Render | 平台图像设备在bitmap上创建图像渲染引擎。 |
| Reflow | 重排页面内容。 |
| Crop | 裁剪PDF页面。 |
| Text Select | 文本选择。 |
| Text Search | 文本搜索,并且支持全文索引搜索。 |
| Outline | 定位和链接到文档中的兴趣点。 |
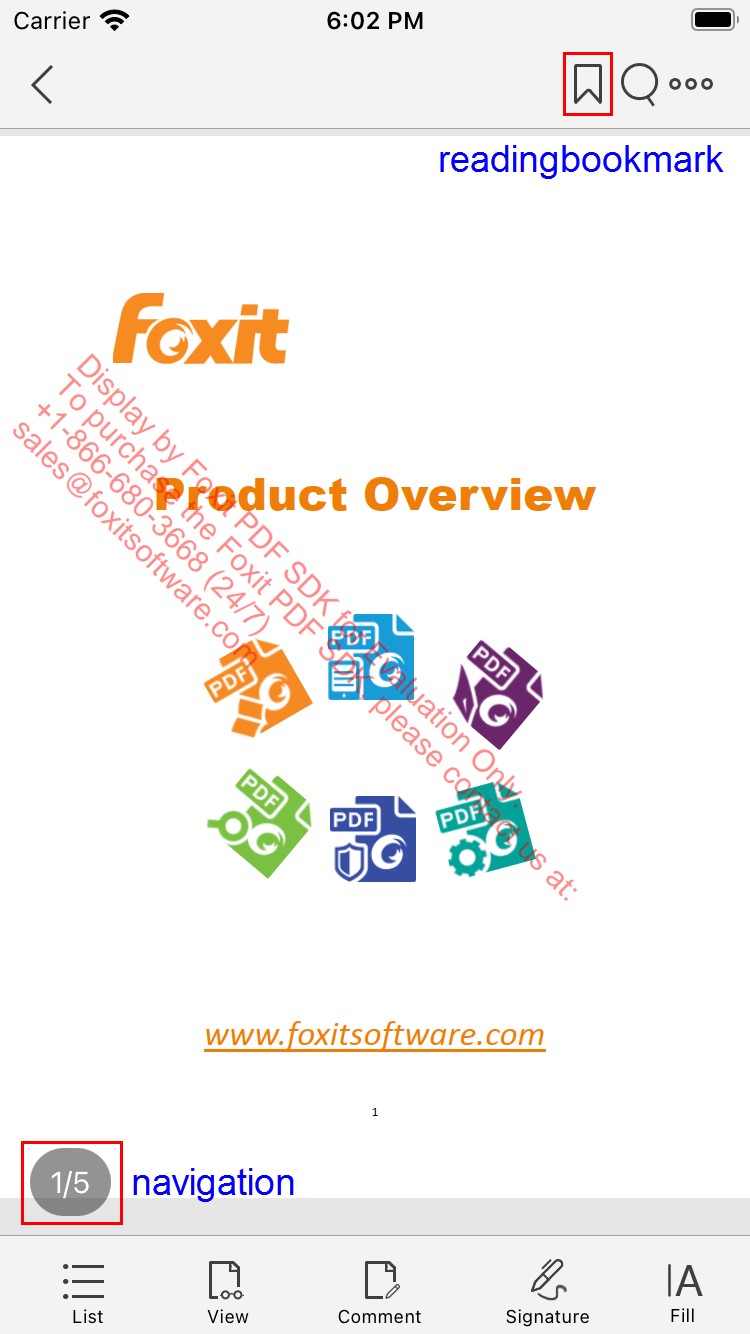
| Reading Bookmark | 标记文档中感兴趣的页面和段落位置。 |
| Annotation | 创建、编辑和移除annotations。 |
| Layers | 添加、编辑和移除PDF层内容。 |
| Attachments | 添加、编辑和移除文档级的附件。 |
| Form | 支持JavaScript填表,通过XFDF/FDF/XML文件导入和导出表单数据。 支持创建文本域、复选框、单选按钮、组合框、列表框和签名域。 |
| XFA | 支持静态和动态XFA。 |
| Signature | 签名PDF文档,验证签名,添加或删除签名域。 添加和验证第三方数字签名。 支持签名的长期验证(LTV)。 |
| Fill | 用文本和符号填写扁平化表单(即非交互式表单) |
| Security | 密码和证书加密PDF文档。 |
| Pan and Zoom | 调整视图中的放大倍数和位置以匹配Pan&Zoom缩略视图中的矩形区域。 |
| 打印PDF文档。 | |
| RMS | 支持微软IRMv1和IRMv2标准的RMS解密。 |
| Comparison | 对比两个PDF文档,并且标记文档之间的差异。 |
| Scanning | 扫描纸质文档,并将其转换为PDF文档。 |
| Speak | 支持阅读PDF文档中的文本。 |
| Out of Memory | 从内存不足中恢复运行。 |
备注 :Outline是PDF规范中的技术术语,在传统的桌面PDF阅读器中常叫做书签。Reading bookmarks常用于移动端和平板的PDF阅读器中,用来标记阅读进度或者用户感兴趣的段落。Reading bookmark在技术上并不是outline,它存储在应用程序中而不是PDF本身。
Foxit PDF SDK for iOS支持鲁棒性的PDF应用程序
在有限内存的移动平台上开发鲁棒性的PDF应用程序是具有挑战性的。当内存分配失败,应用程序可能会crash或者意外退出。为了解决这个问题,Foxit PDF SDK for Android提供了一种内存溢出(OOM) 机制。
OOM是Foxit PDF SDK for iOS的一个高级功能,因为其本身的复杂性。OOM机制的关键点是Foxit PDF SDK for iOS会监视内存的使用情况,并在检测到OOM后自动执行恢复操作。在恢复的过程中,Foxit PDF SDK for iOS会自动重新加载文档和页面,将恢复到发生OOM之前的原始状态。这意味着当前阅读的页面和位置,以及页面阅读模式(单页或者连续页面)都能够恢复,但是编辑相关的内容将会丢失。
Foxit PDF SDK for iOS在FSPDFViewCtrl类中提供一个属性”shouldRecover“。默认情况下,”shouldRecover” 为 “YES”。如果在检测到OOM时您不想开启自动恢复机制,您可以将”shouldRecover” 设置为 “No”,如下所示:
self.pdfViewControl = [[FSPDFViewCtrl alloc] initWithFrame:[[UIScreen mainScreen] bounds]];
self.pdfViewControl.shouldRecover = NO;
此时,应用程序将会抛出异常,可能会crash或者意外退出。
评估
用户可申请下载Foxit PDF SDK的试用版本进行试用评估。试用版除了有试用期10天时间的限制以及生成的PDF页面上会有试用水印以外,其他都和标准认证版一样。当试用期到期后,用户需联系福昕销售团队并购买licenses以便继续使用Foxit PDF SDK.
授权
程序开发人员需购买licenses授权才能在其解决方案中使用Foxit PDF SDK。 Licenses授予用户发布基于Foxit PDF SDK开发的应用程序的权限。然而,在未经福昕软件公司授权下,用户不能将Foxit PDF SDK包中的任何文档、示例代码以及源代码分发给任何第三方机构。
关于此文档
此文档适用于需要将Foxit PDF SDK for iOS集成到自己的应用程序中的开发人员。它旨在介绍以下章节:
- Section 1: 介绍Foxit PDF SDK,特别是iOS平台的SDK。
- Section 2: 说明包的结构,以及运行demos。
- Section 3: 介绍如何快速创建功能齐全的PDF阅读器。
- Section 4: 介绍如何使用Mac Catalyst快速创建功能齐全的PDF阅读器。
- Section 5: 介绍如何自定义用户界面。
- Section 6: 介绍如何使用Foxit PDF SDK core API。
- Section 7: 介绍如何创建自定义工具。
- Section 8: 展示如何使用Cordova实现Foxit PDF SDK
- Section 9: 展示如何使用React Native实现Foxit PDF SDK
- Section 10: 展示如何使用Xamarin实现Foxit PDF SDK
- Section 11: 列出常见问题
- Section 12: 提供技术支持信息
入门指南
安装并集成Foxit PDF SDK for iOS非常简单。您只需要几分钟就能见证其强大的功能。本指南主要介绍如何在iOS或macOS平台使用Foxit PDF SDK。本章的主要内容是包结构的介绍以及如何运行demo。
系统要求
不支持Mac Catalyst的发布包:
iOS 10.0 或更高版本
Xcode 9.0 或更高版本
备注:如果 iOS是13 或更高的版本,那么Xcode需要使用11或更高版本。
支持Mac Catalyst的发布包:
macOS 10.15 or higher
Xcode 11 or higher
包结构说明
Foxit PDF SDK for iOS提供了如下的两种包:
foxitpdfsdk_7_4_ios.zip: 构建的app只能部署到iPhone 或者iPad设备上。
foxitpdfsdk_7_4_ios_catalyst.zip: 构建的app可以部署到iPhone、iPad或者 Mac设备上。
备注:如果您需要在macOS系统上部署app,请选择foxitpdfsdk_7_4_ios_catalyst.zip包。
不支持Mac Catalyst的发布包
下载 “foxitpdfsdk_7_4_ios.zip”包,解压到一个新的目录如 “foxitpdfsdk_7_4_ios”,如Figure 2-1所示。其中解压包中包括如下的内容:
| docs: | API手册,开发文档和升级说明文档 |
| icc_profile | 输出预览 (output preview) 功能所使用的默认icc profile文件 |
| libs: | License文件,AAR,UI Extensions组件源代码 |
| samples: | Android 示例工程 |
| getting_started_ios.pdf: | Foxit PDF SDK for iOS 快速入门 |
| legal.txt: | 法律和版权信息 |
| release_notes.txt: | 发布信息 |
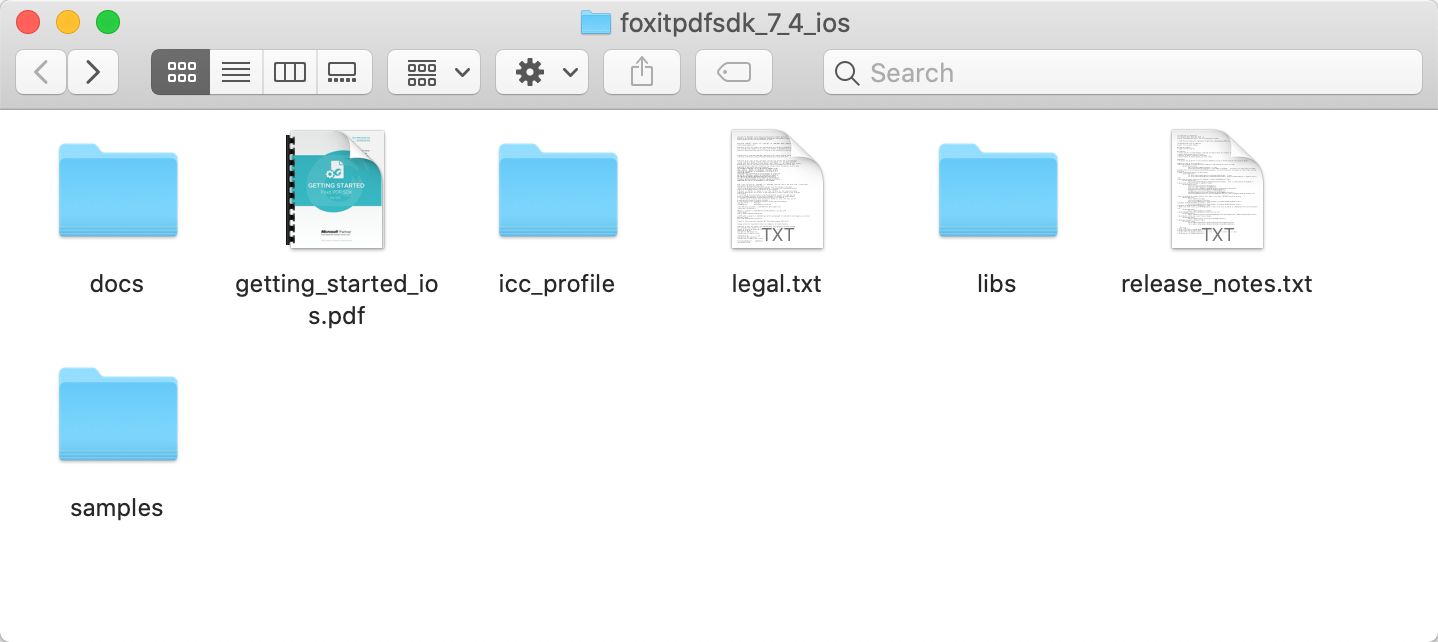
Figure 2-1
如Figure 2-2所示的 “libs” 文件夹下是Foxit PDF SDK for iOS的核心组件。
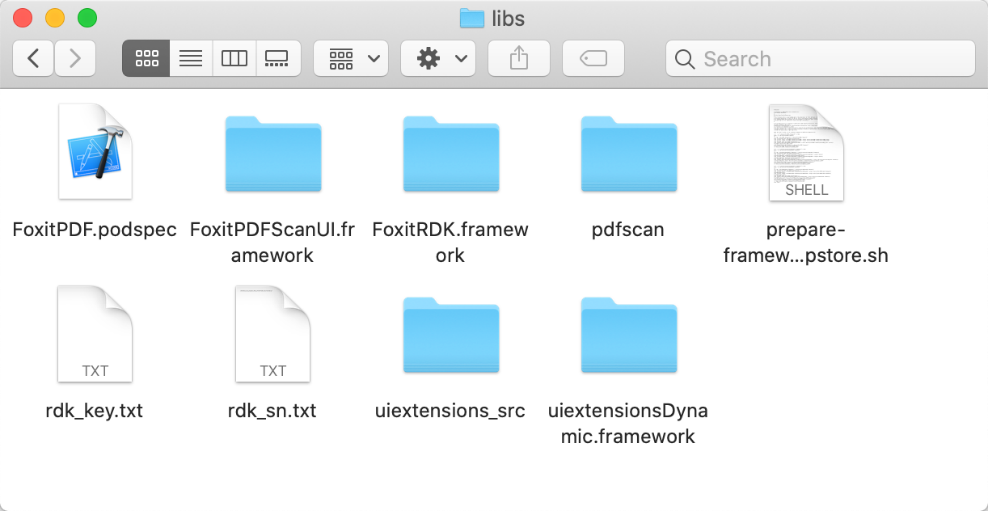
Figure 2-2
- FoxitRDK.framework – 该framework包含Foxit PDF SDK for iOS的动态库和相关头文件。
- uiextensionsDynamic.framework – 该framework包括UI Extensions动态库,相关头文件,以及默认内置UI实现需要的资源文件。
- FoxitPDFScanUI.framework – 该framework包括Foxit PDF SDK扫描功能动态库,相关头文件,以及扫描功能默认内置UI实现需要的资源文件。
- FoxitPDF.podspec – cocoaPods工具的配置文件,用于管理第三方库。该配置文件在 “使用React Native实现Foxit PDF SDK for iOS” 章节中有用到。
- prepare-framework-to-publish-to-appstore.sh – 用于将arm架构从Foxit SDK Framwork中剥离的脚本文件。Foxit SDK Framwork包括arm64,armv7,i386和x86_64架构,但是i386和x86_64架构的framework不允许上传到Apple App Store。
- pdfscan 工程 – 是一个开源库,包含了扫描功能相关的UI实现,可以帮助开发人员快速将扫描功能集成到他们的iOS应用中,或者根据需要自定义扫描功能的UI。
- uiextensions工程 – 在 “libs/uiextensions_src” 文件夹下。它是一个开源库,包含了一些即用型的UI模块实现和应用程序基本的UI设计,可以帮助开发人员快速将功能齐全的PDF阅读器嵌入到他们的iOS应用中。当然,开发人员也不是必须要使用默认的UI,可以通过”uiextensions”工程为特定的应用灵活自定义和设计UI。
备注:对于iOS 13或更高版本,您需要使用Xcode 11或者更高版本来编译 “uiextensions“ 工程。
支持Mac Catalyst的发布包
下载 “foxitpdfsdk_7_4_ios_catalyst.zip” 包,并解压到一个新的目录。该包中的内容和”foxitpdfsdk_7_4_ios.zip” 包类似,具体说明请参阅上一小节 “支持Mac Catalyst的发布包“。
如Figure 2-3所示的 “libs” 文件夹,其区别是FoxitRDK.xcframework 和 uiextensionsDynamic.xcframework支持使用Mac Catalyst构建Mac版本的iPad app。
备注:当前,Mac版本app不支持RMS和扫描功能。

Figure 2-3
运行demo
下载和安装Xcode IDE (https://developer.apple.com/download/)。
备注:在本指南中,不具体介绍Xcode的安装步骤。如果您还没有安装,请参考Apple的开发官网。
如Figure 2-4所示,Foxit PDF SDK for iOS 提供了Objective-C 和 Swift两种语言的三种不同类型的demos (Function demo, Viewer Control demo, 和 Complete PDF viewer demo),用来帮助开发人员学习如何在iOS平台上调用Foxit SDK。Swift demos在”swift” 文件夹下。
备注:Swift语言的complete PDF viewer demo支持多文档阅读模式。
Figure 2-4
Foxit PDF SDK for iOS (Mac Catalyst) 提供了一个Objective-C语言的Complete PDF viewer demo,用来帮助开发人员学习如何调用Foxit SDK。该demo位于 “samples” 文件夹下。运行该demo,请确保您macOS是10.15或者更高版本,以及Xcode是11或者更高版本。
Function demo
Function demo (包括Objective-C 和 Swift 两种语言) 用来展示如何使用Foxit PDF SDK for iOS的core API来实现一些PDF特定的功能。该demo包括如下的功能:
- pdf2txt: 从PDF文档中提取文本,并保存到一个TXT文件中。
- outline: 编辑大纲(也称为书签)的外观和主题。
- annotation: 向PDF页面添加annotations。
- docinfo: 导出PDF文档信息到TXT文件中。
- render: 将指定的PDF页面渲染为位图。
- signature: 向PDF中添加签名,对PDF签名和验证签名。
在Xcode中运行该demo,请按如下的步骤:
a)在 “samples/complete_pdf_viewer” 文件夹下,双击function_demo.xcodeproj在Xcode中打开该demo。(对Swift demo,在 “samples/swift/function_demo_swift”文件夹下,双击function_demo_swift.xcodeproj)。
备注:另一种打开demo的方式是:双击 “samples“ 文件夹下的samples_xcworkspace,它是一个包含三个demos的workspace。
b)点击 “Product -> Run” 在iOS设备或者模拟器上运行demo。在本指南中,将使用iPhone 8模拟器来运行该demo。当成功编译后,您可以看到如Figure 2-5 所示的功能选项。
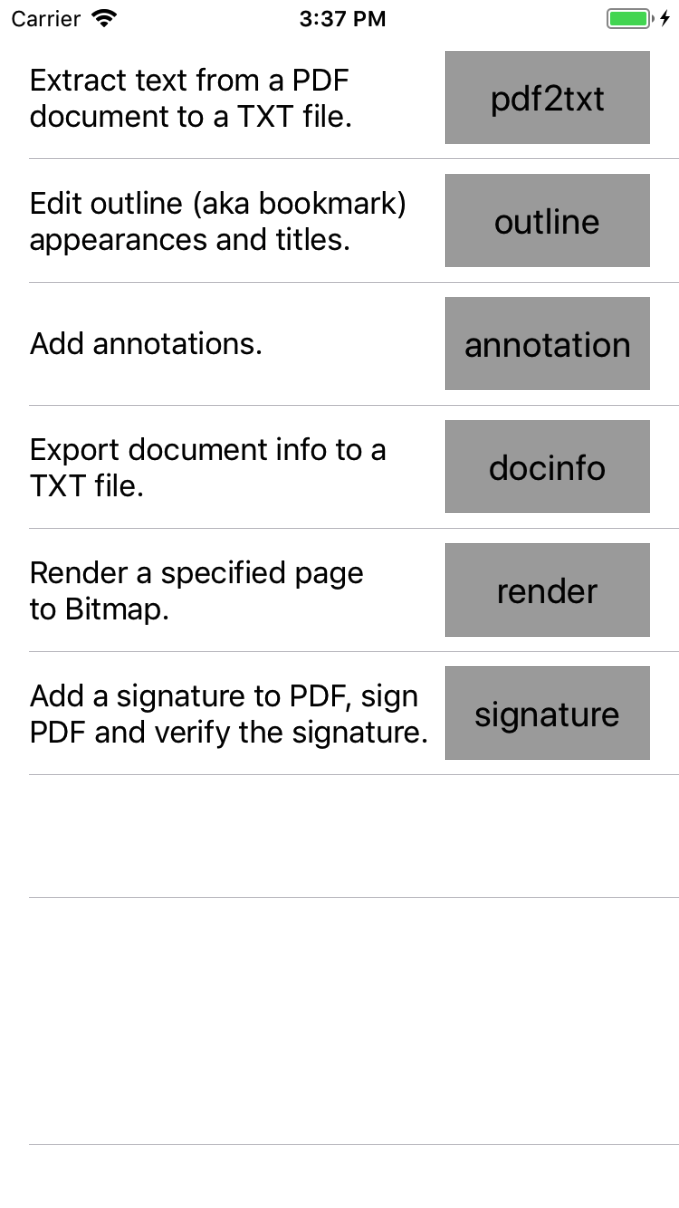
Figure 2-5
c)点击上图中的功能按钮去执行相应的操作。例如,点击 “pdf2txt”, 则会弹出如Figure 2-6所示的消息框,提示转换后的文本文件保存的位置。请运行demo并自由体验其功能。
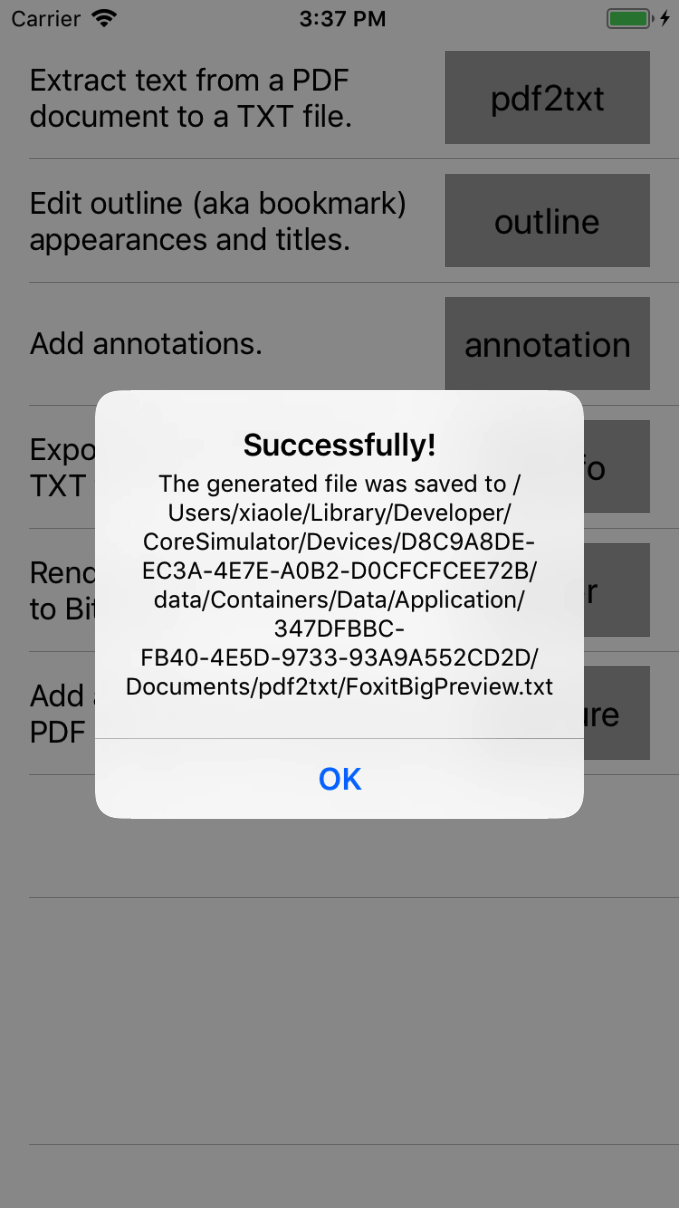
Figure 2-6
Viewer control demo
Viewer control demo (包括Objective-C 和 Swift 两种语言) 用来展示如何使用Foxit PDF SDK for iOS实现与View Control功能层相关的功能,比如操作annotations (注释、打字机、高亮、下划线、删除线、波浪线等) ,大纲,阅读标记书签 (reading bookmarks) 和文本搜索。该demo的代码逻辑结构非常清晰和简单,开发人员可以快速定位PDF应用,比如PDF阅读器中某个功能的具体实现。并且通过这个demo,开发人员可以更进一步的接触和了解Foxit PDF SDK for iOS所提供的APIs。
在Xcode中运行该demo,请参考Function demo 中的步骤。
Demo成功运行后会如Figure 2-7所示。这里,使用iPhone 8模拟器来运行demo。

Figure 2-7
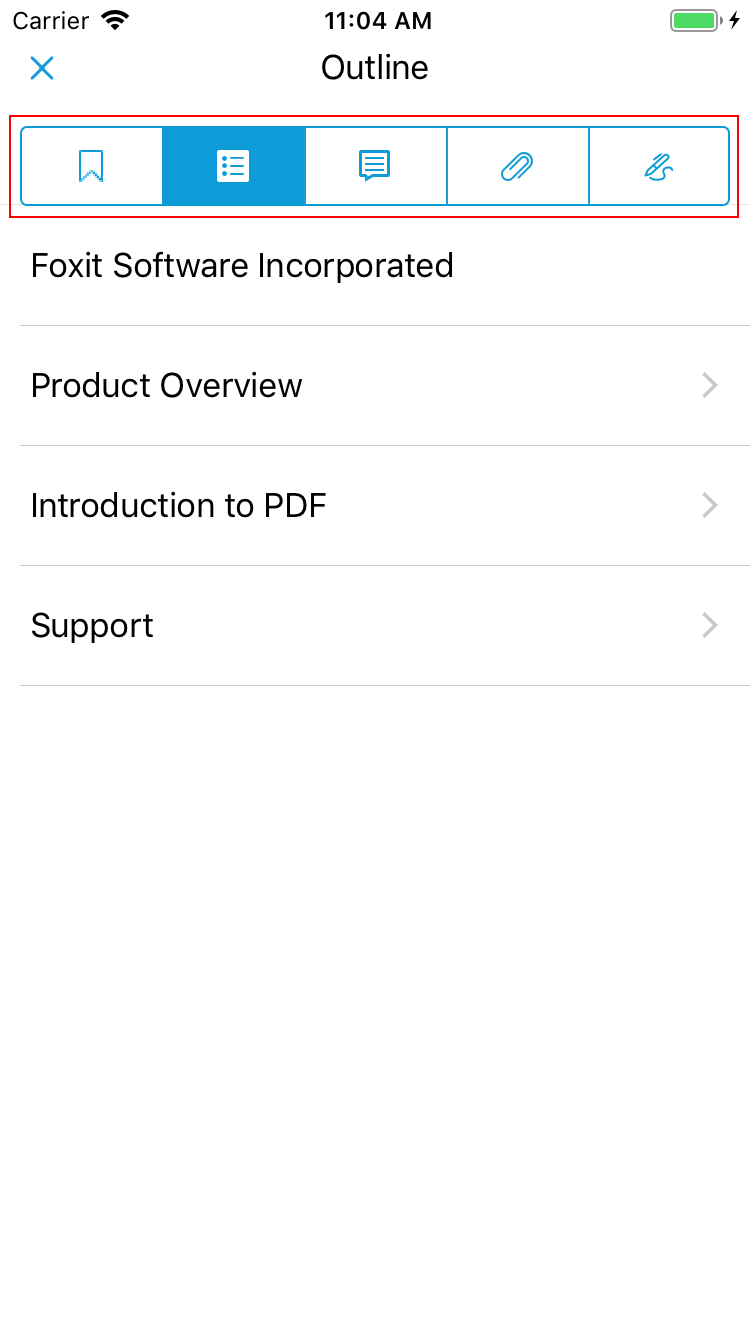
该demo提供了文本搜索、阅读标记书签、大纲、注释和数字签名等功能。例如,点击![]() ,选择第二个选项卡 (outline),然后文档的大纲将显示如Figure 2-8所示。
,选择第二个选项卡 (outline),然后文档的大纲将显示如Figure 2-8所示。
备注 :Outline是PDF规范中的技术术语,在传统的桌面PDF阅读器中常叫做书签。Reading bookmarks常用于移动端和平板的PDF阅读器中,用来标记阅读进度或者用户感兴趣的段落。Reading bookmark在技术上并不是outline,它存储在应用程序中而不是PDF本身。
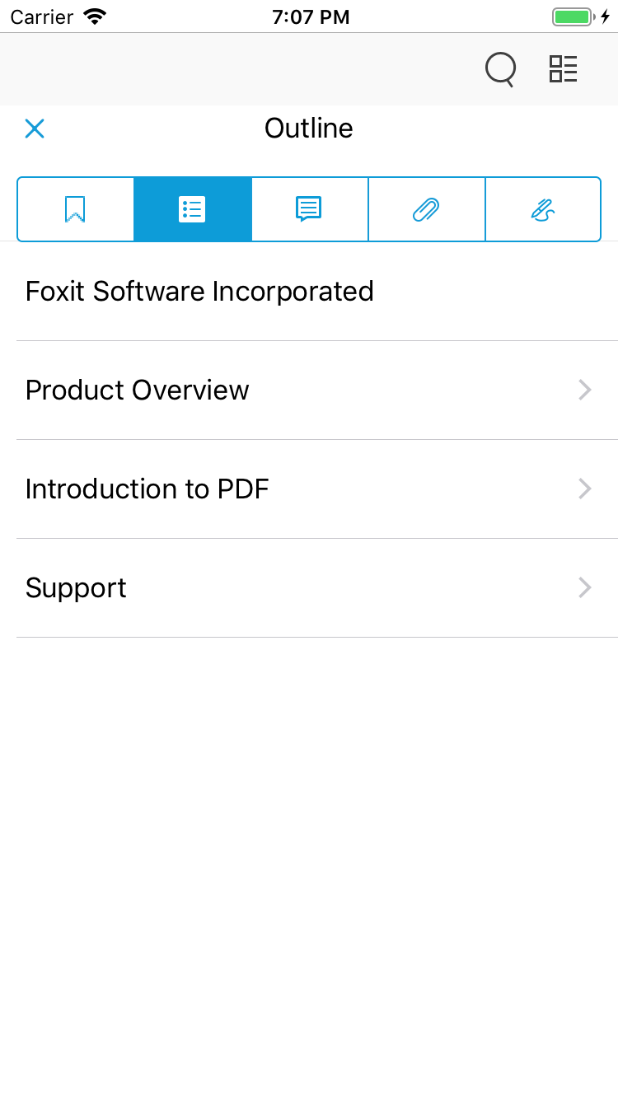
Figure 2-8
Complete PDF viewer demo
不支持Mac Catalyst的Complete PDF Viewer demo
Complete PDF Viewer demo阐述了如何通过使用Foxit PDF SDK for iOS实现一个功能齐全的PDF阅读器,该阅读器几乎可以作为实际移动端的PDF阅读器使用。该demo使用了Foxit PDF SDK for iOS所提供的所有功能和内置UI实现。
备注 : Swift语言的complete PDF viewer demo支持多文档阅读模式。
在Xcode中运行该demo,请参考Function demo 中的步骤。
这里,将使用iPhone 8 模拟器来编译和运行Swift语言的complete PDF viewer demo。当成功运行后,屏幕会列出”Sample.pdf” 和 “complete_pdf_viewer_guide_ios.pdf”文档。如果您想要阅读多个文档,点击![]() 切换到多文档阅读模式 (如Figure 2-9所示)。
切换到多文档阅读模式 (如Figure 2-9所示)。
备注 : 如果您想用其他的PDF文档来测试该demo,您需要将其放置到设备的 “Document“ 文件夹下。
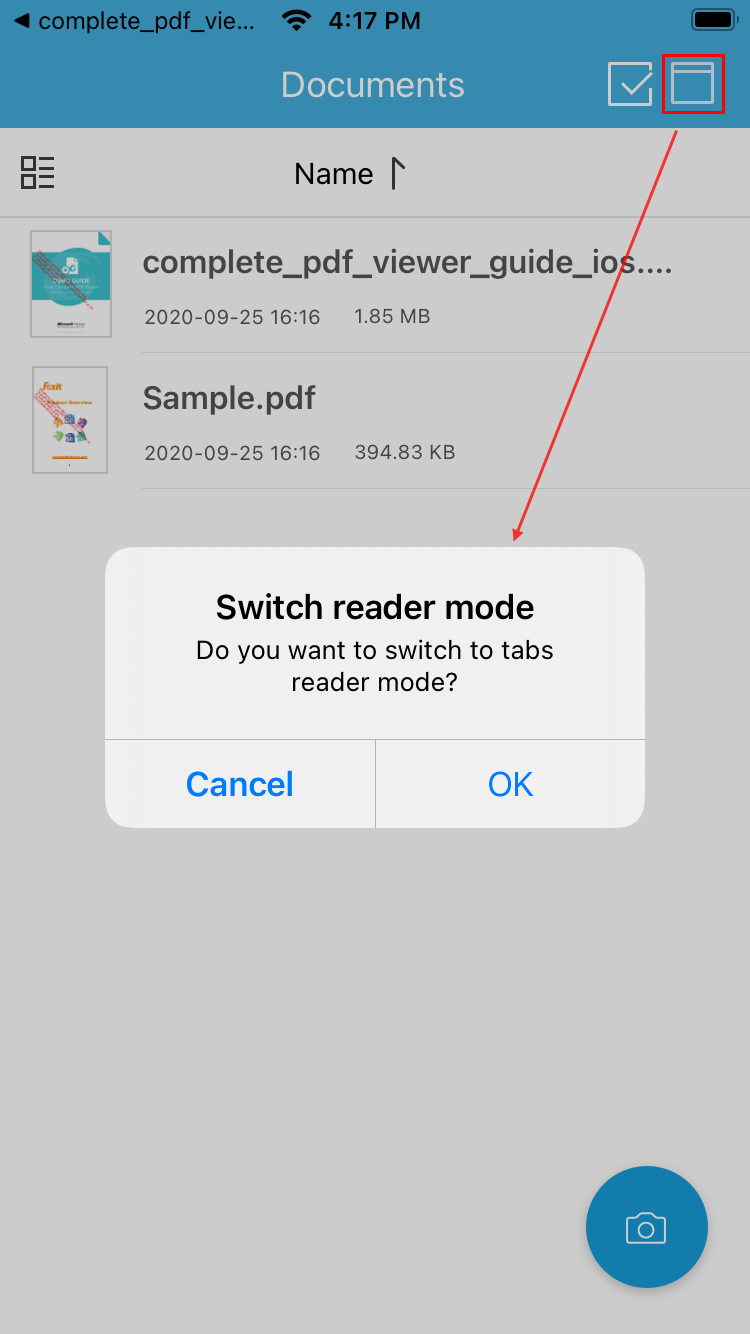
Figure 2-9
点击YES切换到多文档阅读模式。选择”complete_pdf_viewer_guide_ios.pdf” 文档,点击Back按钮![]() ,再选择”Sample.pdf”,如Figure 2-10所示。现在,您可以通过切换选项卡浏览这两个文档。
,再选择”Sample.pdf”,如Figure 2-10所示。现在,您可以通过切换选项卡浏览这两个文档。
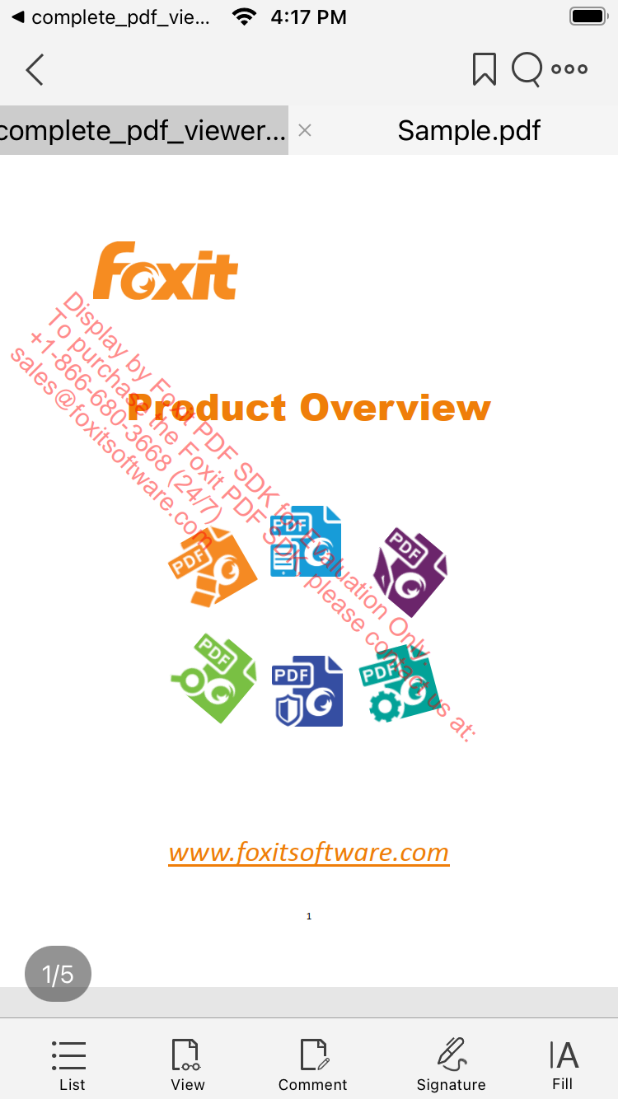
Figure 2-10
该demo实现了一个功能齐全的PDF阅读器,请随意体验。
例如,它提供了页面缩略图功能。您可以点击View菜单,选择Thumbnail 如Figure 2-11所示,然后您可以看到如Figure 2-12所示的文档的缩略图。

Figure 2-11
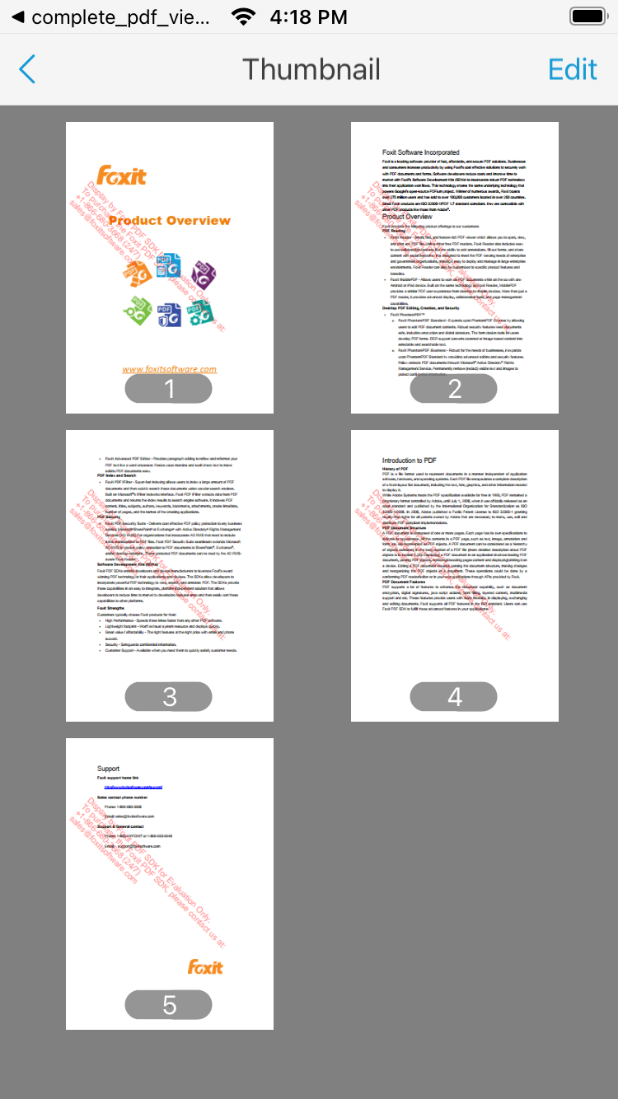
Figure 2-12
支持Mac Catalyst的Complete PDF Viewer demo
在Xcode中运行该demo,请按如下的步骤:
在 “samples/complete_pdf_viewer” 文件夹下,双击complete_pdf_viewer.xcodeproj在Xcode中打开该demo。
点击 “Product -> Run” 在iOS设备或者模拟器上运行demo,或者在您的Mac电脑上运行该demo。此处,选择 “My Mac” 来运行demo。当成功编译后,屏幕会列出”Sample.pdf” 和 “complete_pdf_viewer_guide_ios.pdf”文档,如Figure 2-13所示。
该demo包含的功能与 “不支持Mac Catalyst的Complete PDF Viewer demo” 类似。
备注:您可能需要使用开发配置文件 (development provisioning profile) 注册您的Mac电脑,以允许该demo可以在Mac上启动,以及在开发中使用某些应用服务。
Figure 2-13
快速构建一个功能齐全的PDF阅读器
Foxit PDF SDK for iOS 将所有的UI实现(包括应用程序的基本UI和即用型UI功能模块)封装在UI Extensions组件中,因此开发人员可以轻松快速通过几行代码构建一个功能齐全的PDF阅读器。本章将提供详细的教程来帮助您快速开始使用Foxit PDF SDK for iOS创建Objective-C 和 Swift两种语言的功能齐全的PDF阅读器 (只支持部署到iPhone 或 iPad 设备上)。
使用Foxit PDF SDK for iOS构建一个Objective-C的iOS应用程序
本节将阐述如何使用Foxit PDF SDK for iOS 快速构建一个Objective-C语言的iOS应用程序。其主要包括以下的步骤:
- 创建一个Objective-C语言的iOS工程
- 集成Foxit PDF SDK for iOS到您的应用程序
- 初始化Foxit PDF SDK for iOS
- 使用FSPDFViewCtrl显示PDF文档
- 使用UI Extensions组件构建一个功能齐全的PDF阅读器
- 基于功能齐全的PDF阅读器添加扫描功能
创建一个Objective-C语言的iOS工程
在本指南中,使用Xcode 11.3.1创建一个新的iOS工程。
启动Xcode,选择File -> New -> Project…,然后选择iOS -> Single View App,如Figure 3-1所示。点击Next.
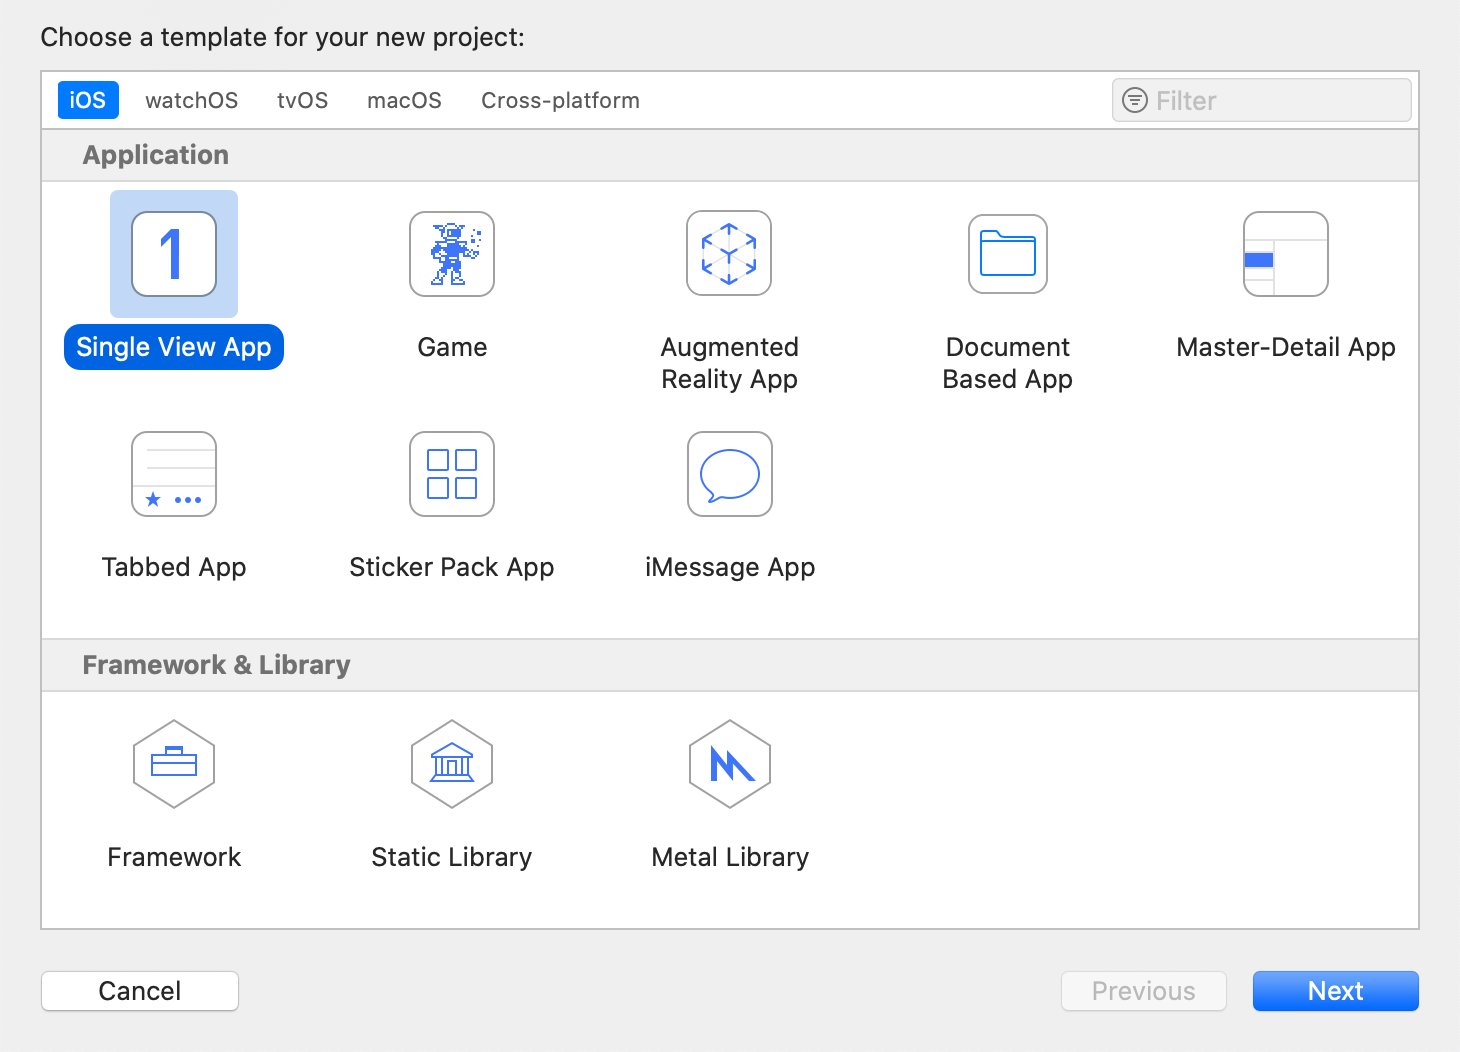
Figure 3-1
为该工程选择如Figure 3-2所示的选项。请确保选择Objective-C语言。为简单起见,我们不勾选用于自动测试的单元测试和UI测试。然后,点击Next。
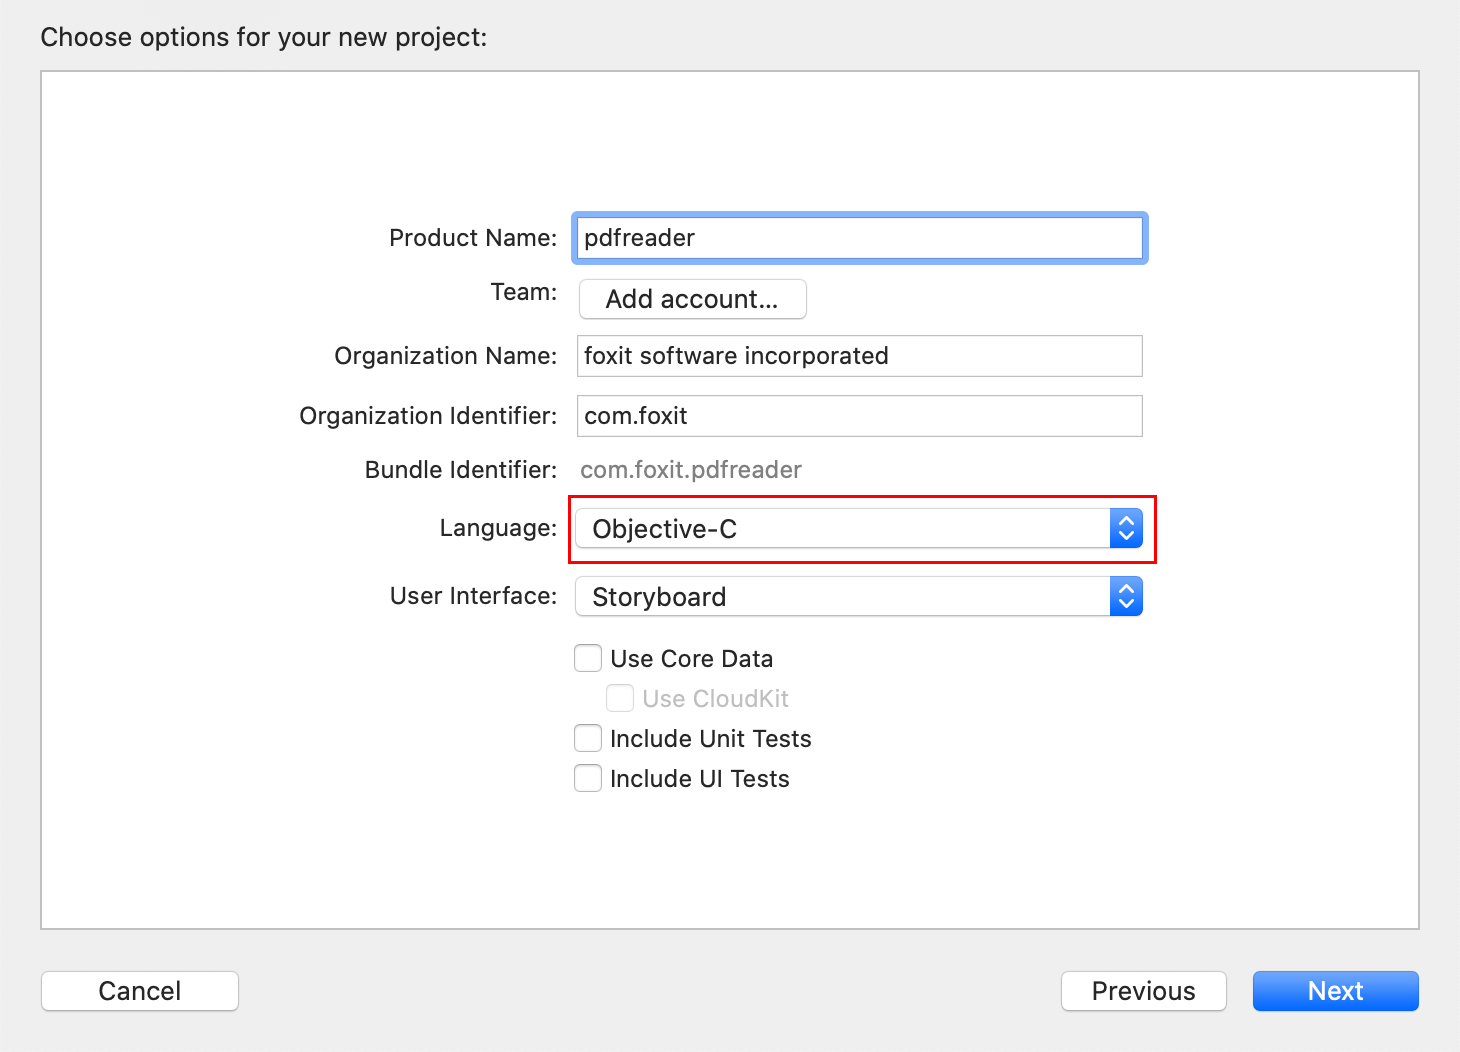
Figure 3-2
放置该工程到所需的位置。”version control” 选项对构建您的第一个PDF应用程序来说不是很重要,因此不用勾选Git repository。这里,我们将该工程放置在桌面,如Figure 3-3所示。然后,点击Create。
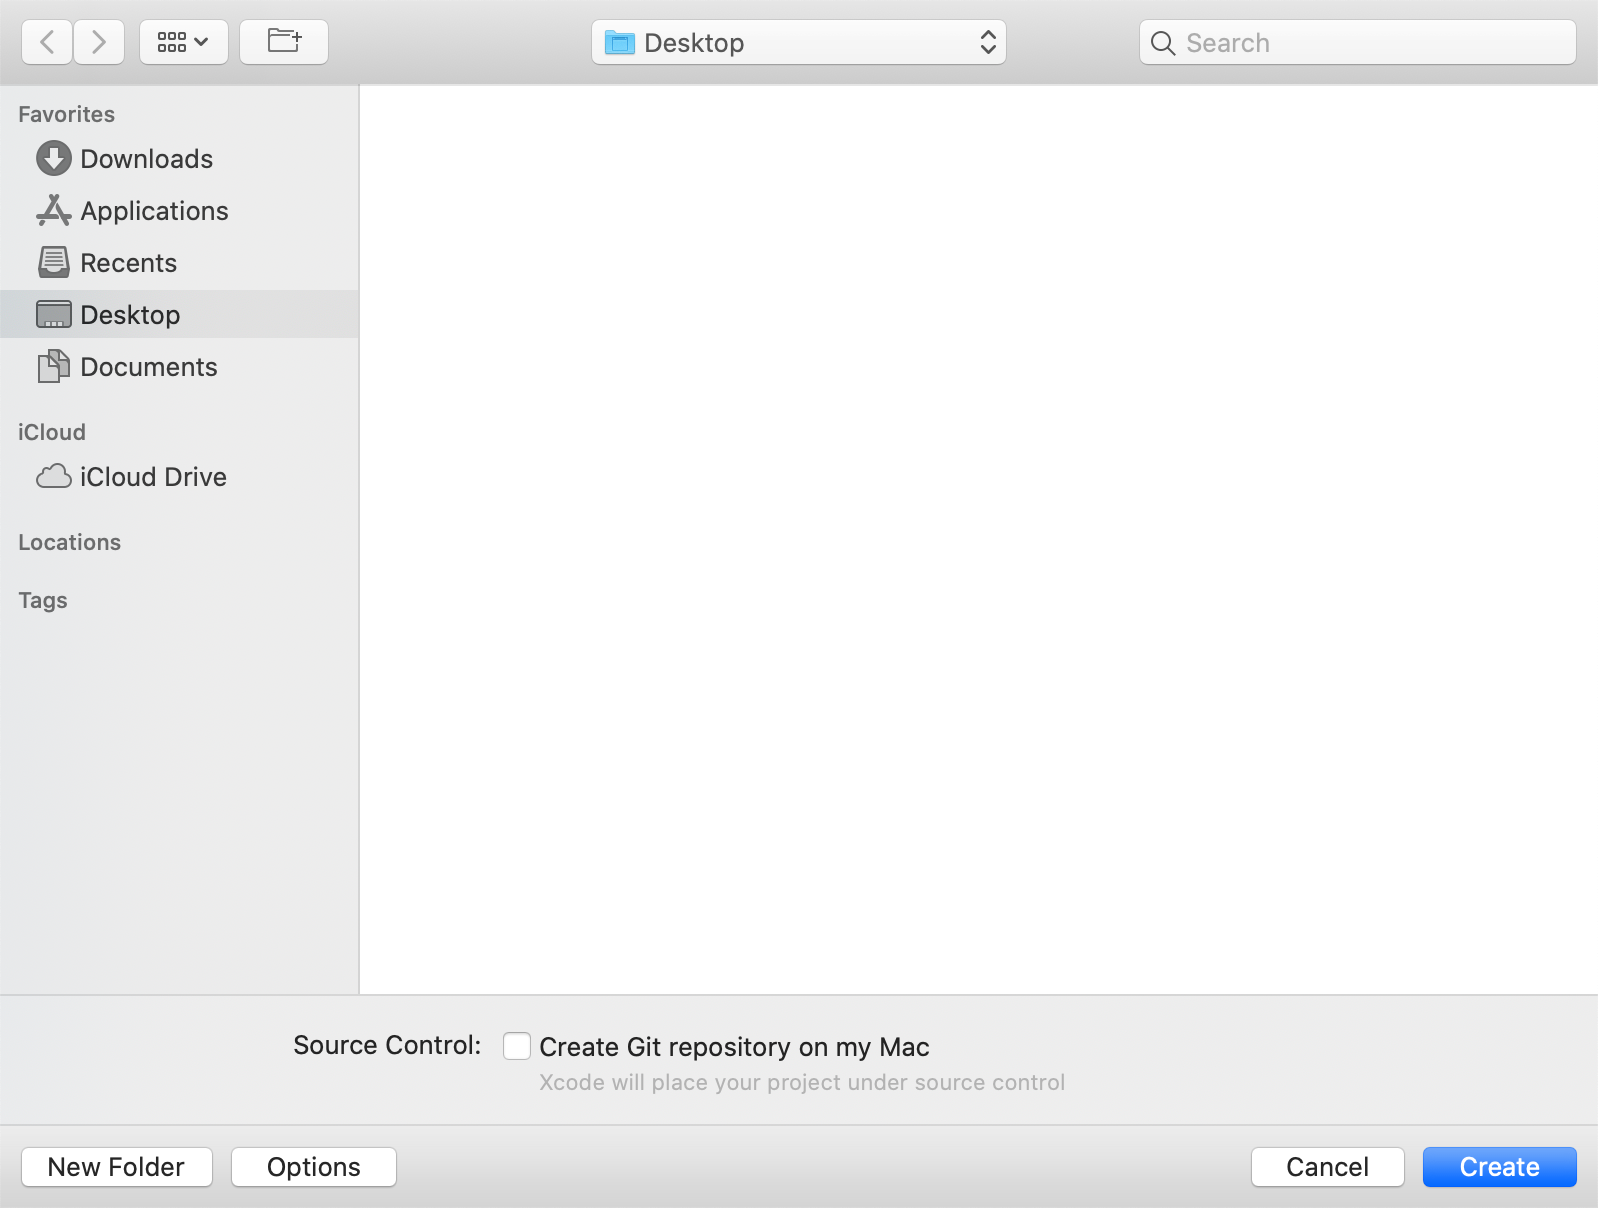
Figure 3-3
集成 Foxit PDF SDK for iOS 到您的应用程序
备注:在本章中,我们将使用默认的内置UI实现来开发该应用程序,为了简单和方便 (直接使用UI Extensions组件,不需要源代码工程),我们只需要添加以下的文件到PDFReader工程中。
- FoxitRDK.framework – 该framework包含Foxit PDF SDK for iOS的动态库和相关头文件。
- uiextensionsDynamic.framework – 该framework包括UI Extensions动态库,相关头文件,以及默认内置UI实现需要的资源文件。
- (可选) FoxitPDFScanUI.framework – 该framework包括Foxit PDF SDK扫描功能动态库,相关头文件,以及扫描功能默认内置UI实现需要的资源文件。
技巧:
- 在接下来的 “初始化Foxit PDF SDK for iOS“和 “使用PDFViewCtrl显示PDF文档 “两小节中,不需要使用UI Extensions组件 (uiextensionsDynamic.framework), 因此您可以先将FoxitRDK.framework添加到工程中。然后在您需要使用UI Extensions组件时再添加uiextensionsDynamic.framework,比如在 “使用UI Extensions组件构建一个功能齐全的PDF阅读器 “章节中。
- 扫描 (Scan)模块需要使用FoxitPDFScanUI.framework,比如在 “基于功能齐全的PDF阅读器添加扫描功能” 章节中。
添加上述的三个动态framework文件到pdfreader工程,请按照如下的步骤:
a)右击 “pdfreader” 工程,选择Add Files to “pdfreader“…,如Figure 3-4所示。
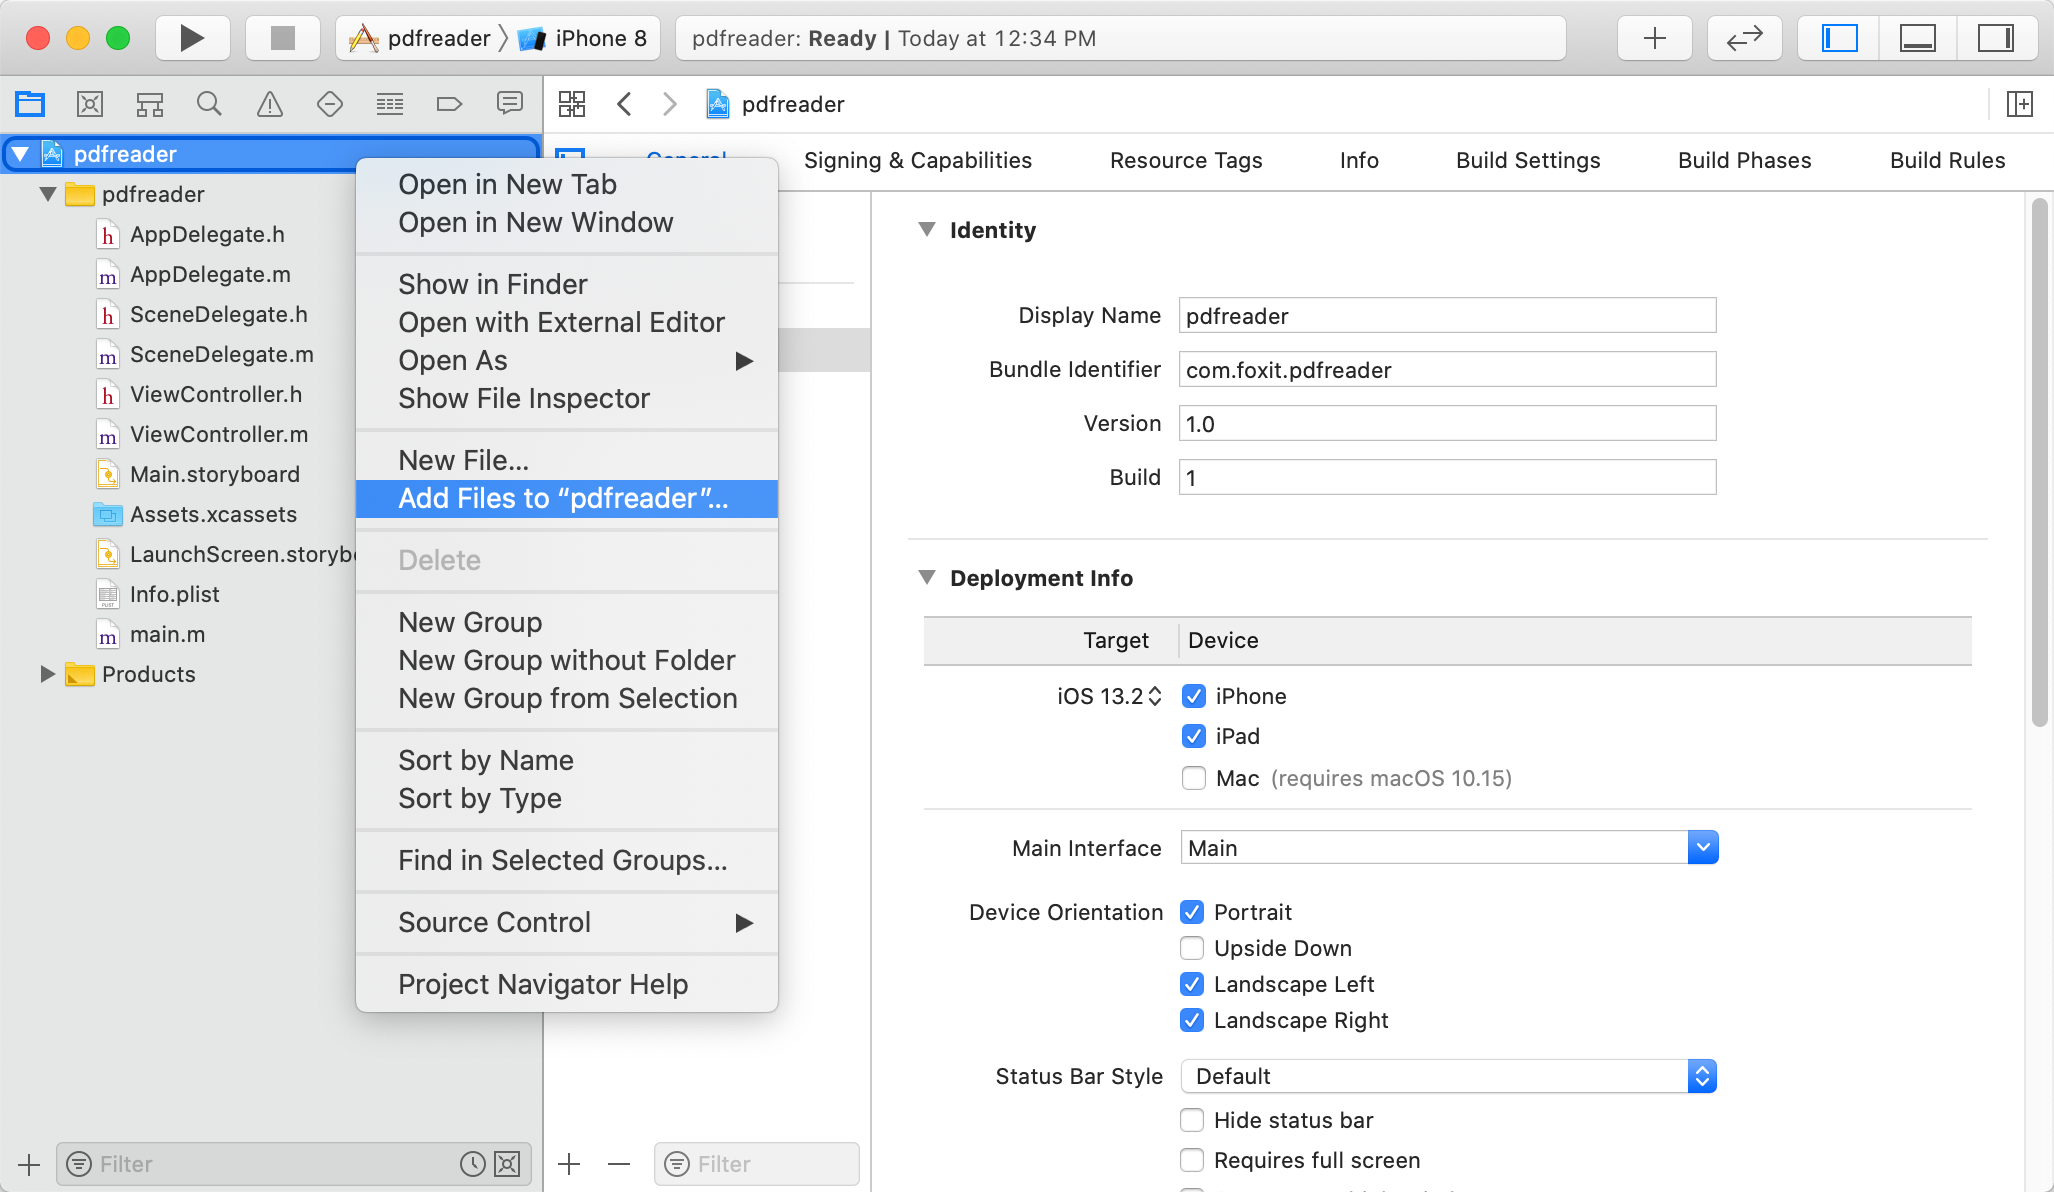
Figure 3-4
b)定位到下载解压包中的 “libs”文件夹下,选择 “FoxitRDK.framework“,然后点击Add,如Figure 3-5所示。
备注:请确保勾选 “Copy items if needed“ 选项。
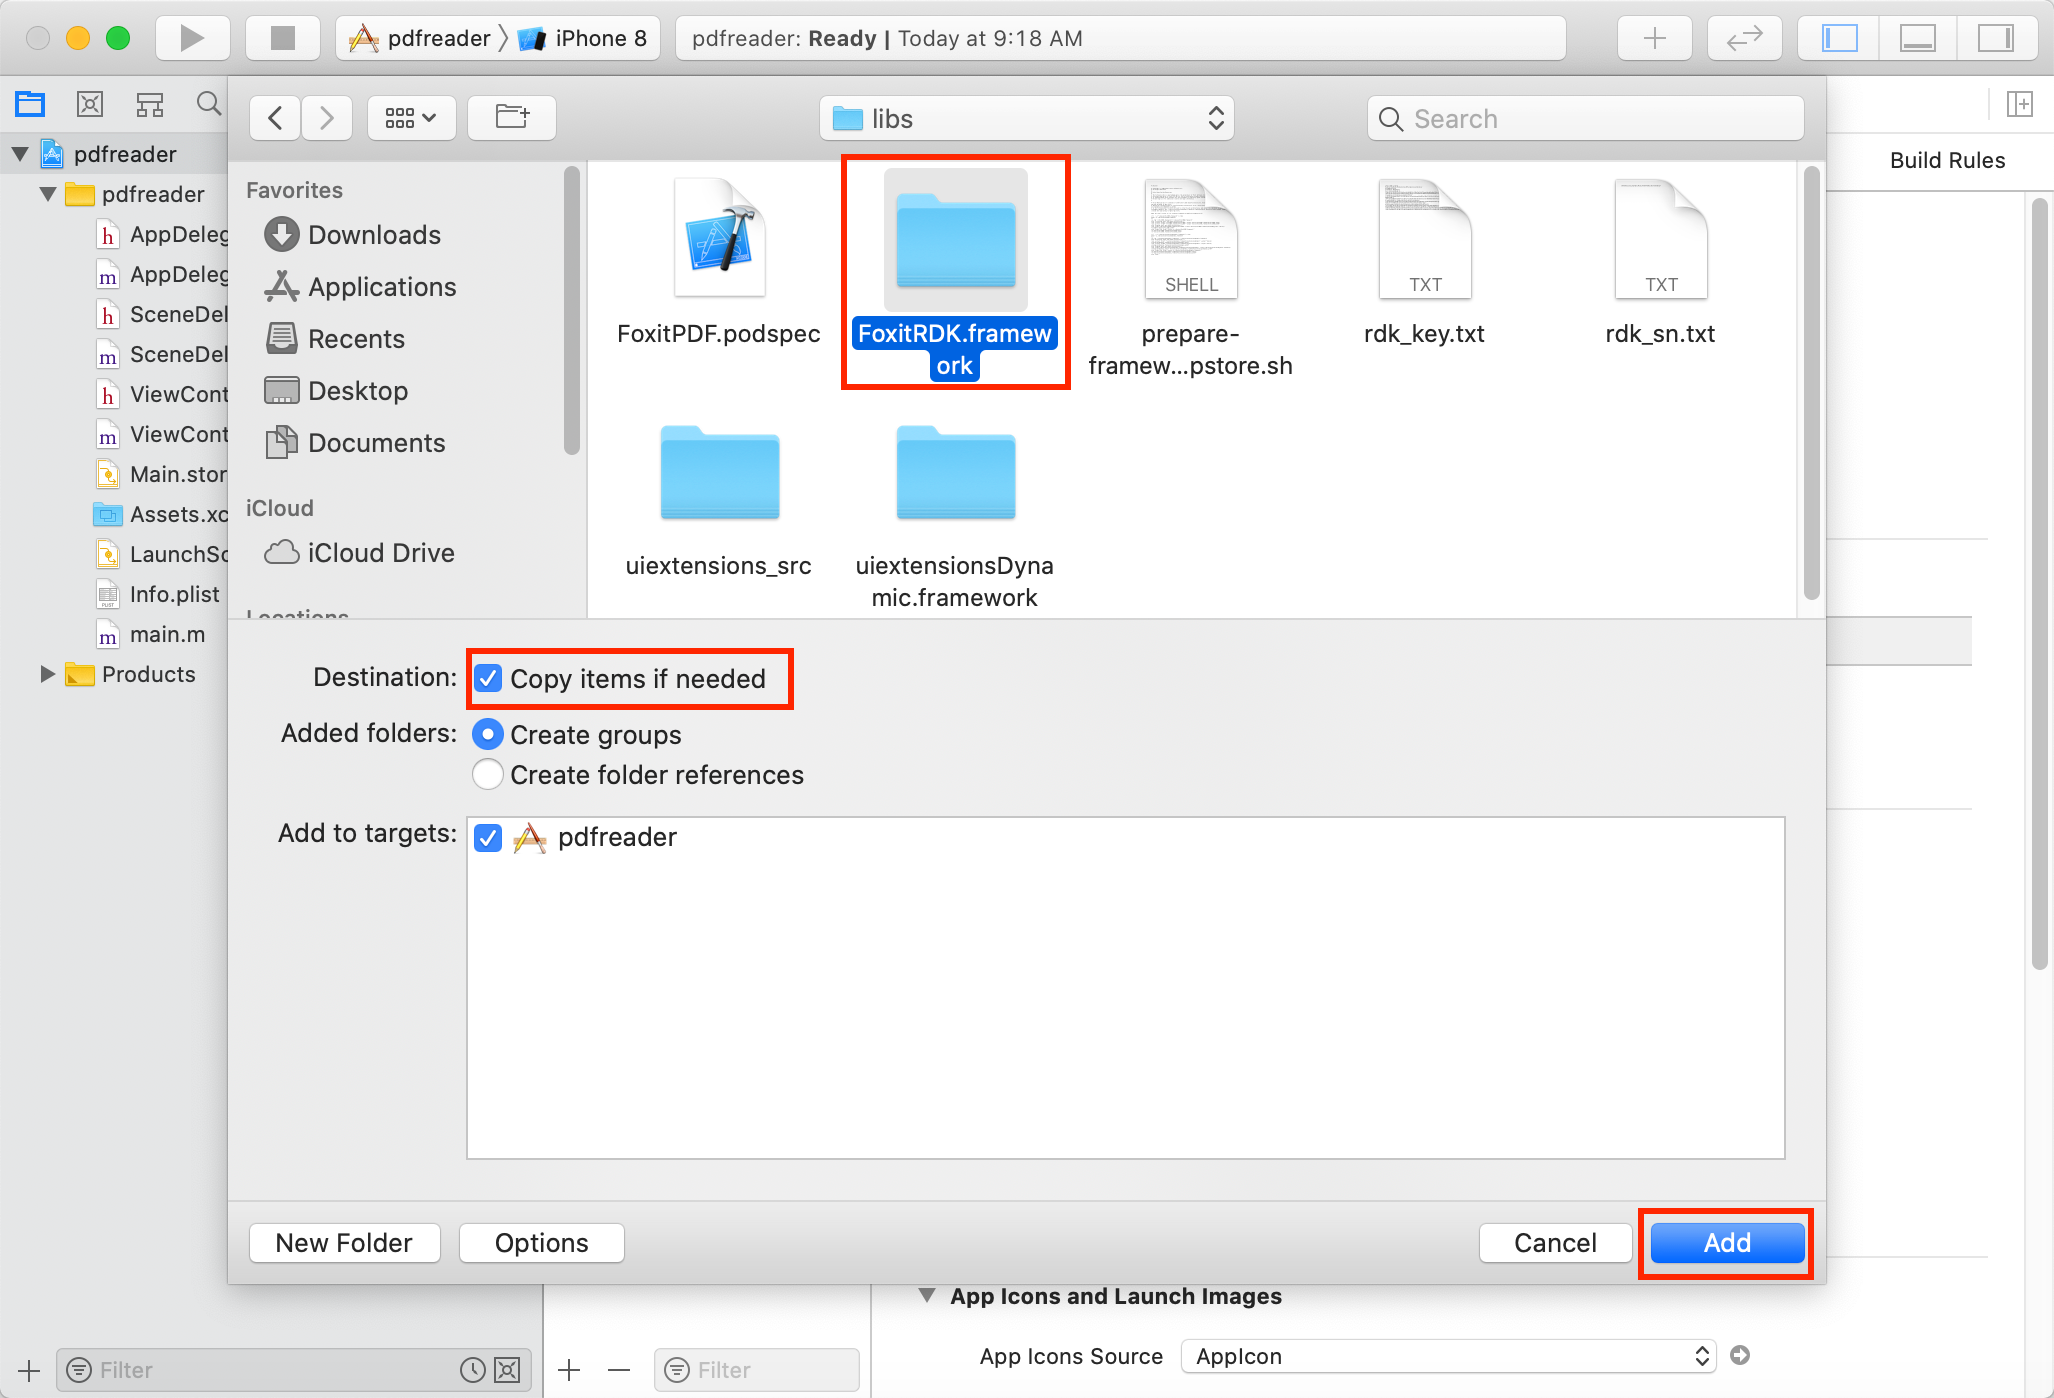
Figure 3-5
c)重复步骤a) 和 b),添加 “uiextensionsDynamic.framework” 和“FoxitPDFScanUI.framework“。然后,pdfreader工程将如Figure 3-6所示。
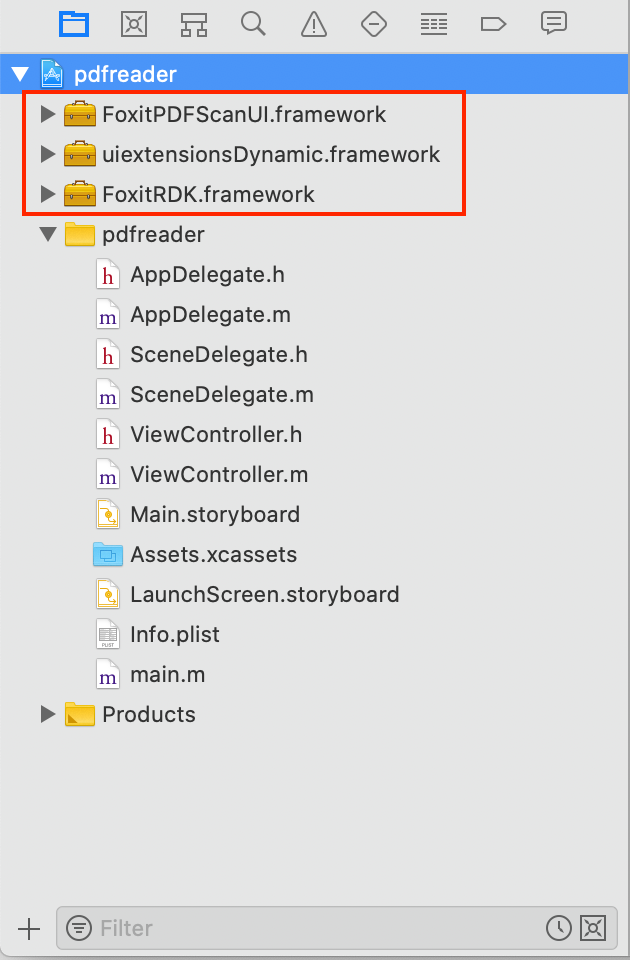
Figure 3-6
d)嵌入动态framework。单击工程,在General选项卡下找到Frameworks, Libraries, and Embedded Content,然后选择 “Embed & Sign”,如Figure 3-7所示。
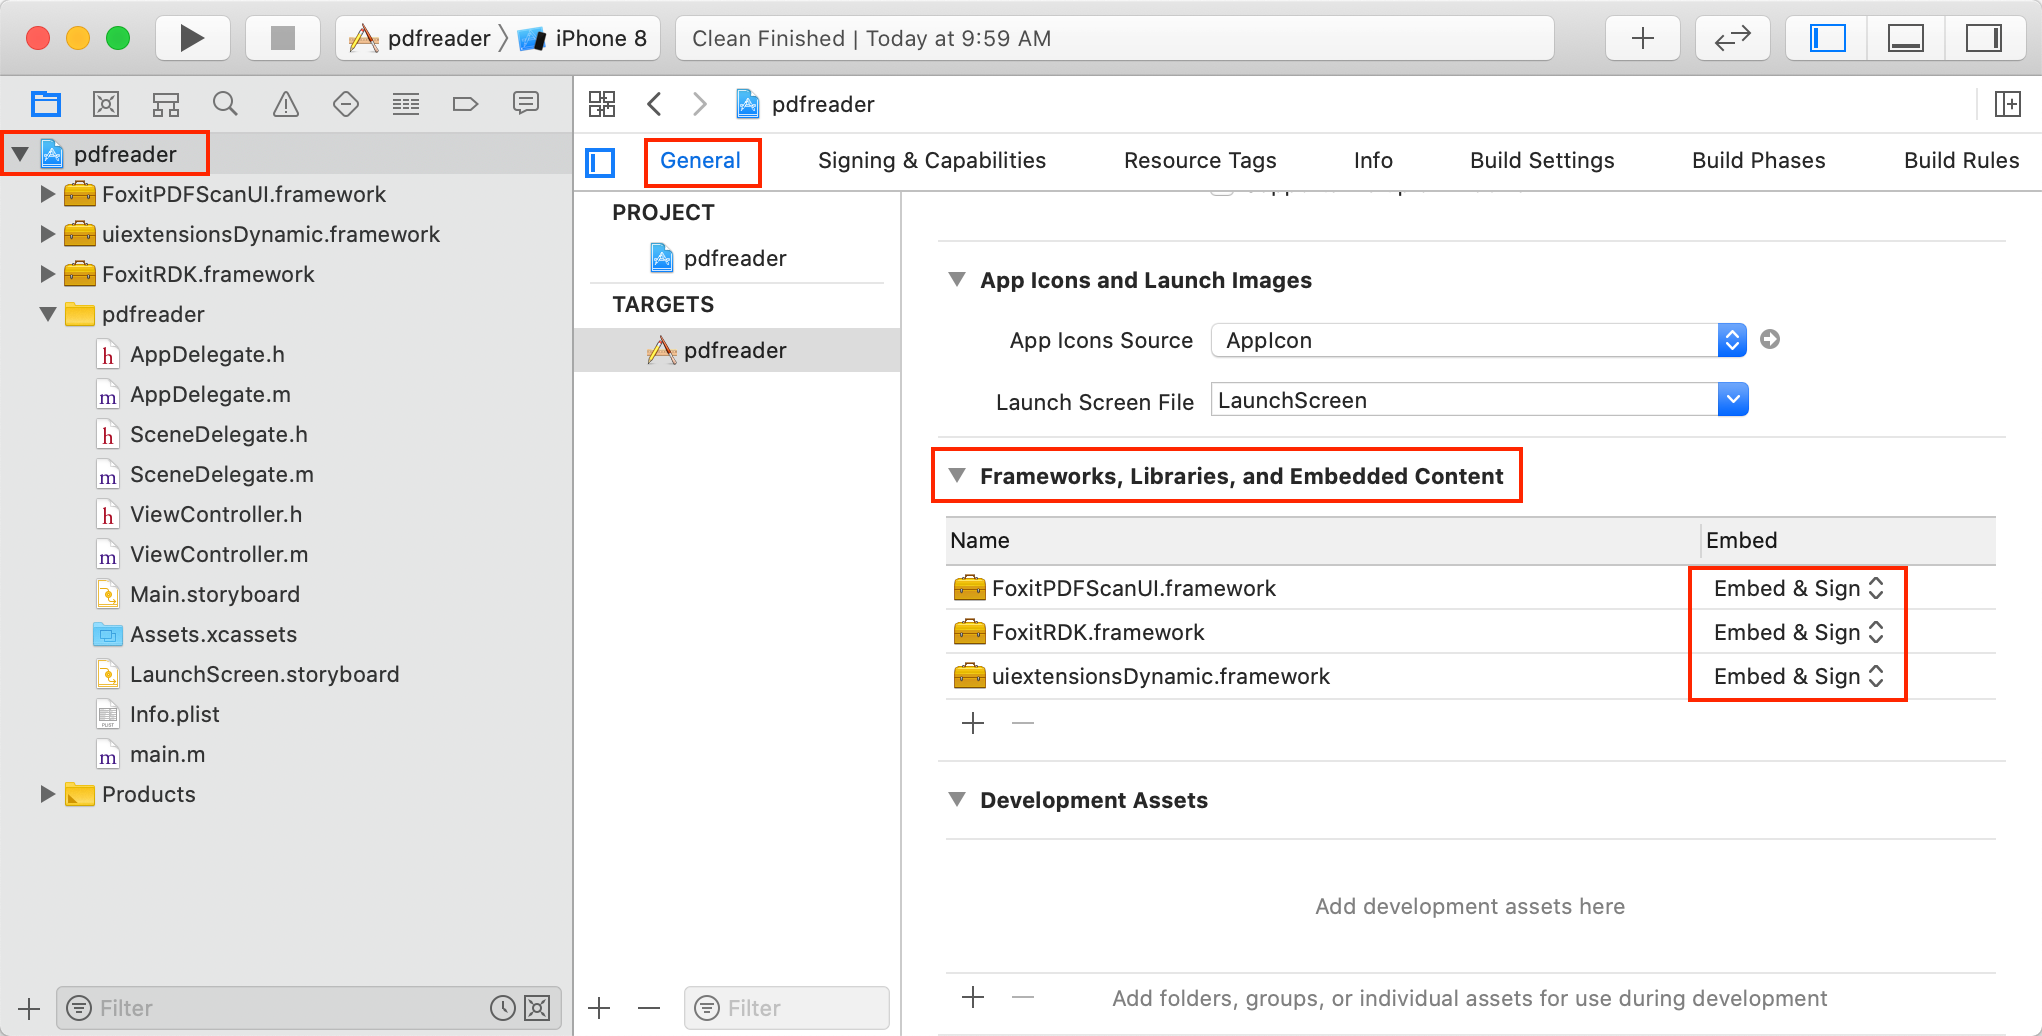
Figure 3-7
到此,我们已成功在pdfreader工程中添加了”FoxitRDK.framework“,”uiextensionsDynamic.framework” 和 “FoxitPDFScanUI.framework“。
初始化 Foxit PDF SDK for iOS
在调用任何API之前,应用程序必须使用license初始化Foxit PDF SDK for iOS。[FSLibrary initialize:sn key:key] 函数用于SDK库的初始化。试用license文件在下载包的”libs”文件夹下。当试用期结束后,您需要购买正式license以继续使用该SDK。在AppDelegate.m 文件的didFinishLaunchingWithOptions方法中完成SDK的初始化。
#import "AppDelegate.h"
#import <FoxitRDK/FSPDFObjC.h>

@interface AppDelegate ()

@end

@implementation AppDelegate

- (BOOL)application:(UIApplication *)application didFinishLaunchingWithOptions:(NSDictionary *)launchOptions {

    // The value of "sn" can be found in the "rdk_sn.txt".
    // The value of "key" can be found in the "rdk_key.txt".
    NSString* sn = @" ";
    NSString* key = @" ";

    FSErrorCode eRet = [FSLibrary initialize:sn key:key];
    if (FSErrSuccess != eRet) {
        return NO;
    }
    return YES;
}

@end
备注:参数 “sn“的值在“rdk_sn.txt“中 (“SN=“后面的字符串),“key“的值在 “rdk_key.txt“中 (“Sign=“后面的字符串)。
使用 FSPDFViewCtrl显示PDF文档
到目前为止,我们已经在pdfreade工程中添加了Foxit PDF SDK for iOS frameworks,并且完成了SDK库的初始化。现在,我们将使用FSPDFViewCtrl通过几行代码来显示一个PDF文档。
备注:如果只需要显示一个PDF文档,则不需要UI Extensions组件。
首先,在工程中添加一个PDF文档作为测试文档。例如,使用下载解压包中 “samples\test_files” 文件夹下的 “Sample.pdf” 文档。右击pdfreader工程,选择Add Files to “pdfreader“…添加该文档。当添加完成后,您可以在Xcode的Copy Bundle Resources看到该文档,如Figure 3-8所示。
备注:您可以直接添加PDF到Copy Bundle Resources。单击pdfreader工程,在Build Phases选项卡下找到Copy Bundle Resources,点击 + 按钮,选择需要添加的文档。您可以使用任何PDF文档,只需要将其添加到Xcode的Copy Bundle Resources。
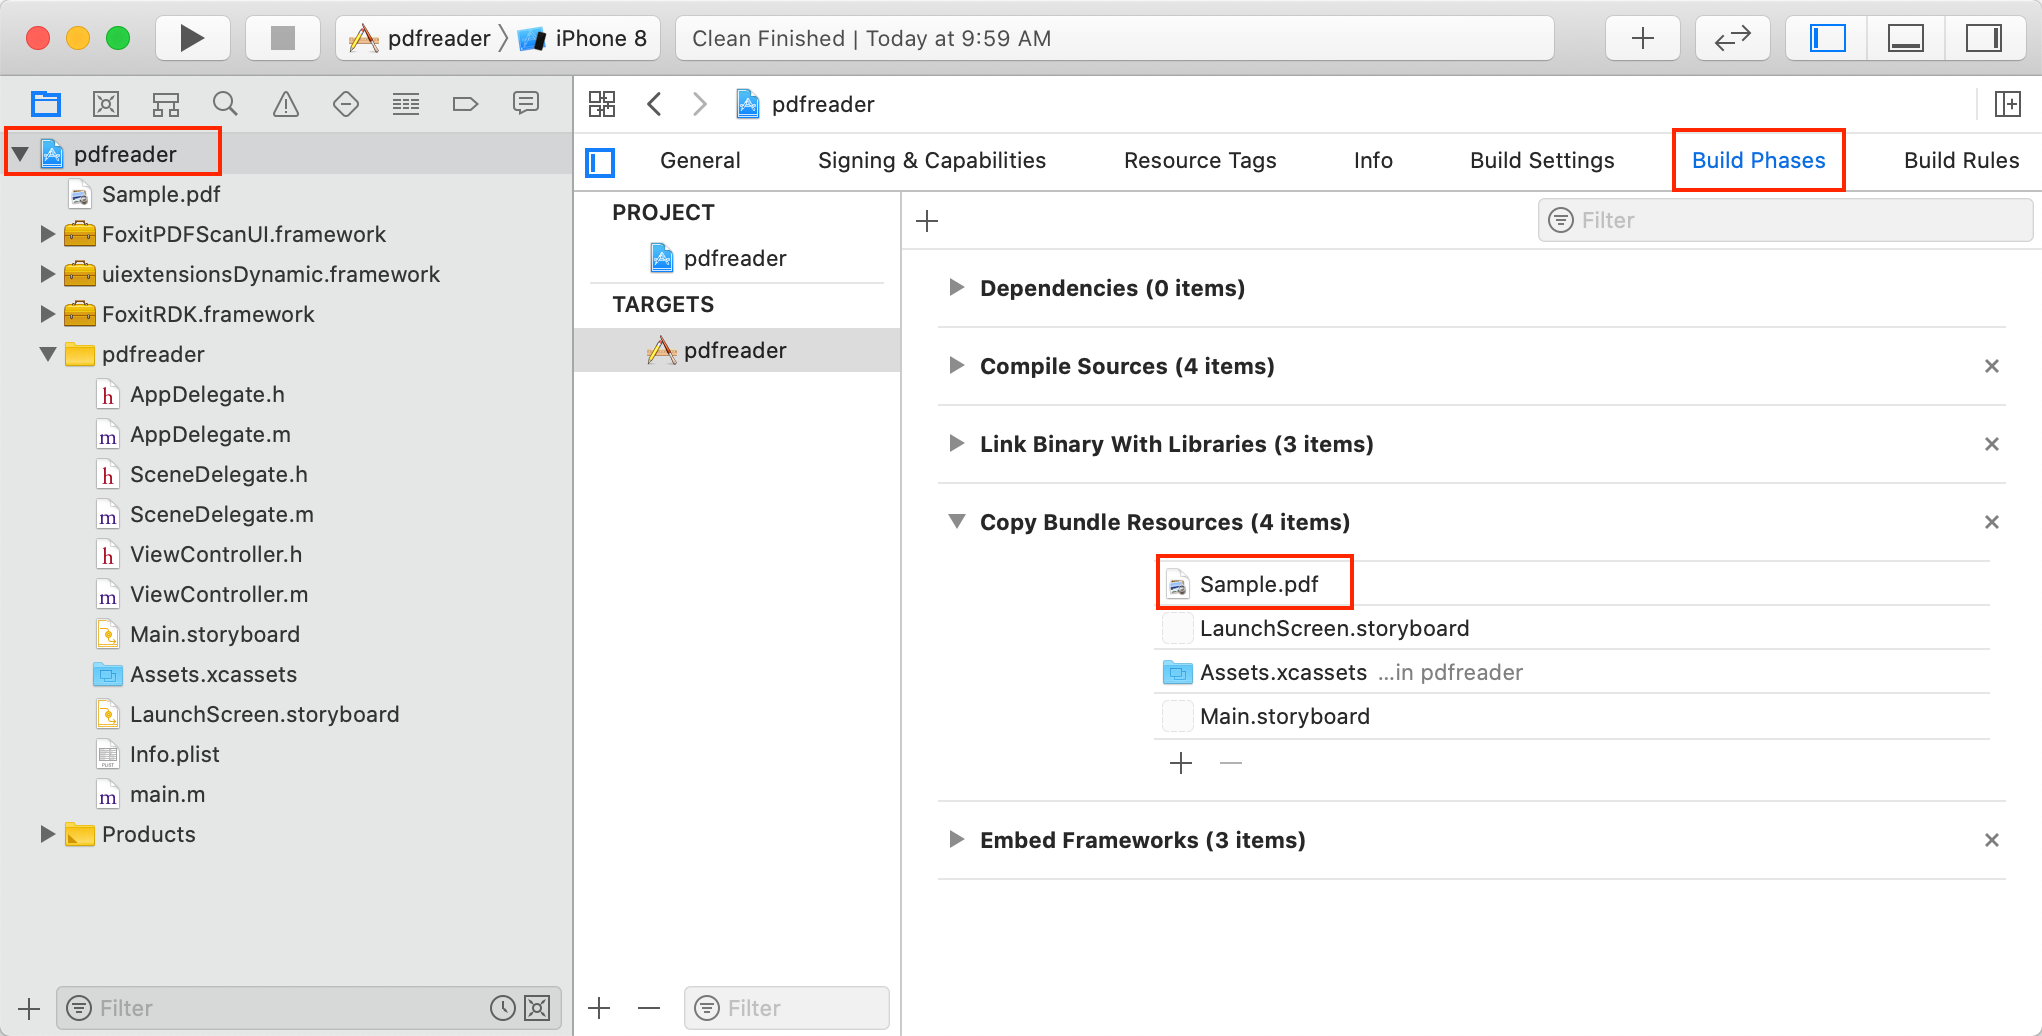
Figure 3-8
其次,在ViewController.m中加入如下的代码来打开并显示一个PDF文档。显示一个PDF文档很简单,您只需要获取一个PDF文档路径,实例化一个FSPDFViewCtrl对象,然后调用 [FSPDFViewCtrl openDoc: filePath passwork: password completion: completion] 函数即可。
更新ViewController.m,如下所示:
#import "ViewController.h"
#import <FoxitRDK/FSPDFViewControl.h>

@interface ViewController ()

@end

@implementation ViewController

- (void)viewDidLoad {
    [super viewDidLoad];

    // Get the path of a PDF.
    NSString* pdfPath = [[NSBundle mainBundle] pathForResource:@"Sample" ofType:@"pdf"];

    // Initialize a FSPDFViewCtrl object with the size of the entire screen.
    FSPDFViewCtrl* pdfViewCtrl;
    pdfViewCtrl = [[FSPDFViewCtrl alloc] initWithFrame: [self.view bounds]];

    // Open an unencrypted PDF document.
    [pdfViewCtrl openDoc:pdfPath password:nil completion:nil];

    // Add the pdfViewCtrl to the root view.
    [self.view addSubview:pdfViewCtrl];
}

- (void)didReceiveMemoryWarning {
    [super didReceiveMemoryWarning];
    // Dispose of any resources that can be recreated.
}

@end
太棒了!我们已经使用Foxit PDF SDK for iOS通过几行代码完成了一个显示PDF文档的简单的iOS应用程序 (Objective-C语言) 。下一步是在真机设备或者模拟器上运行该工程。
在本指南中,将使用iPhone 8模拟器来编译和运行该工程。当成功编译后,您将看到”Sample.pdf”文档显示如Figure 3-9所示。该示例应用程序具有一些基本的PDF功能,比如放大/缩小和翻页。您可以进行体验。

Figure 3-9
使用 UI Extensions组件构建一个功能齐全的PDF阅读器
Foxit PDF SDK for iOS 带有内置的UI设计,包括应用程序的基础UI和功能模块UI。内置UI通过Foxit PDF SDK for iOS实现,并且封装在UI Extensions组件中。因此,构建一个功能齐全的PDF阅读器变得越来越简单。您只需要实例化一个UIExtensionsManager对象,然后将其设置给FSPDFViewCtrl。
实例化一个UIExtensionsManager对象,并且设置给FSPDFViewCtrl
在 “ViewController.m” 文件中,您只需要添加如下的代码:
#import <uiextensionsDynamic/uiextensionsDynamic.h>
UIExtensionsManager* extensionsManager;
...
extensionsManager = [[UIExtensionsManager alloc] initWithPDFViewControl:pdfViewCtrl];
pdfViewCtrl.extensionsManager = extensionsManager;
添加访问摄像头、麦克风和照片库的权限
为了在iOS 9.0或者更高版本的设备上访问摄像头、麦克风和照片库,您需要在 “Info.plist” 文件中添加如下的配置。
<key>NSCameraUsageDescription</key>
<string>The App needs to access your Camera, please allow</string>
<key>NSMicrophoneUsageDescription</key>
<string>The App needs to access your Microphone, please allow</string>
<key>NSPhotoLibraryAddUsageDescription</key>
<string>The App needs to add pictures into your Photo Library, please allow</string>
<key>NSPhotoLibraryUsageDescription</key>
<string>The App needs to access your Photo Library, please allow</string>
ViewController.m的完整更新如下:
#import "ViewController.h"
#import <FoxitRDK/FSPDFViewControl.h>
#import <uiextensionsDynamic/uiextensionsDynamic.h>

@interface ViewController ()

@end

@implementation ViewController
{
    UIExtensionsManager* extensionsManager;
}

- (void)viewDidLoad {
    [super viewDidLoad];

    // Get the path of a PDF.
    NSString* pdfPath = [[NSBundle mainBundle] pathForResource:@"Sample" ofType:@"pdf"];

    // Initialize a FSPDFViewCtrl object with the size of the entire screen.
    FSPDFViewCtrl* pdfViewCtrl;
    pdfViewCtrl = [[FSPDFViewCtrl alloc] initWithFrame: [self.view bounds]];

    // Open an unencrypted PDF document.
    [pdfViewCtrl openDoc:pdfPath password:nil completion:nil];

    // Add the pdfViewCtrl to the root view.
    [self.view addSubview:pdfViewCtrl];

    // Instantiate a UIExtensionsManager object and set it to pdfViewCtrl
    extensionsManager = [[UIExtensionsManager alloc] initWithPDFViewControl:pdfViewCtrl];
    pdfViewCtrl.extensionsManager = extensionsManager;
}

- (void)didReceiveMemoryWarning {
    [super didReceiveMemoryWarning];
    // Dispose of any resources that can be recreated.
}

@end
我们在iPhone 8模拟器上运行该工程。现在,它是一个功能齐全的PDF阅读器,如Figure 3-10所示,包含Complete PDF Viewer demo中所有的功能。请随意进行体验。

Figure 3-10
基于功能齐全的PDF阅读器添加扫描功能
扫描功能是一个单独的模块,没有封装在UI Extensions组件中。因此,如果您需要在工程中使用该功能,那么请添加如下的核心代码来调用scan模块:
#import <FoxitPDFScanUI/PDFScanManager.h>

// Initialize the scan module.
[PDFScanManager initializeScanner:0 serial2:0];
[PDFScanManager initializeCompression:0 serial2:0];

// Get the PDFScan controller.
UIViewController *VC = [PDFScanManager getPDFScanView];
if (VC) [self presentViewController:VC animated:YES completion:nil];

[PDFScanManager setSaveAsCallBack:^(NSError * _Nonnull error, NSString * _Nonnull savePath) {
    // <add your code>
}];
对于PDFScanManager::initializeScanner和PDFScanManager::initializeCompression接口,如果您将参数设置为0,则扫描后的图片会带有水印。如果您需要去掉水印,请联系Foxit销售或者技术支持团队来获取授权的key。
基于上一节,添加一个新的button来调用scan模块。
更新 ViewController.m,如下所示:
(假设您已经将名为 “scan.png” 的图片加入到工程。该图片位于”samples/complete_pdf_viewer/Source/Assets.xcassets/scan.imageset” 文件夹下。)
#import "ViewController.h"
#import <FoxitRDK/FSPDFViewControl.h>
#import <uiextensionsDynamic/uiextensionsDynamic.h>
#import <FoxitPDFScanUI/PDFScanManager.h>

@interface ViewController ()

@end

@implementation ViewController
{
    UIExtensionsManager* extensionsManager;
    UIButton *openScanBtn;
}

- (void)viewDidLoad {
    [super viewDidLoad];

    // Get the path of a PDF.
    NSString* pdfPath = [[NSBundle mainBundle] pathForResource:@"Sample" ofType:@"pdf"];

    // Initialize a FSPDFViewCtrl object with the size of the entire screen.
    FSPDFViewCtrl* pdfViewCtrl;
    pdfViewCtrl = [[FSPDFViewCtrl alloc] initWithFrame: [self.view bounds]];

    // Open an unencrypted PDF document.
    [pdfViewCtrl openDoc:pdfPath password:nil completion:nil];

    // Add the pdfViewCtrl to the root view.
    [self.view addSubview:pdfViewCtrl];

    // Instantiate a UIExtensionsManager object and set it to pdfViewCtrl
    extensionsManager = [[UIExtensionsManager alloc] initWithPDFViewControl:pdfViewCtrl];
    pdfViewCtrl.extensionsManager = extensionsManager;

    // Create a scan button.
    openScanBtn = [[UIButton alloc] initWithFrame:CGRectMake(self.view.frame.size.width - 80, self.view.frame.size.height - 120, 60, 60)];
    [openScanBtn setImage:[UIImage imageNamed:@"scan"] forState:UIControlStateNormal];
    [openScanBtn addTarget:self action:@selector(openScan:) forControlEvents:UIControlEventTouchUpInside];

    // Add the scan button to the root view.
    [self.view addSubview:openScanBtn];

    // Initialize the scan module.
    [PDFScanManager initializeScanner:0 serial2:0];
    [PDFScanManager initializeCompression:0 serial2:0];

}

- (IBAction)openScan🙁UIButton *)sender{
    // Get the PDFScan controller.
    UIViewController *VC = [PDFScanManager getPDFScanView];
    if (VC) [self presentViewController:VC animated:YES completion:nil];

    [PDFScanManager setSaveAsCallBack:^(NSError * _Nonnull error, NSString * _Nonnull savePath) {
          if (savePath) {
              if (VC.presentingViewController) {
                  [VC.presentingViewController dismissViewControllerAnimated:NO completion:nil];
              }
              [VC dismissViewControllerAnimated:NO completion:nil];
        }
    }];
}

- (void)didReceiveMemoryWarning {
    [super didReceiveMemoryWarning];
    // Dispose of any resources that can be recreated.
}

@end
在iPhone 8 模拟器上运行该工程,然后您将看到如Figure 3-11所示的界面,点击scan按钮可以开始扫描文档。

Figure 3-11
Make an iOS app in Swift with Foxit PDF SDK for iOS
如今,Swift因其简单清晰、更易于阅读的语法,越来越受到iOS开发人员的欢迎。为了更好地支持Swift开发人员,本节将帮助您使用Foxit PDF SDK for iOS快速构建一个Swift语言的iOS应用程序。其主要包括以下的步骤:
- 创建一个Swift语言的iOS工程
- 集成 Foxit PDF SDK for iOS 到您的应用程序
- 初始化 Foxit PDF SDK for iOS
- 使用 FSPDFViewCtrl显示PDF文档
- 使用UI Extensions组件构建一个功能齐全的PDF阅读器
- 基于功能齐全的PDF阅读器添加扫描功能
创建一个Swift语言的iOS工程
在本指南中,使用Xcode 11.3.1创建一个新的iOS工程。
创建一个Swift语言的iOS工程,请参阅3.1.1小节 “创建一个Objective-C语言的iOS工程“。唯一不同的是需要选择Swift语言,如Figure 3-12所示。
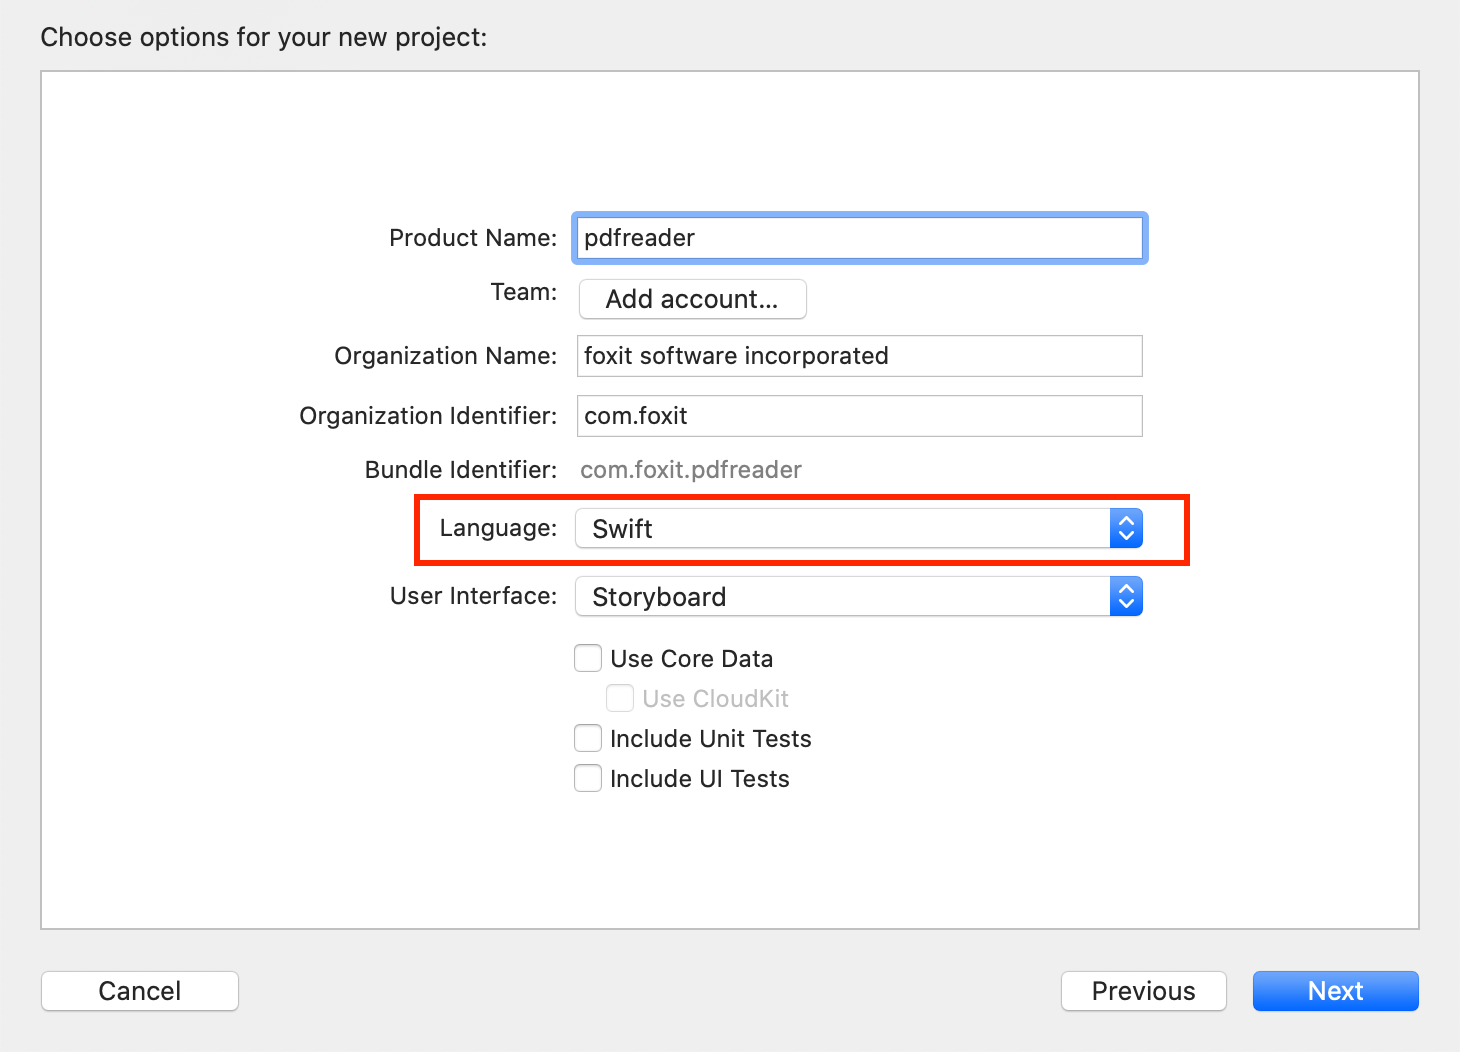
Figure 3-12
集成 Foxit PDF SDK for iOS 到您的应用程序
集成Foxit PDF SDK for iOS到您的Swift应用程序,请参阅3.1.2小节 “集成 Foxit PDF SDK for iOS 到您的应用程序” 将 “FoxitRDK.framework“,”uiextensionsDynamic.framework” 和”FoxitPDFScanUI.framework” 添加到pdfreader工程。
初始化 Foxit PDF SDK for iOS
在调用任何API之前,应用程序必须使用license初始化Foxit PDF SDK for iOS。FSLibrary::initialize函数用于SDK库的初始化。试用license文件在下载包的”libs”文件夹下。当试用期结束后,您需要购买正式license以继续使用该SDK。在AppDelegate. swift文件的application方法中完成SDK的初始化。
import FoxitRDK
...

func application(_ application: UIApplication, didFinishLaunchingWithOptions launchOptions: [UIApplicationLaunchOptionsKey: Any]?) -> Bool {

        let sn = ""
        let key = ""
        let eRet = FSLibrary.initialize(sn, key:key)
        if .errSuccess != eRet {
            return false
        }
        return true
}
备注:参数 “sn“的值在“rdk_sn.txt“中 (“SN=“后面的字符串),“key“的值在 “rdk_key.txt“中 (“Sign=“后面的字符串)。
使用 FSPDFViewCtrl显示PDF文档
到目前为止,我们已经在pdfreade工程中添加了Foxit PDF SDK for iOS frameworks,并且完成了SDK库的初始化。现在,我们将使用FSPDFViewCtrl通过几行代码来显示一个PDF文档。
备注:如果只需要显示一个PDF文档,则不需要UI Extensions组件。
首先,在工程中添加一个PDF文档作为测试文档。例如,使用下载解压包中 “samples\test_files” 文件夹下的 “Sample.pdf” 文档。右击pdfreader工程,选择Add Files to “pdfreader“…添加该文档。当添加完成后,您可以在Xcode的Copy Bundle Resources看到该文档,如Figure 3-13所示。
备注:您可以直接添加PDF到Copy Bundle Resources。单击pdfreader工程,在Build Phases选项卡下找到Copy Bundle Resources,点击 + 按钮,选择需要添加的文档。您可以使用任何PDF文档,只需要将其添加到Xcode的Copy Bundle Resources。
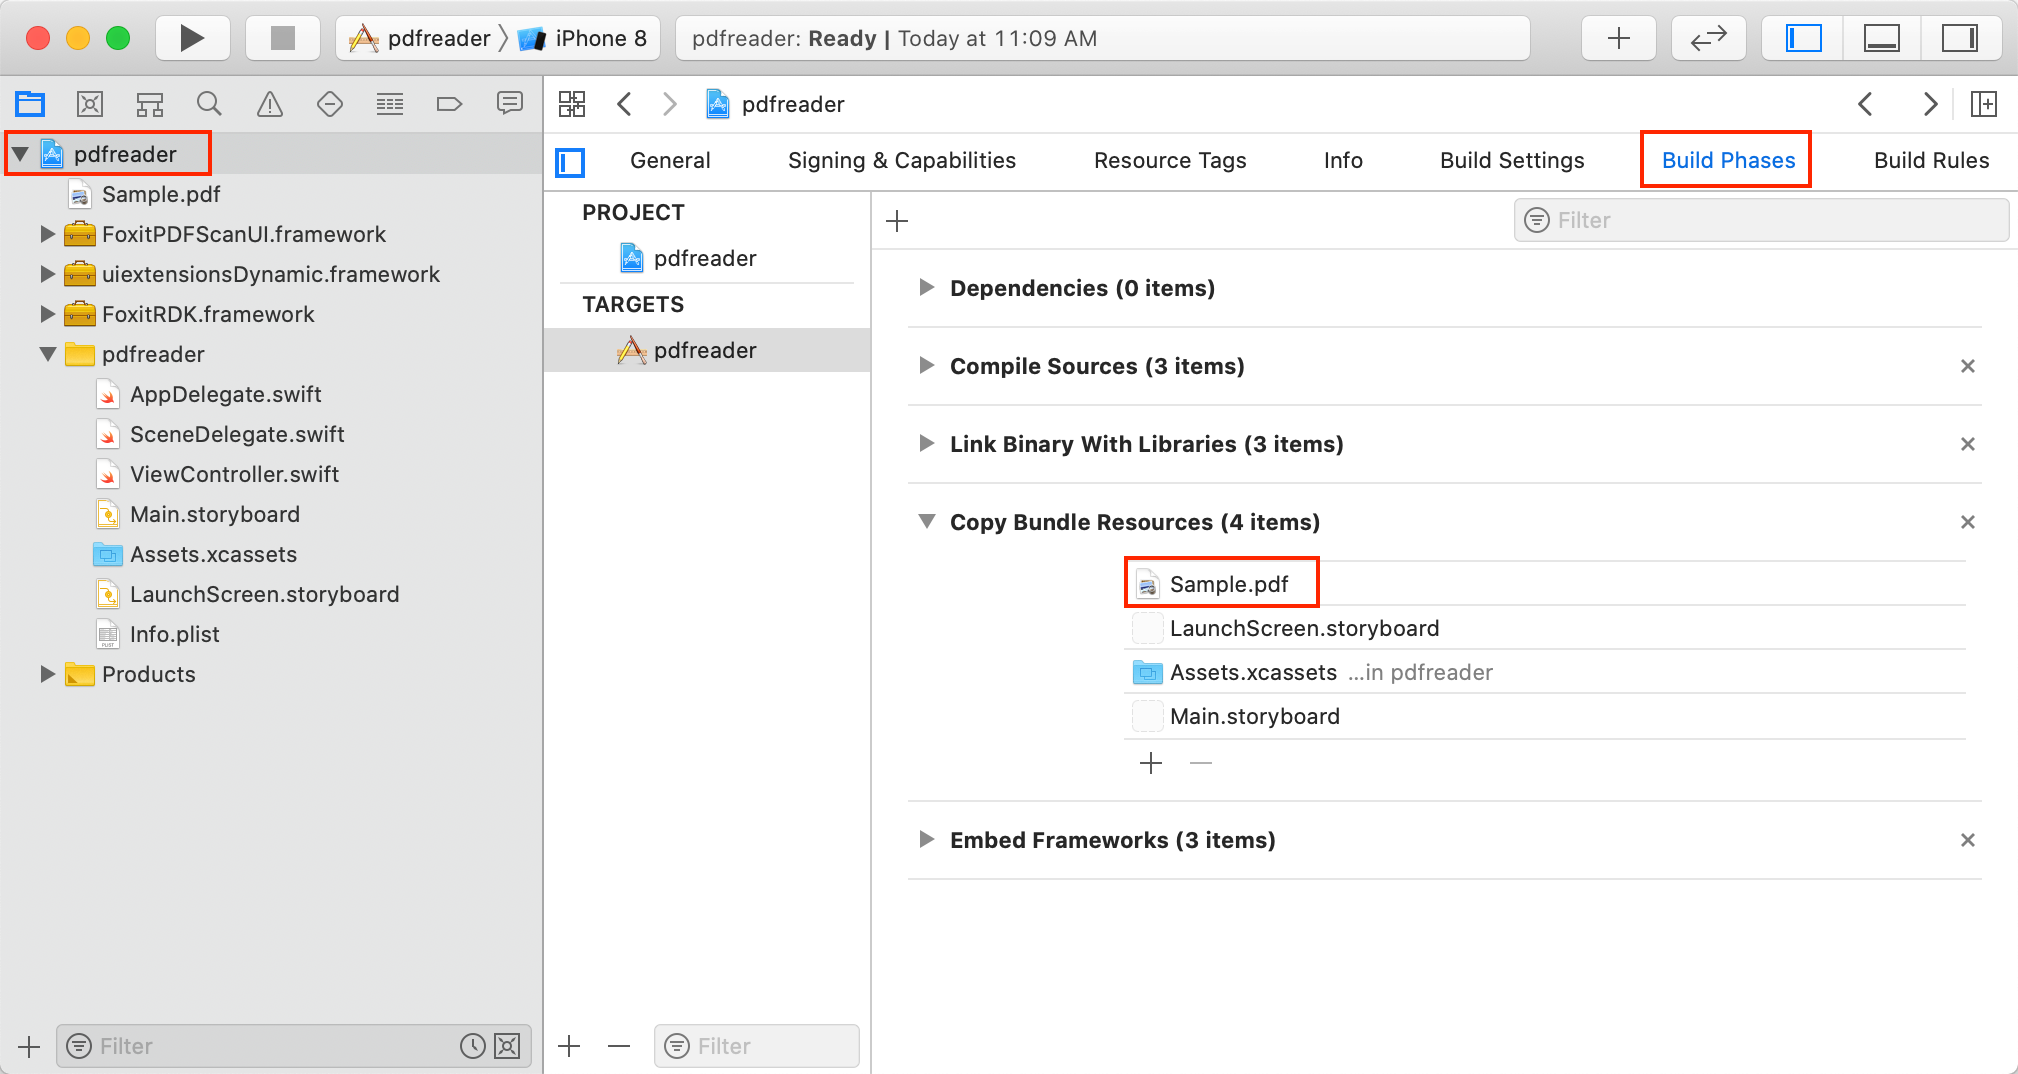
Figure 3-13
其次,在ViewController.swift中加入如下的代码来打开并显示一个PDF文档。显示一个PDF文档很简单,您只需要获取一个PDF文档路径,实例化一个FSPDFViewCtrl对象,然后调用FSPDFViewCtrl::openDoc 函数打开和渲染该PDF文档。
更新ViewController. swift,如下所示:
import UIKit
import FoxitRDK

class ViewController: UIViewController {

    override func viewDidLoad() {
        super.viewDidLoad()

        // Get the path of a PDF.
        let pdfPath = Bundle.main.path(forResource: "Sample", ofType: "pdf")!

        // Initialize a FSPDFViewCtrl object with the size of the entire screen.
        var pdfViewCtrl: FSPDFViewCtrl!
        pdfViewCtrl = FSPDFViewCtrl.init(frame:self.view.bounds)

        // Set the document to display.
        pdfViewCtrl.openDoc(pdfPath, password: nil, completion: nil)

        // Add the pdfViewCtrl to the root view.
        self.view.insertSubview(pdfViewCtrl, at: 0)
    }

    override func didReceiveMemoryWarning() {
        super.didReceiveMemoryWarning()
        // Dispose of any resources that can be recreated.
    }
}
太棒了!我们已经使用Foxit PDF SDK for iOS通过几行代码完成了一个显示PDF文档的简单的iOS应用程序 (Swift语言) 。下一步是在真机设备或者模拟器上运行该工程。
在本指南中,将使用iPhone 8模拟器来编译和运行该工程。当成功编译后,您将看到”Sample.pdf”文档显示如Figure 3-14所示。该示例应用程序具有一些基本的PDF功能,比如放大/缩小和翻页。您可以进行体验。

Figure 3-14
使用UI Extensions组件构建一个功能齐全的PDF阅读器
Foxit PDF SDK for iOS 带有内置的UI设计,包括应用程序的基础UI和功能模块UI。内置UI通过Foxit PDF SDK for iOS实现,并且封装在UI Extensions组件中。因此,构建一个功能齐全的PDF阅读器变得越来越简单。您只需要实例化一个UIExtensionsManager对象,然后将其设置给FSPDFViewCtrl。
实例化一个UIExtensionsManager对象,并且设置给FSPDFViewCtrl
在 “ViewController.swift” 文件中,您只需要添加如下的代码:
import uiextensionsDynamic
...

var extensionsManager: UIExtensionsManager!
...
extensionsManager = UIExtensionsManager(pdfViewControl: pdfViewCtrl)
pdfViewCtrl.extensionsManager = extensionsManager;
添加访问摄像头、麦克风和照片库的权限
为了在iOS 9.0或者更高版本的设备上访问摄像头、麦克风和照片库,您需要在 “Info.plist” 文件中添加如下的配置。
<key>NSCameraUsageDescription</key>
<string>For adding photographs to your PDF files.</string>
<key>NSMicrophoneUsageDescription</key>
<string>RDK need to add record permissions,please allow</string>
<key>NSPhotoLibraryAddUsageDescription</key>
<string>RDK need to add picture permissions,please allow</string>
<key>NSPhotoLibraryUsageDescription</key>
<string>For adding pictures to your PDF files.</string>
ViewController.swift的完整更新如下:
import UIKit
import FoxitRDK
import uiextensionsDynamic

class ViewController: UIViewController {

    var extensionsManager: UIExtensionsManager!

    override func viewDidLoad() {
        super.viewDidLoad()

        // Get the path of a PDF.
        let pdfPath = Bundle.main.path(forResource: "Sample", ofType: "pdf")!

        // Initialize a FSPDFViewCtrl object with the size of the entire screen.
        var pdfViewCtrl: FSPDFViewCtrl!
        pdfViewCtrl = FSPDFViewCtrl.init(frame:self.view.bounds)

        // Set the document to display.
        pdfViewCtrl.openDoc(pdfPath, password: nil, completion: nil)

        // Add the pdfViewCtrl to the root view.
        self.view.insertSubview(pdfViewCtrl, at: 0)

        // Initialize a UIExtensionsManager object and set it to pdfViewCtrl.
        extensionsManager = UIExtensionsManager(pdfViewControl: pdfViewCtrl)
        pdfViewCtrl.extensionsManager = extensionsManager;
    }

    override func didReceiveMemoryWarning() {
        super.didReceiveMemoryWarning()
        // Dispose of any resources that can be recreated.
    }
}
我们在iPhone 8模拟器上运行该工程。现在,它是一个功能齐全的PDF阅读器,如Figure 3-15所示,包含Complete PDF Viewer demo中所有的功能。请随意进行体验。

Figure 3-15
基于功能齐全的PDF阅读器添加扫描功能
扫描功能是一个单独的模块,没有封装在UI Extensions组件中。因此,如果您需要在工程中使用该功能,那么请添加如下的核心代码来调用scan模块:
import FoxitPDFScanUI

// Initialize the scan module.
PDFScanManager.initializeScanner(0, serial2: 0);
PDFScanManager.initializeCompression(0, serial2: 0);

// Get the PDFScan controller.
let VC = PDFScanManager.getPDFScanView();
self.present(VC, animated: true, completion: nil);
PDFScanManager.saveAsCallBack = { (error, savePath) -> () in
     // <add your code>
}
对于PDFScanManager.initializeScanner和PDFScanManager.initializeCompression接口,如果您将参数设置为0,则扫描后的图片会带有水印。如果您需要去掉水印,请联系Foxit销售或者技术支持团队来获取授权的key。
基于上一节,添加一个新的button来调用scan模块。
更新 ViewController.swift,如下所示:
(假设您已经将名为 “scan.png” 的图片加入到工程。该图片位于”samples/swift/complete_pdf_viewer_swift/Sources/Assets.xcassets/scan.imageset” 文件夹下。)
import UIKit
import FoxitRDK
import uiextensionsDynamic
import FoxitPDFScanUI

class ViewController: UIViewController {

    var extensionsManager: UIExtensionsManager!
    var openScanBtn: UIButton!

    override func viewDidLoad() {
        super.viewDidLoad()

        // Get the path of a PDF.
        let pdfPath = Bundle.main.path(forResource: "Sample", ofType: "pdf")!

        // Initialize a FSPDFViewCtrl object with the size of the entire screen.
        var pdfViewCtrl: FSPDFViewCtrl!
        pdfViewCtrl = FSPDFViewCtrl.init(frame:self.view.bounds)

        // Set the document to display.
        pdfViewCtrl.openDoc(pdfPath, password: nil, completion: nil)

        // Add the pdfViewCtrl to the root view.
        self.view.insertSubview(pdfViewCtrl, at: 0)

        // Initialize a UIExtensionsManager object and set it to pdfViewCtrl.
        extensionsManager = UIExtensionsManager(pdfViewControl: pdfViewCtrl)
        pdfViewCtrl.extensionsManager = extensionsManager;

        // Create a scan button.
        openScanBtn = UIButton(frame: CGRect(x: view.frame.size.width - 80, y: view.frame.size.height - 120, width: 60, height: 60))
        openScanBtn.setImage(UIImage(named: "scan"), for: .normal);
        openScanBtn.addTarget(self, action: #selector(openScan(_🙂), for: .touchUpInside)

        // Add the scan button to the root view.
        self.view.addSubview(openScanBtn);

        // Initialize the scan module.
        PDFScanManager.initializeScanner(0, serial2: 0);
        PDFScanManager.initializeCompression(0, serial2: 0);

    }

    @IBAction func openScan(_ sender: UIButton) {
        let VC = PDFScanManager.getPDFScanView();
        self.present(VC, animated: true, completion: nil);
        PDFScanManager.saveAsCallBack = { (error, savePath) -> () in
            if ((savePath) != nil) {
                if ((VC.presentingViewController) != nil) {
                    VC.presentingViewController?.dismiss(animated: false, completion: nil)
                }
                VC.dismiss(animated: false, completion: nil)
                }
        }
    }

    override func didReceiveMemoryWarning() {
        super.didReceiveMemoryWarning()
        // Dispose of any resources that can be recreated.
    }
}
在iPhone 8 模拟器上运行该工程,然后您将看到如Figure 3-16所示的界面,点击scan按钮可以开始扫描文档。

Figure 3-16
使用Mac Catalyst快速构建一个功能齐全的PDF阅读器
上一章节介绍了如何使用Foxit PDF SDK for iOS创建一个功能齐全的PDF阅读器,该阅读器应用程序只能部署到iPhone 和 iPad 设备上。本节将使用Foxit PDF SDK for iOS (Mac Catalyst) 构建一个功能齐全的PDF阅读器 (使用Objective-C语言) ,该阅读器应用程序可以部署到iPhone、iPad和Mac设备上。其主要包括以下的步骤:
- 使用Mac Catalyst创建一个 Mac应用程序
- 集成Foxit PDF SDK for iOS (Catalyst) 到您的应用程序
- 初始化Foxit PDF SDK for iOS (Catalyst)
- 使用FSPDFViewCtrl显示PDF文档
- 使用UI Extensions组件构建一个功能齐全的PDF阅读器
使用Mac Catalyst创建一个Mac 应用程序
本节将使用Mac Catalyst创建一个Mac 应用程序,当前Xcode版本使用的是11.5。请参阅3.1.1小节 “创建一个Objective-C语言的iOS工程” 创建一个Mac工程,并命名为 “pdfreader_catalyst“。
集成 Foxit PDF SDK for iOS (Catalyst) 到您的应用程序
备注:在本章中,我们将使用默认的内置UI实现来开发该应用程序,为了简单和方便 (直接使用UI Extensions组件,不需要源代码工程),我们只需要添加以下的文件到pdfreader_catalyst工程中。
- FoxitRDK.xcframework – 该framework包含Foxit PDF SDK for iOS的动态库和相关头文件。
- uiextensionsDynamic.xcframework – 该framework包括UI Extensions动态库,相关头文件,以及默认内置UI实现需要的资源文件。
- (可选) FoxitPDFScanUI.framework – 该framework包括Foxit PDF SDK扫描功能动态库,相关头文件,以及扫描功能默认内置UI实现需要的资源文件。
备注:FoxitPDFScanUI.framework仅支持iOS平台,目前不支持macOS平台。
添加上述的三个动态framework文件到pdfreader_catalyst工程,请按照如下的步骤:
a)添加对Mac设备的支持。单击工程,在General选项卡下找到Deployment Info,勾选Mac复选框,如Figure 4-1所示。(如果您的应用程序只需要支持iPhone/iPad,则不需要勾选Mac复选框)
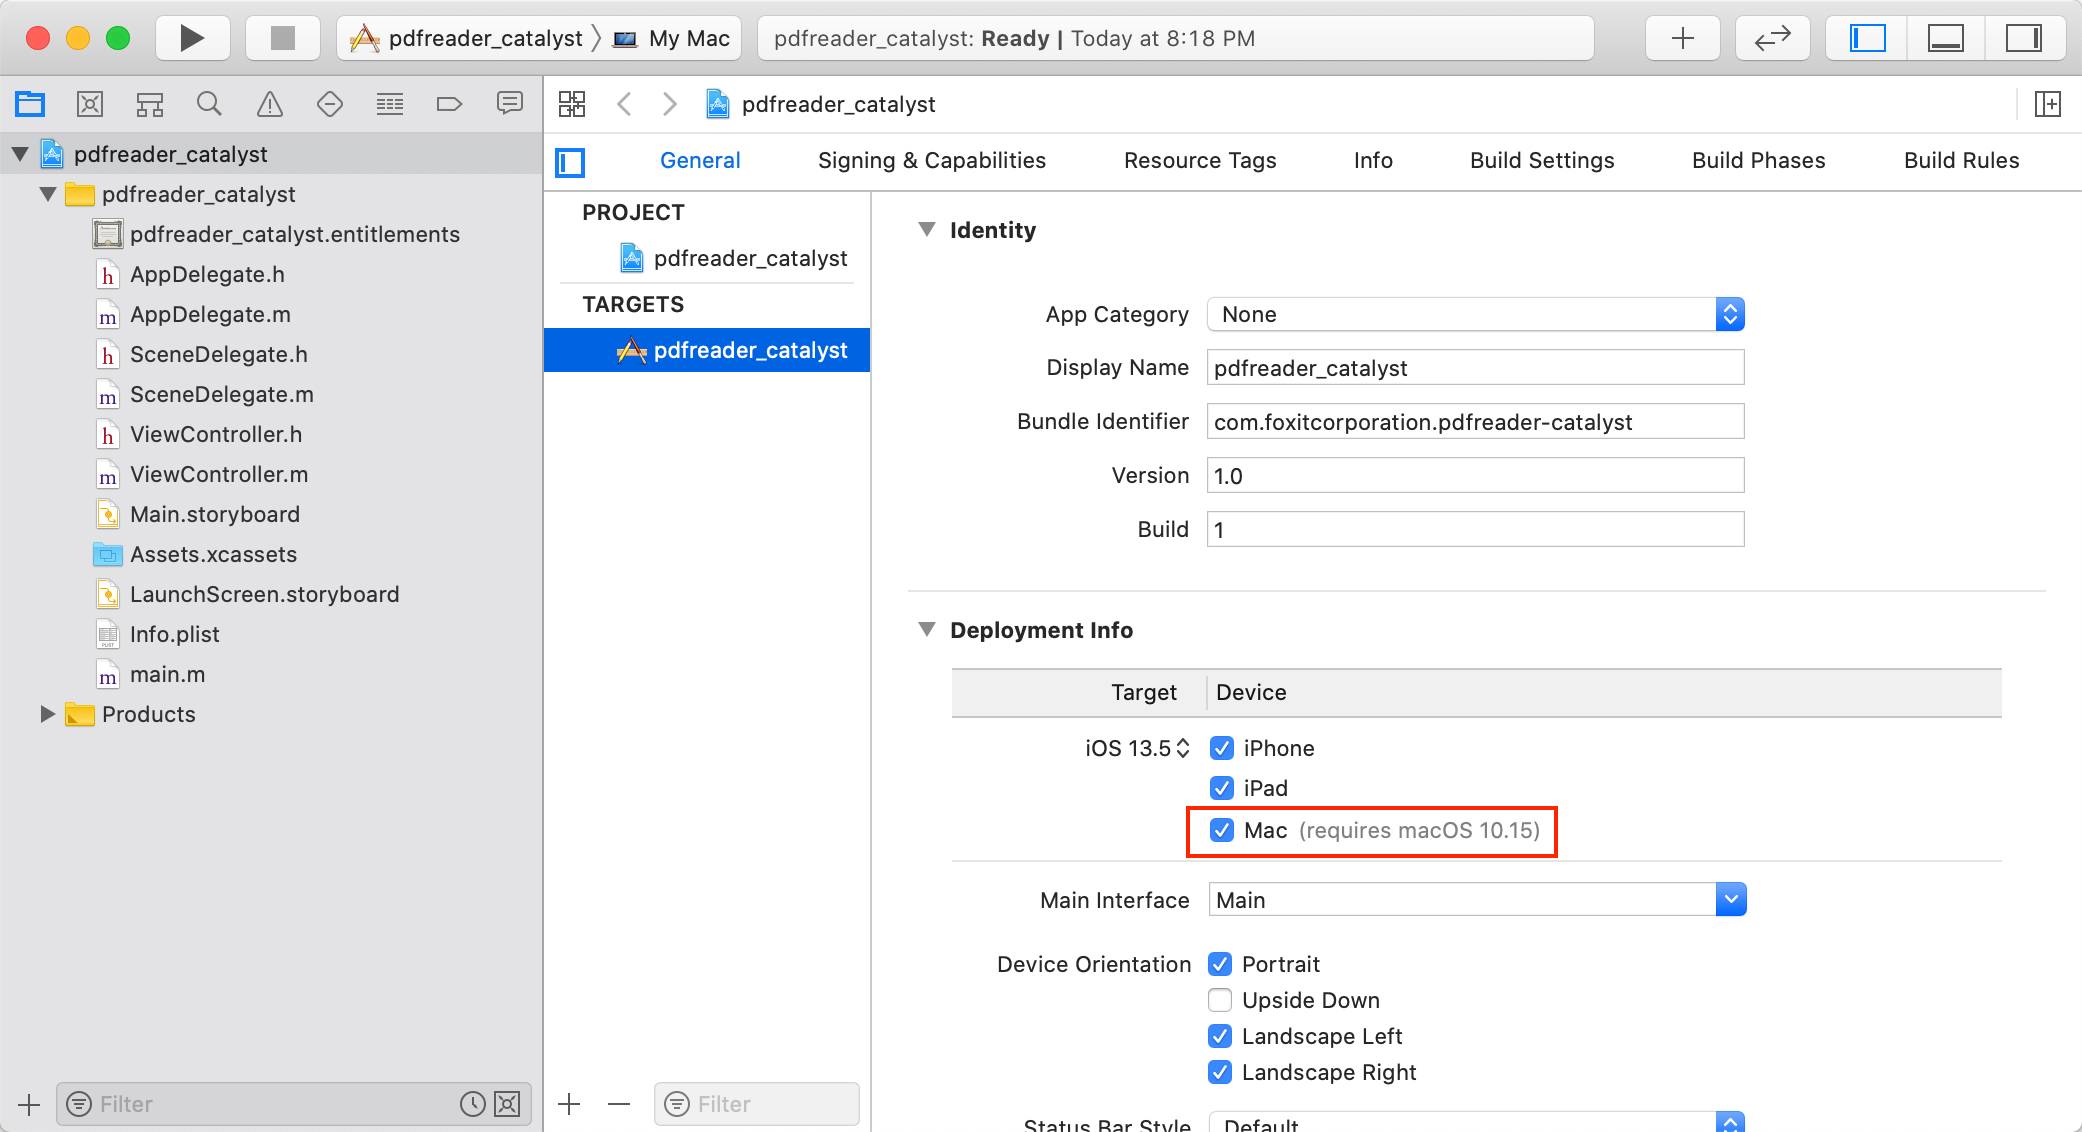
Figure 4-1
b)将发布包 “libs” 目录下的FoxitRDK.xcframework, uiextensionsDynamic.xcframework 和 FoxitPDFScanUI.framework拖拽到pdfreader_catalyst 工程中。
备注:当拖拽framework时,请确保勾选 “Copy items if needed“ 选项,如Figure 4-2所示。
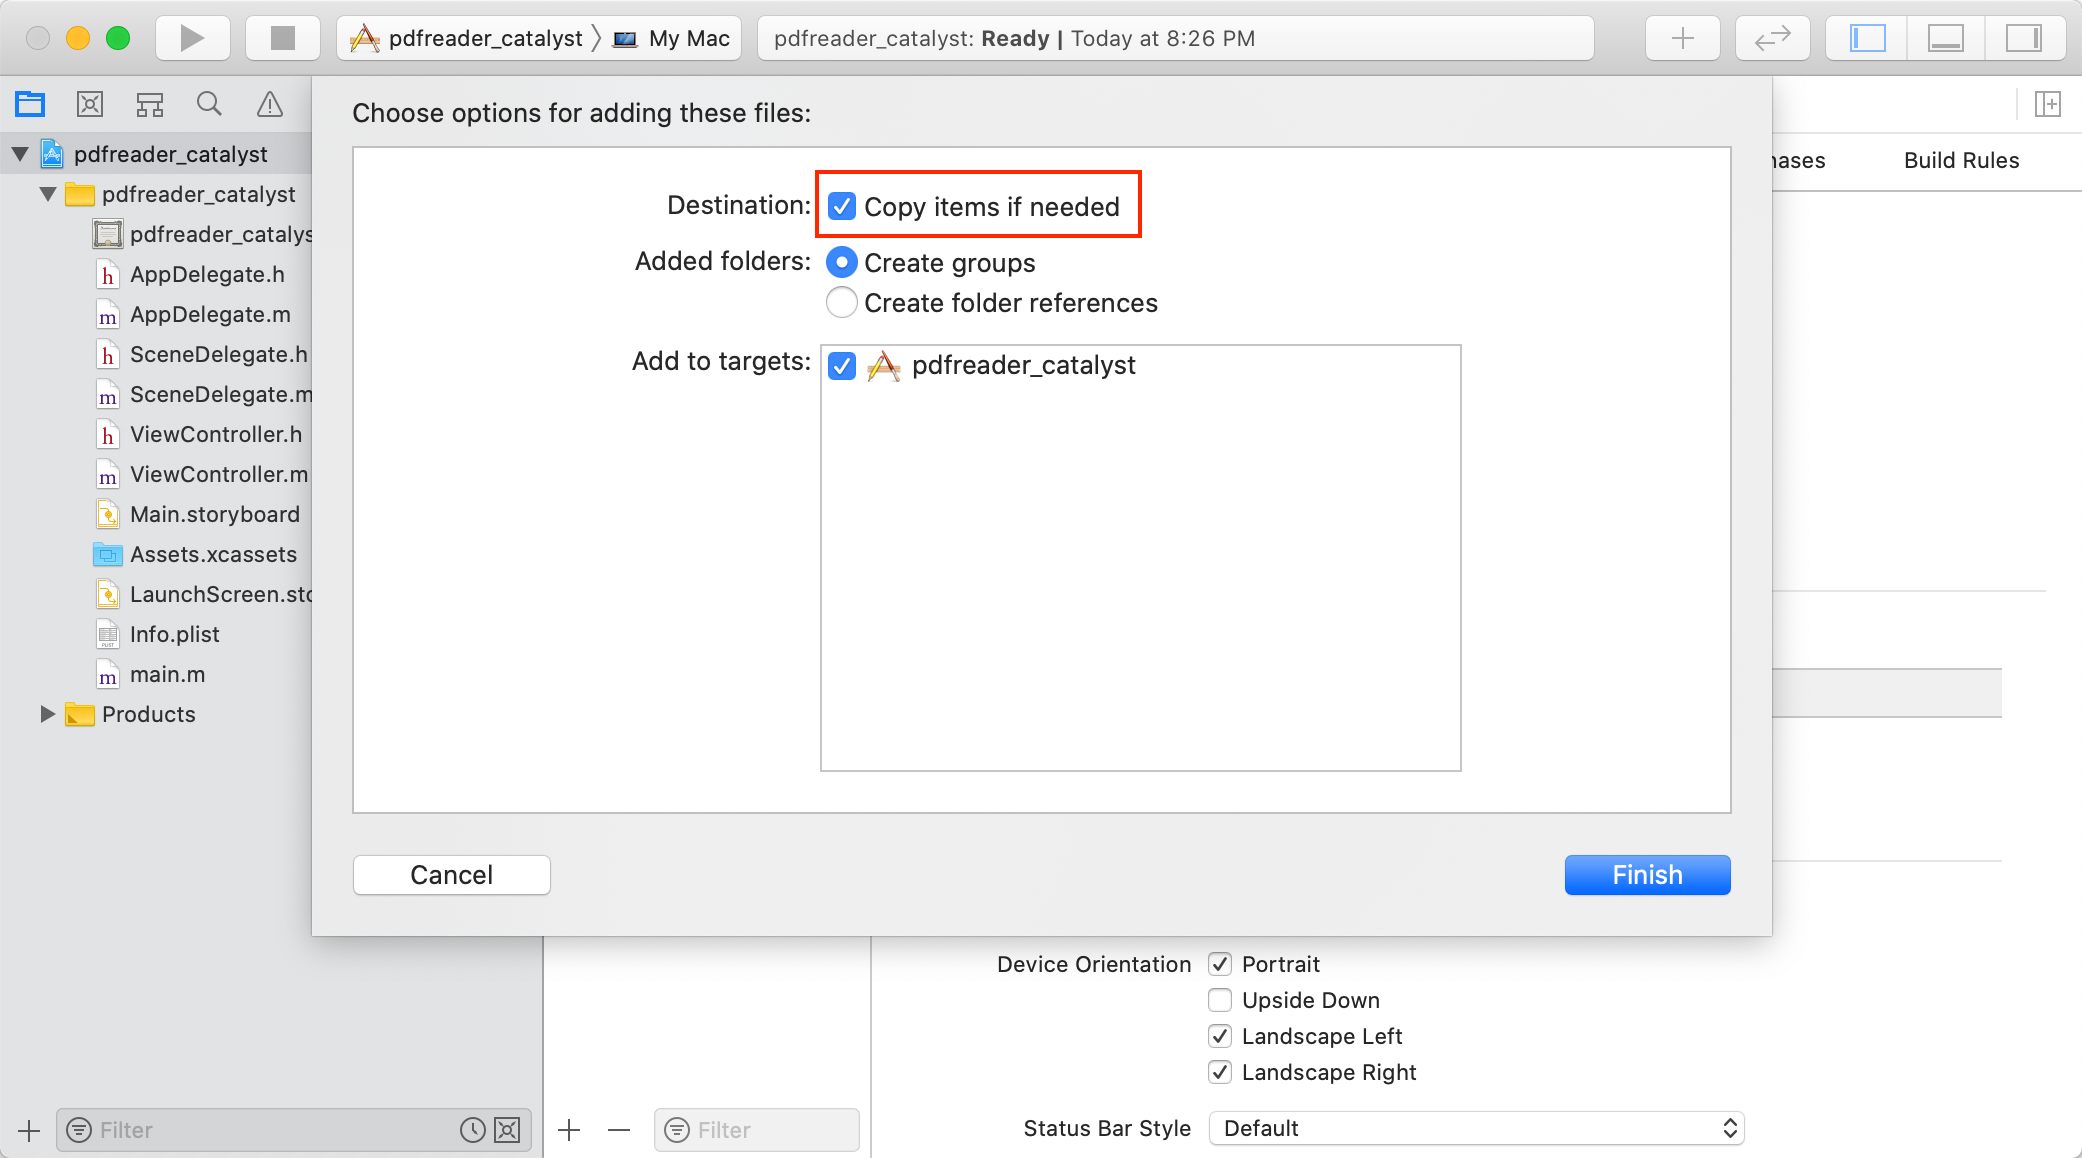
Figure 4-2
c)嵌入动态framework。单击工程,在General选项卡下找到Frameworks, Libraries, and Embedded Content,然后选择 “Embed & Sign” 以及支持的平台,如Figure 4-3所示。
备注:FoxitPDFScanUI.framework只支持iOS平台。
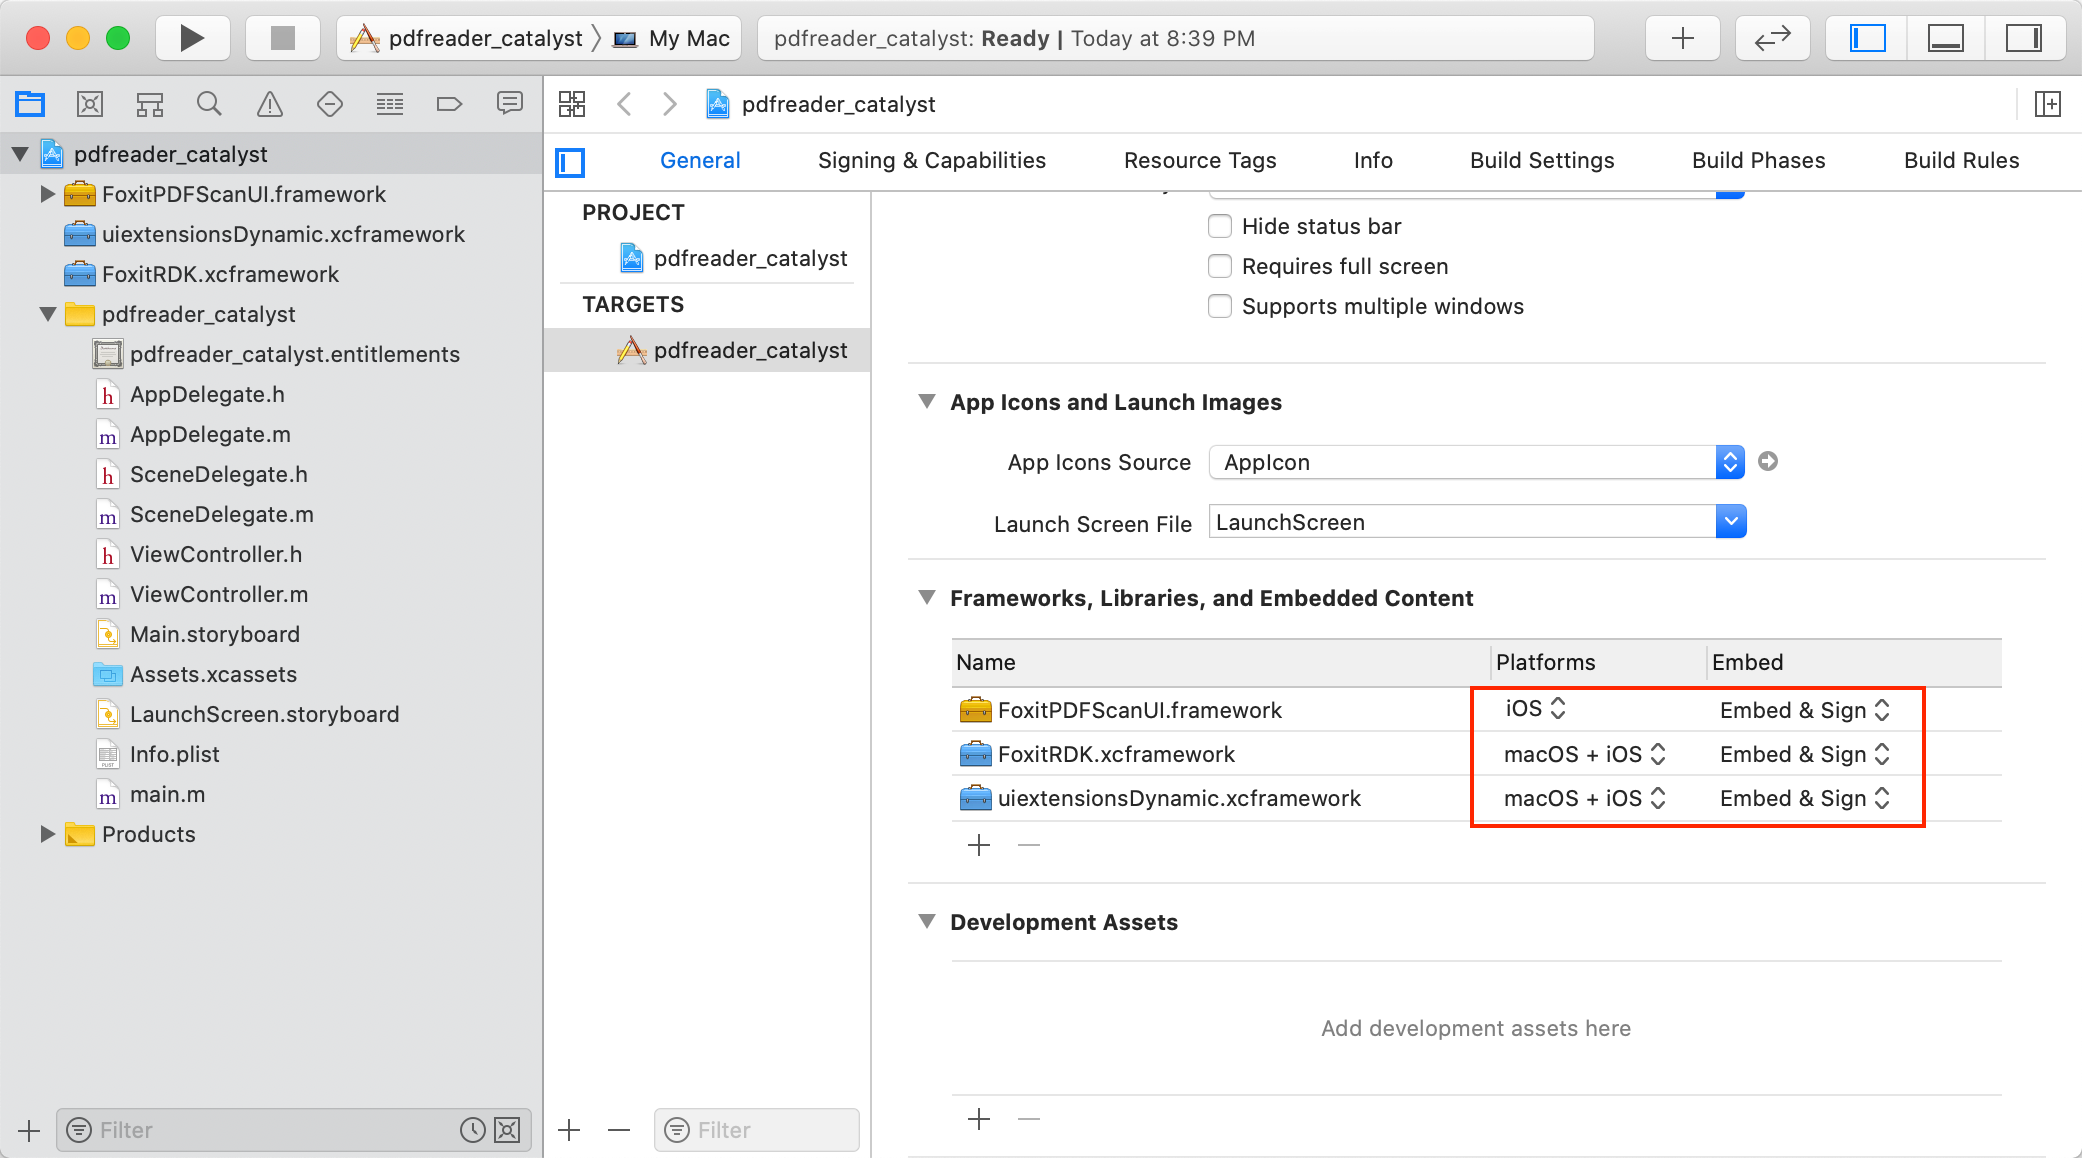
Figure 4-3
d)检查Framework搜索路径。点击工程,在Build Settings选项卡下找到Search Paths,检查Framework search paths是否有设置,如果没有,请正确设置,如Figure 4-4所示。
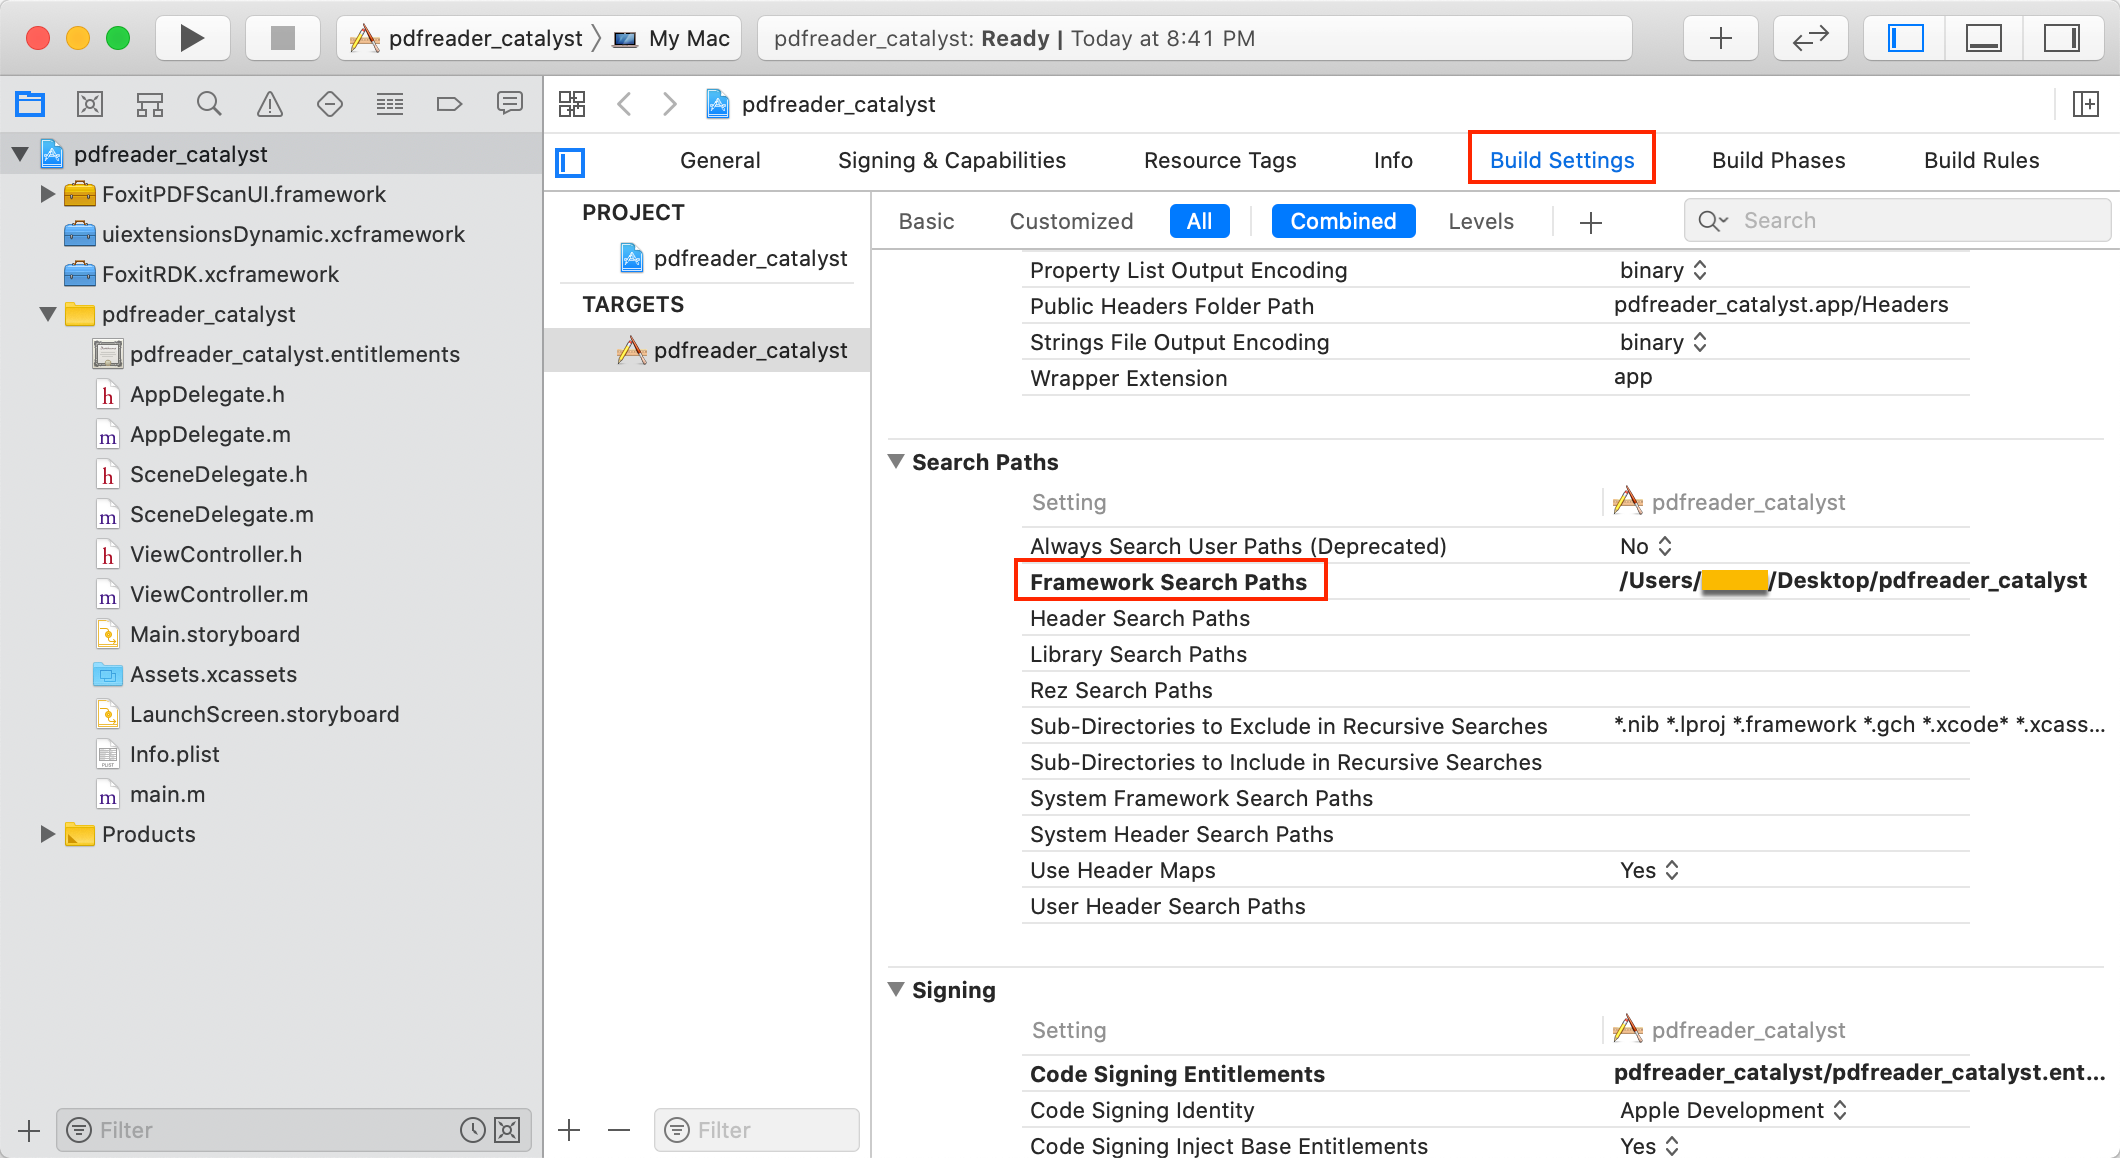
Figure 4-4
到此,我们已成功在pdfreader_catalyst工程中添加了”FoxitRDK.xcframework“,”uiextensionsDynamic.xcframework” 和 “FoxitPDFScanUI.framework“。
初始化 Foxit PDF SDK for iOS (Catalyst)
初始化Foxit PDF SDK for iOS (Catalyst) 与3.1.3小节 “初始化 Foxit PDF SDK for iOS” 是一样的,请参阅该小节。
使用 FSPDFViewCtrl显示PDF文档
使用FSPDFViewCtrl显示一个PDF文档与3.1.4小节是一样的。请参阅3.1.4小节 “使用 FSPDFViewCtrl显示PDF文档” 添加一个PDF文档到工程中,然后在ViewController.m中添加以下的代码。
更新ViewController.m,如下所示:
#import "ViewController.h"
#import <FoxitRDK/FSPDFViewControl.h>

@interface ViewController ()

@end

@implementation ViewController

- (void)viewDidLoad {
    [super viewDidLoad];

    // Get the path of a PDF.
    NSString* pdfPath = [[NSBundle mainBundle] pathForResource:@"Sample" ofType:@"pdf"];

    // Initialize a FSPDFViewCtrl object with the size of the entire screen.
    FSPDFViewCtrl* pdfViewCtrl;
    pdfViewCtrl = [[FSPDFViewCtrl alloc] initWithFrame: [self.view bounds]];

    // Open an unencrypted PDF document.
    [pdfViewCtrl openDoc:pdfPath password:nil completion:nil];

    // Add the pdfViewCtrl to the root view.
    [self.view addSubview:pdfViewCtrl];
}

- (void)didReceiveMemoryWarning {
    [super didReceiveMemoryWarning];
    // Dispose of any resources that can be recreated.
}

@end
然后,编译和运行工程。该工程可以在iPhone/iPad, 或者Mac上运行。本节中,选择 “My Mac” 来运行该工程。当成功编译后,您将看到 “Sample.pdf” 文档显示如Figure 4-5所示。
备注:您可能需要使用开发配置文件 (development provisioning profile) 注册您的Mac电脑,以允许该应用程序可以在Mac上启动,以及在开发中使用某些应用服务。

Figure 4-5
使用 UI Extensions组件构建一个功能齐全的PDF阅读器
构建一个功能齐全的PDF阅读器与3.1.5小节 “使用 UI Extensions组件构建一个功能齐全的PDF阅读器” 是一样的。更新ViewController.m,如下所示:
#import "ViewController.h"
#import <FoxitRDK/FSPDFViewControl.h>
#import <uiextensionsDynamic/uiextensionsDynamic.h>

@interface ViewController ()

@end

@implementation ViewController
{
    UIExtensionsManager* extensionsManager;
}

- (void)viewDidLoad {
    [super viewDidLoad];

    // Get the path of a PDF.
    NSString* pdfPath = [[NSBundle mainBundle] pathForResource:@"Sample" ofType:@"pdf"];

    // Initialize a FSPDFViewCtrl object with the size of the entire screen.
    FSPDFViewCtrl* pdfViewCtrl;
    pdfViewCtrl = [[FSPDFViewCtrl alloc] initWithFrame: [self.view bounds]];

    // Open an unencrypted PDF document.
    [pdfViewCtrl openDoc:pdfPath password:nil completion:nil];

    // Add the pdfViewCtrl to the root view.
    [self.view addSubview:pdfViewCtrl];

    // Instantiate a UIExtensionsManager object and set it to pdfViewCtrl
    extensionsManager = [[UIExtensionsManager alloc] initWithPDFViewControl:pdfViewCtrl];
    pdfViewCtrl.extensionsManager = extensionsManager;
}

- (void)didReceiveMemoryWarning {
    [super didReceiveMemoryWarning];
    // Dispose of any resources that can be recreated.
}

@end
然后,编译工程,并在Mac上运行工程。当成功编译后,您将看到 “Sample.pdf” 文档显示如Figure 4-6所示。
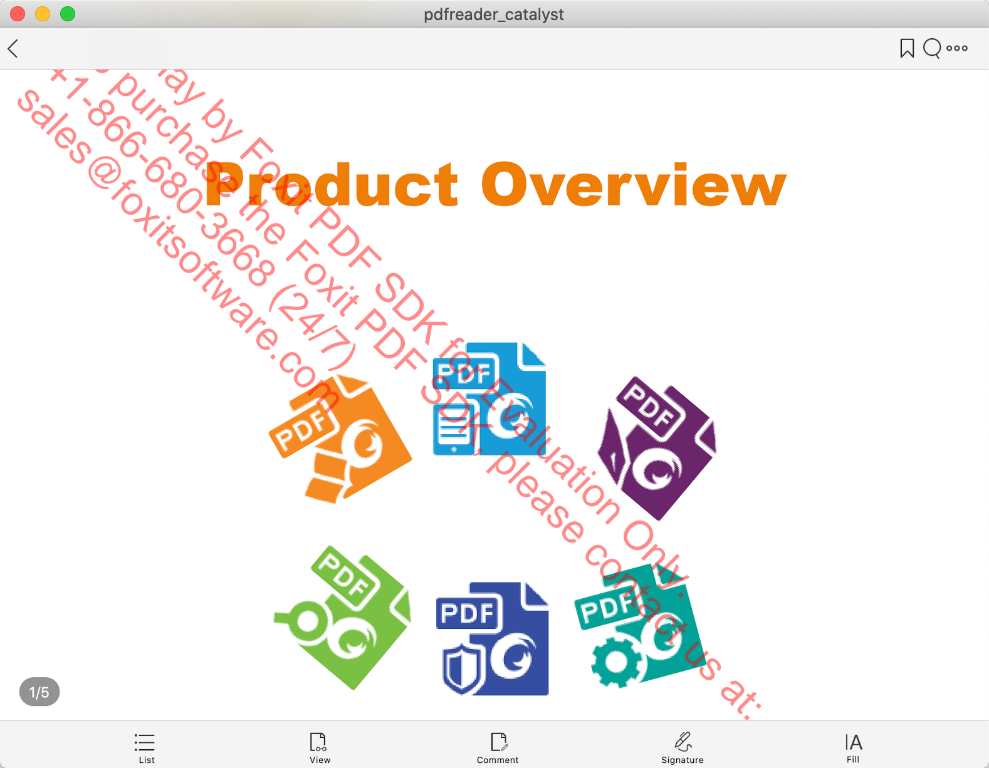
Figure 4-6
自定义UI
Foxit PDF SDK for iOS为开发人员 提供了一个简单、干净和友好的用户界面,可以快速构建一个功能齐全的PDF应用程序而不需花费太多的时间在设计上。此外,自定义用户页面也非常简单。Foxit PDF SDK for iOS提供了UI Extensions组件的源代码 (包含即用型UI模块的实现),这样开发人员可以根据需要灵活自定义界面的外观。
从4.0版本开始,开发人员可以通过一个配置文件对功能进行自定义。
从5.0版本开始,内置UI中的任何元素都是可配置的,并且为开发人员提供了更高级的APIs和更强大的配置文件用来进一步自定义UI元素,比如显示/隐藏某个特定的面板、top/bottom toolbar、top toolbar中的菜单项,以及View setting bar和More Menu view中的菜单项。
从6.3版本开始,配置文件被进一步改进,提供了更多设置选项对UI进行自定义,包括权限管理和UI元素的属性。
以下部分将介绍如何通过配置文件、APIs、源代码自定义功能模块、权限管理和UI元素。
通过配置文件自定义UI
通过配置文件,开发人员可以轻松选择功能模块,设置权限管理和UI元素的属性,而无需编写任何额外的代码或者重新设计应用程序的UI。
JSON文件介绍
配置文件可以作为JSON文件提供,也可以直接在代码中编写。我们建议您使用JSON文件格式,因为其可以更直观,更清晰的查看和配置各个选项。
您可以参考Foxit PDF SDK for iOS包中”samples\complete_pdf_viewer\Source\Resource\”文件夹下的JSON文件。其内容如下所示:
{
    "modules": {
        "readingbookmark": true,
        "outline": true,
        "annotations": {
            "highlight": true,
            "underline": true,
            "squiggly": true,
            "strikeout": true,
            "insert": true,
            "replace": true,
            "line": true,
            "rectangle": true,
            "oval": true,
            "arrow": true,
            "pencil": true,
            "eraser": true,
            "typewriter": true,
            "textbox": true,
            "callout": true,
            "note": true,
            "stamp": true,
            "polygon": true,
            "cloud": true,
            "polyline": true,
            "distance": true,
            "image": true,
            "audio": true,
            "video": true,
            "redaction": true
        },
        "thumbnail": true,
        "attachment": true,
        "signature": true,
        "fillSign": true,
        "search": true,
        "navigation": true,
        "form": true,
        "selection": true,
        "encryption": true,
        "multipleSelection": true
    },
    "permissions": {
        "runJavaScript" : true,
        "copyText" : true,
        "disableLink" : false
    },
    "uiSettings": {
        "pageMode":"Single",
        "continuous":false,
        "colorMode" : "Normal",
        "zoomMode" : "FitWidth",
        "mapForegroundColor" : "#5d5b71",
        "mapBackgroundColor" : "#00001b",
        "reflowBackgroundColor":"#ffffff",
        "disableFormNavigationBar" : false,
        "highlightForm" : true,
        "highlightLink" : true,
        "highlightLinkColor" : "#16007fff",
        "highlightFormColor":"#200066cc",
        "fullscreen" : true,
        "annotations": {
            "continuouslyAdd" : false,
            "highlight": {
                "color" : "#ffff00",
                "opacity" : 1.0
            },
            "underline": {
                "color" : "#66cc33",
                "opacity" : 1.0
            },
            "squiggly": {
                "color" : "#ff6633",
                "opacity" : 1.0
            },
            "strikeout": {
                "color" : "#ff0000",
                "opacity" : 1.0
            },
            "insert": {
                "color" : "#993399",
                "opacity" : 1.0
            },
            "replace": {
                "color" : "#0000ff",
                "opacity" : 1.0
            },
            "line": {
                "color" : "#ff0000",
                "opacity" : 1.0,
                "thickness" : 2
            },
            "rectangle": {
                "color" : "#ff0000",
                "opacity" : 1.0,
                "thickness" : 2
            },
            "oval": {
                "color" : "#ff0000",
                "opacity" : 1.0,
                "thickness" : 2
            },
            "arrow": {
                "color" : "#ff0000",
                "opacity" : 1.0,
                "thickness" : 2
            },
            "pencil": {
                "color" : "#ff0000",
                "opacity" : 1.0,
                "thickness" : 2
            },
            "polygon": {
                "color" : "#ff0000",
                "opacity" : 1.0,
                "thickness" : 2
            },
            "cloud": {
                "color" : "#ff0000",
                "opacity" : 1.0,
                "thickness" : 2
            },
            "polyline": {
                "color" : "#ff0000",
                "opacity" : 1.0,
                "thickness" : 2
            },
            "typewriter": {
                "textColor" : "#0000ff",
                "opacity" : 1.0,
                "textFace" : "Courier",
                "textSize" : 18.0
            },
            "textbox": {
                "color" : "#ff0000",
                "textColor": "#0000ff",
                "opacity" : 1.0,
                "textFace" : "Courier",
                "textSize" : 18.0
            },
            "callout": {
                "color": "#ff0000",
                "textColor": "#0000ff",
                "opacity" : 1.0,
                "textFace" : "Courier",
                "textSize" : 18.0
            },
            "note": {
                "color" : "#ff6633",
                "opacity" : 1.0,
                "icon" : "Comment"
            },
            "attachment": {
                "color" : "#ff6633",
                "opacity" : 1.0,
                "icon" : "Pushpin"
            },
            "image": {
                "rotation" : 0,
                "opacity" : 1.0
            },
            "distance": {
                "color" : "#ff0000",
                "opacity" : 1.0,
                "thickness" : 2,
                "scaleFromUnit" : "inch",
                "scaleToUnit" : "inch",
                "scaleFromValue" : 1,
                "scaleToValue" : 1
            },
            "redaction": {
                "fillColor" : "#000000",
                "textColor": "#ff0000",
                "textFace" : "Courier",
                "textSize" : 12
            }
        },
        "form": {
          "textField": {
            "textColor": "#000000",
            "textFace": "Courier",
            "textSize": 0
          },
          "checkBox": {
            "textColor": "#000000"
          },
          "radioButton": {
            "textColor": "#000000"
          },
          "comboBox": {
            "textColor": "#000000",
            "textFace": "Courier",
            "textSize": 0,
            "customText": false
          },
          "listBox": {
            "textColor": "#000000",
            "textFace": "Courier",
            "textSize": 0,
            "multipleSelection": false
          }
        },
        "signature": {
        "color" : "#000000",
        "thickness" : 4
        }
    }
}
备注:
上述JSON文件中的值是配置项的默认值。如果某些配置项不在JSON文件中,则将使用其默认值。例如,如果您注释掉”“highlight“: true,”,但高亮功能仍然是可用的。
只有Annotation工具栏中的附件 (attachment) 注释 是不受 “annotations“的子项控制的。点击底部Comment,可以看到Annotation工具栏,然后长按 (Note) 即可看到附件注释,如Figure 5-1所示。
““attachment“: true,“控制了attachments面板和attachment注释。如果您将其设置为“false“, 则两者都将被禁用。如果您需要隐藏底部工具栏中的 “Comment“, 那么您需要将 “annotations“和 “attachment“同时设置为 “false“。
Figure 5-1
配置项描述
JSON配置文件包括三个部分:功能模块,权限管理和UI设置 (例如,UI元素属性) 。本节将详细介绍这些配置项。
配置功能模块
备注:功能模块项的值类型是bool,其中 “true“ 表示启用该功能模块,“false“表示将禁用该功能模块。默认值为 “true“。
| 功能模块 | 描述 |
| readingbookmark | 用户定义书签 |
| outline | PDF文档书签 |
| annotations (highlight, underline, squiggly, strikeout, insert, replace, line, rectangle, oval, arrow, pencil, eraser, typewriter, textbox, callout, note, stamp, polygon, cloud, polyline, distance, image, audio, video, redaction) |
注释模块集合 |
| thumbnail | PDF页面缩略图显示和页面管理 |
| attachment | PDF文档附件和附件注释 |
| signature | 电子签名和手写签名 |
| fillSign | 用文本和符号填写扁平化表单(即非交互式表单) |
| search | 文本搜索 |
| navigation | PDF页面导航 |
| form | 表单填写和表单数据导入导出 |
| selection | 文本选择 |
| encryption | PDF加密 |
| multipleSelection | 选择多个annotations |
配置权限管理
备注:配置项的值类型为bool,其中 “true“ 表示将启用该权限,“false“表示将禁用该权限。runJavaScript和copyText的默认值为 “true“,disableLink的默认值为“false“。
| 权限管理 | 描述 |
| runJavaScript | 是否允许执行JavaScript |
| copyText | 是否允许复制文本 |
| disableLink | 是否禁用超链接 |
配置UI项及其属性
| UI配置子项 | 描述/属性 | 值类型 | 可选值 | 默认值 | 备注 | |
| displayMode | 页面显示模式 | String | Single/
Facing/ CoverLeft/ CoverMiddle/ CoverRight/ Reflow |
Single | 动态XFA文件不支持Reflow模式。 | |
| continuous | 是否连续的显示单页页面 | Bool | true/false | false | True表示连续显示,false表示不连续显示。该配置项在”Reflow”模式下无效。 | |
| zoomMode | 页面缩放模式 | String | FitWidth
/FitPage |
FitWidth | ||
| colorMode | 页面颜色显示模式 | String | Normal
/Night/Map
|
Normal | “Night” 是一种特殊的“Map”模式。 | |
| mapForeg
-roundColor |
页面显示的前景颜色 | RGB | — | #5d5b71 | 只有在“colorMode”设置为“Map”时,该配置项才有效。 | |
| mapBackg
-roundColor |
页面显示的背景颜色 | RGB | — | #00001b | 只有在“colorMode”设置为“Map”时,该配置项才有效。 | |
| reflowBack
-groundColor |
Reflow (重排)页面的背景 | RGB | — | #ffffff | ||
| disableFormN
-avigationBar |
是否禁用表单的辅助导航栏 | Bool | true/false | false | ||
| highlightForm | 是否高亮表单域 | Bool | true/false | true | ||
| highlight
-FormColor |
表单高亮颜色 | ARGB | #20006
6cc |
包括alpha通道,并且对动态xfa文件无效。 | ||
| highlightLink | 是否高亮超链接 | Bool | true/false | true | ||
| highlight
-LinkColor |
超链接高亮颜色 | ARGB | #16007fff | 包括alpha通道。 | ||
| fullscreen | 是否全屏显示 | Bool | true/false | true | 当“fullscreen” 设置为“true”时,文档将以全屏方式显示。如果用户点击页面,工具栏将会出现。如果5秒内无任何动作,工具栏和其他辅助工具按钮将自动隐藏。 | |
|
annotations |
continuo
uslyAdd |
Bool | true/false | false | 是否连续添加某个注释 | |
| highlight | color | RGB | #ffff00 | |||
| opacity | numeric | [0.0-1.0] | 1.0 | |||
| underline | color | RGB | #66cc33 | |||
| opacity | numeric | [0.0-1.0] | 1.0 | |||
| squiggly | color | RGB | #ff6633 | |||
| opacity | numeric | [0.0-1.0] | 1.0 | |||
| strikeout | color | RGB | #ff0000 | |||
| opacity | numeric | [0.0-1.0] | 1.0 | |||
| insert | color | RGB | #993399 | |||
| opacity | numeric | [0.0-1.0] | 1.0 | |||
| replace | color | RGB | #0000ff | |||
| opacity | numeric | [0.0-1.0] | 1.0 | |||
| line | color | RGB | #ff0000 | |||
| opacity | numeric | [0.0-1.0] | 1.0 | |||
| thickness | numeric | [1-12] | 2 | |||
| rectangle | color | RGB | #ff0000 | |||
| opacity | numeric | [0.0-1.0] | 1.0 | |||
| thickness | numeric | [1-12] | 2 | |||
| oval | color | RGB | #ff0000 | |||
| opacity | numeric | [0.0-1.0] | 1.0 | |||
| thickness | numeric | [1-12] | 2 | |||
| arrow | color | RGB | #ff0000 | |||
| opacity | numeric | [0.0-1.0] | 1.0 | |||
| thickness | numeric | [1-12] | 2 | |||
| pencil | color | RGB | #ff0000 | |||
| opacity | numeric | [0.0-1.0] | 1.0 | |||
| thickness | numeric | [1-12] | 2 | |||
| polygon | color | RGB | #ff0000 | |||
| opacity | numeric | [0.0-1.0] | 1.0 | |||
| thickness | numeric | [1-12] | 2 | |||
| cloud | color | RGB | #ff0000 | |||
| opacity | numeric | [0.0-1.0] | 1.0 | |||
| thickness | numeric | [1-12] | 2 | |||
| polyline | color | RGB | #ff0000 | |||
| opacity | numeric | [0.0-1.0] | 1.0 | |||
| thickness | numeric | [1-12] | 2 | |||
| type
-writer |
textColor | RGB | #0000ff | |||
| opacity | numeric | [0.0-1.0] | 1.0 | |||
| textFace | String | Courier/
Courier-Bold/ Courier -BoldOblique/ Courier -Oblique/ Helvetica/ Helvetica-Bold/ Helvetica -BoldOblique/ Helvetica -Oblique/ Times-Roman/ Times-Bold/ Times-Italic/ Times-BoldItalic |
Courier | 文本字体名称。
如果设置为非法值,则使用默认字体。 |
||
| textSize | Integer | >=1 | 18 | |||
| textbox | color | RGB | #ff0000 | |||
| textColor | RGB | #0000ff | ||||
| opacity | numeric | [0.0-1.0] | 1.0 | |||
| textFace | String | Courier/
Courier-Bold/ Courier -BoldOblique/ Courier-Oblique/ Helvetica/ Helvetica-Bold/ Helvetica -BoldOblique/ Helvetica-Oblique/ Times-Roman/ Times-Bold/ Times-Italic/ Times-BoldItalic |
Courier | 文本字体名称。
如果设置为非法值,则使用默认字体。 |
||
| textSize | Integer | >=1 | 18 | |||
| callout | color | RGB | #ff0000 | |||
| textColor | RGB | #0000ff | ||||
| opacity | numeric | [0.0-1.0] | 1.0 | |||
| textFace | String | Courier/
Courier-Bold/ Courier-BoldOblique/ Courier-Oblique/ Helvetica/ Helvetica-Bold/ Helvetica -BoldOblique/ Helvetica-Oblique/ Times-Roman/ Times-Bold/ Times-Italic/ Times-BoldItalic |
Courier | 文本字体名称。
如果设置为非法值,则使用默认字体。 |
||
| textSize | Integer | >=1 | 18 | |||
| note | color | RGB | #ff6633 | |||
| opacity | numeric | [0.0-1.0] | 1.0 | |||
| icon | String | Comment/
Key/ Note/ Help/ NewParagraph/ Paragraph/ Insert |
Comment | 如果设置为非法值,则使用默认值。 | ||
| attach
-ment |
color | RGB | #ff6633 | |||
| opacity | numeric | [0.0-1.0] | 1.0 | |||
| icon | String | Graph/
PushPin/ Paperclip/ Tag |
PushPin | |||
| image | rotation | numeric | 0/90
/180/270 |
0 | 如果设置为非法值,则使用默认值。 | |
| opacity | numeric | [0.0-1.0] | 1.0 | |||
| distance | color | RGB | ff0000 | |||
| opacity | numeric | [0.0-1.0] | 1.0 | |||
| thickness | numeric | [1-12] | 2 | |||
| scaleFromUnit | String | pt/m/cm/mm
/inch/p/ft/yd |
inch | 缩放的基准单位。
如果设置为非法值,则使用默认值。 |
||
| scaleToUnit | String | pt/m/cm/mm
/inch/p /ft/yd |
inch | 缩放的目标单位。
如果设置为非法值,则使用默认值。 |
||
| scaleFromValue | numeric | 1 | 缩放的基准数值 | |||
| scaleToValue | numeric | 1 | 缩放的目标数值 | |||
| redaction | fillColor | RGB | #000000 | |||
| textColor | RGB | #ff0000 | ||||
| textFace | String | Courier/
Helvetica/ Times |
Courier | 文本字体名称。
如果设置为非法值,则使用默认字体。 |
||
| textSize | Integer | >=1 | 12 | |||
| form | textField | textColor | RGB | #000000 | ||
| textFace | String | Courier/ Helvetica/ Times |
Courier | 文本字体名称。 如果设置为非法值,则使用默认字体。 |
||
| textSize | Integer | >=0 | 0 | 0表示自动调整字体大小。 | ||
| checkBox | textColor | RGB | #000000 | |||
| radioButton | textColor | RGB | #000000 | |||
| comboBox | textColor | RGB | #000000 | |||
| textFace | String | Courier/ Helvetica/ Times |
Courier | 文本字体名称。 如果设置为非法值,则使用默认字体。 |
||
| textSize | Integer | >=0 | 0 | 0表示自动调整字体大小。 | ||
| customText | false | True表示允许自定义文本。 False表示不允许自定义文本。 |
||||
| listBox | textColor | RGB | #000000 | |||
| textFace | String | Courier/ Helvetica/ Times |
Courier | 文本字体名称。 如果设置为非法值,则使用默认字体。 |
||
| textSize | Integer | >=0 | 0 | 0表示自动调整字体大小。 | ||
| multipleSelection | false | True表示支持多选。 False表示不支持多选。 |
||||
| signature | color | RGB | #000000 | |||
| thickness | numeric | [1-12] | 4 | |||
使用配置文件实例化一个UIExtensionsManager对象
在section 3.1.5 (Objective-C) 和 section 3.2.5 (Swift)小节中,我们已经介绍了如何实例化UIExtensionsManager,而且使用这种方式,所有的内置UI框架将会被默认加载。在本节中,我们将提供另外一种使用配置文件来实例化一个UIExtensionsManager,以便开发人员可以根据需要轻松自定义UI。
请参阅以下代码使用配置文件实例化UIExtensionsManager对象。
备注:您需要准备一个JSON配置文件,然后将其添加到工程中。在这里,我们假设您已经添加了一个名为 “uiextensions_config.json“的JSON文件。
在ViewController.m中添加如下的代码: (Objective-C)
UIExtensionsManager* extensionsManager;
...
// Instantiate a FSPDFViewCtrl object with the size of the entire screen.
FSPDFViewCtrl* pdfViewCtrl;
pdfViewCtrl = [[FSPDFViewCtrl alloc] initWithFrame: [self.view bounds]];

// Get the path of the JSON configuration file.
NSString* configPath = [[NSBundle mainBundle] pathForResource:@"uiextensions_config" ofType:@"json"];

// Initialize a UIExtensionsManager object and set it to pdfViewCtrl.
extensionsManager = [[UIExtensionsManager alloc] initWithPDFViewControl:pdfViewCtrl configuration:[NSData dataWithContentsOfFile:configPath]];
if (nil == extensionsManager) {
        return;
}
pdfViewCtrl.extensionsManager = extensionsManager;
在ViewController.swift中添加如下的代码: (Swift)
var extensionsManager: UIExtensionsManager!
...
// Initialize a FSPDFViewCtrl object with the size of the entire screen
var pdfViewCtrl: FSPDFViewCtrl!
pdfViewCtrl = FSPDFViewCtrl.init(frame:self.view.bounds)

// Get the path of the JSON configuration file.
let configPath = Bundle.main.path(forResource: "uiextensions_config", ofType: "json")
var data: Data?
if nil != configPath {
     data = NSData(contentsOfFile: configPath!) as Data?
}

// Initialize a UIExtensionsManager object and set it to pdfViewCtrl.
extensionsManager = UIExtensionsManager.init(pdfViewControl: pdfViewCtrl, configuration: data)
if nil == extensionsMgr  {
   return
}
pdfViewCtrl.extensionsManager = extensionsManager;
备注:在上述代码中,我们使用一个配置文件来实例化UIExtensionsManager。如果您不想使用配置文件,可参考section 3.1.5 (Objective-C) 和 section 3.2.5(Swift)小节。
通过配置文件自定义UI的示例
在本节中,我们将向您展示如何在您的项目中自定义功能模块、权限管理和UI设置 (例如,UI元素属性)。您会发现这些自定义都非常容易的实现,您只需要修改配置文件。下面列出了一些操作示例。
Note: For your convenience, we will try it in the “complete_pdf_viewer“ (Objective-C) and “complete_pdf_viewer_swift“ (Swift) demos found in the “samples“ folder.
备注:为了方便起见,我们将在 “samples“文件夹下的 “complete_pdf_viewer“ (Objective-C) 和 “complete_pdf_viewer_swift“ (Swift) demos中进行演示。
在Xcode中打开 该 demos。在 “complete_pdf_viewer\Resource” 或者 “complete_pdf_viewer_swift\Resource” 文件夹下找到配置文件 “uiextensions_config.json”。
示例1:禁用“readingbookmark“ 和 “navigation“ 功能模块。
在JSON文件中,将 “readingbookmark” 和 “navigation” 的值设置为 “false”,如下所示:
"readingbookmark": true,
"navigation": true,
然后,重新编译和运行该demo。如下列出了前后对比图:
修改前: 修改后:

“readingbookmark“ 和 “navigation“ 功能模块被移除了。
示例2:禁用超链接。
在JSON文件中,将 “disableLink” 的值设置为 “true”,如下所示:
"permissions": {
     "runJavaScript": true,
     "copyText": true,
     "disableLink": true
},
然后,重新编译和运行该demo,您会发现当您单击超链接时没有任何响应。
示例3:将高亮颜色从黄色设置为红色。
在JSON文件中,将 “highlight” 的color属性设置为 “#ff0000” ,如下所示:
"highlight": {
    "color" : "#ff0000",
    "opacity" : 1.0
},
然后,重新编译和运行该demo。如下列出了前后对比图:
修改前: 修改后:

高亮颜色变为红色了。
通过APIs自定义UI元素
在4.0版本中,Foxit PDF SDK for Android 支持自定义显示或者隐藏整个top toolbar 或者bottom toolbar,从5.0版本开始,提供了APIs去自定义显示或者隐藏一个特定的面板,top/bottom toolbar、View setting bar和More Menu view上面的菜单项,方便开发人员在内置UI框架下对UI元素进行修改。
备注:为了方便起见,我们将在 “samples“文件夹下的 “complete_pdf_viewer“ (Objective-C) 和 “complete_pdf_viewer_swift“ (Swift) demos中向您展示如何通过APIs对UI元素进行自定义。我们假设您没有修改过demos中的 “uiextensions_config.json“ 文件,也就是说UI Extensions组件中的所有内置UI都是启用的。
自定义 top/bottom toolbar
对于top/bottom toolbar (如Figure 5-2所示),您可以执行以下操作:
- 显示或者隐藏top/bottom toolbar。
- 显示或者隐藏top/bottom toolbar上某个特定的菜单项。
Figure 5-2
Table 5-1列出了用于自定义top/bottom toolbar相关的APIs。
Table 51
| (void)enableTopToolbar:(BOOL)isEnabled | 启用或者禁用top toolbar。 |
| (void)enableBottomToolbar:(BOOL)isEnabled | 启用或者禁用bottom toolbar。 |
| (void)setToolbarItemHiddenWithTag: (NSUInteger)itemTag hidden:(BOOL)isHidden |
显示或者隐藏top toolbar上的菜单项。 |
setToolbarItemHiddenWithTag接口中的 “itemTag” 参数值可以设置如下表所示,其分别对应top/bottom toolbar上面的功能菜单。
| Item name | itemTag | NSUInteger |
| Back | FS_TOPBAR_ITEM_BACK_TAG | 101 |
| Bookmark | FS_TOPBAR_ITEM_BOOKMARK_TAG | 100 |
| Search | FS_TOPBAR_ITEM_SEARCH_TAG | 103 |
| More | FS_TOPBAR_ITEM_MORE_TAG | 102 |
| List | FS_BOTTOMBAR_ITEM_PANEL_TAG | 200 |
| View | FS_BOTTOMBAR_ITEM_READMODE_TAG | 203 |
| Comment | FS_BOTTOMBAR_ITEM_ANNOT_TAG | 201 |
| Signature | FS_BOTTOMBAR_ITEM_SIGNATURE_TAG | 202 |
| Fill | FS_BOTTOMBAR_ITEM_FILLSIGN_TAG | 204 |
在下面的示例中,我们将在”samples”文件夹下的”complete_pdf_viewer” (Objective-C) 和 “complete_pdf_viewer_swift” (Swift) demos中向您展示如何通过APIs对top/bottom bar进行自定义。
在Xcode中打开该demos。将示例代码加入到 “ViewController.m” (Objective-C) 或者 “ViewController.swift” (Swift) 中 (加在UIExtensionsManager初始化之后) 。
示例1:隐藏整个top toolbar.
Objective-C:
[self.extensionsMgr enableTopToolbar:false];
Swift:
extensionsMgr.enableTopToolbar(false)
修改前:
![]()
修改后:

示例2:隐藏整个bottom toolbar.
Objective-C:
[self.extensionsMgr enableBottomToolbar:false];
Swift:
extensionsMgr.enableBottomToolbar(false)
修改前:
![]()
修改后:
![]()
示例3:隐藏top toolbar中的more menu菜单.
Objective-C:
[self.extensionsMgr setToolbarItemHiddenWithTag:FS_TOPBAR_ITEM_MORE_TAG hidden:YES];
Swift:
extensionsMgr.setToolbarItemHiddenWithTag(UInt(FS_TOPBAR_ITEM_MORE_TAG), hidden: true)
修改前:
![]()
修改后:

示例4:隐藏bottom toolbar中的List menu菜单.
Objective-C:
[self.extensionsMgr setToolbarItemHiddenWithTag:FS_BOTTOMBAR_ITEM_PANEL_TAG hidden:YES];
Swift:
extensionsMgr.setToolbarItemHiddenWithTag(UInt(FS_BOTTOMBAR_ITEM_PANEL_TAG), hidden: true)
修改前:
![]()
修改后:
![]()
对于top/bottom toolbar中的其他菜单项,您可以参考上面的示例,只需要修改setToolbarItemHiddenWithTag接口中的 “itemTag“ 参数的值。
显示top toolbar中的UI菜单元素,只需要在上述示例中设置”true” 和 “false”的相反值。
自定义显示/隐藏一个特定的面板
显示或者隐藏一个特定的面板 (见Figure 5-3,包括了”Reading Bookmarks”、”Outline”、”Annotations”、”Attachments” 和 “Digital Signatures” 面板,在首页的bottom toolbar上点击List查看),您只需要使用下面的API:
(void)setPanelHidden:(BOOL)isHidden type:(FSPanelType)type
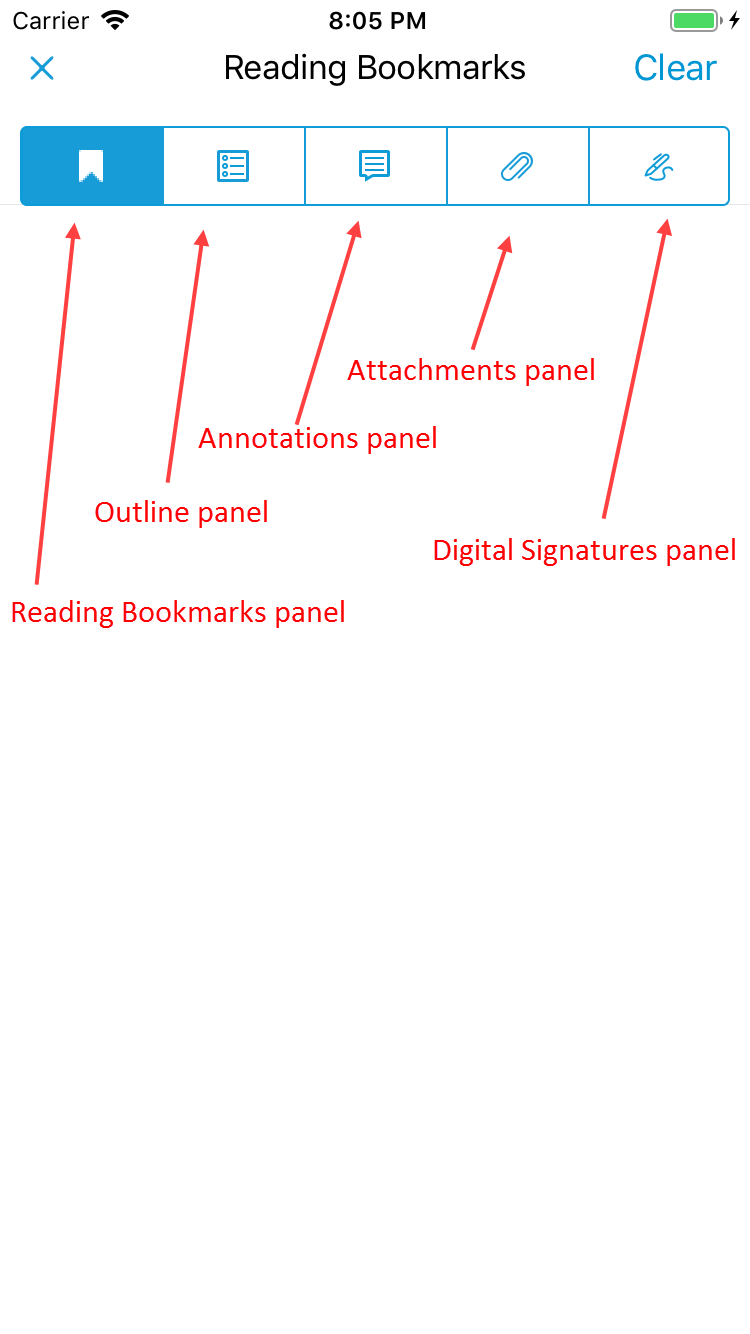
Figure 5-3
备注:通过APIs显示或者隐藏某个特定的面板,请您确保其对应的功能在配置文件中是设置为“true“。否则,API的设置不会有任何效果。
在本节中,我们在 “samples” 文件夹下的 “complete_pdf_viewer” (Objective-C) 和 “complete_pdf_viewer_swift” (Swift) demos中提供了一个示例代码用来展示如何通过APIs来显示或者隐藏面板。以”Outline”面板为例,对于其他的面板,您只需要修改FSPanelType的值。Panels和FSPanelType之间的对应关系如下表所示:
| Panel | FSPanelType |
| Reading Bookmarks | FSPanelTypeReadingBookmark |
| Outline | FSPanelTypeOutline |
| Annotations | FSPanelTypeAnnotation |
| Attachments | FSPanelTypeAttachment |
| Digital Signatures | FSPanelTypeDigitalSignature |
在Xcode中打开该demos。将示例代码加入到 “ViewController.m” (Objective-C) 或者 “ViewController.swift” (Swift) 中 (加在UIExtensionsManager初始化之后) 。
示例1:隐藏 “Outline“面板。
Objective-C:
[self.extensionsMgr.panelController setPanelHidden:true type:FSPanelTypeOutline];
Swift:
extensionsMgr.panelController.setPanelHidden(true, type: .outline)
修改前: 修改后:
![]()
对于Reading Bookmarks、Annotations、Attachments和Digital Signatures 面板,您只需要修改FSPanelType即可。
自定义显示/隐藏View setting bar上的UI元素
显示或者隐藏View setting bar上的UI元素 (见Figure 5-4,在首页的bottom toolbar上点击View查看),您只需要使用下面的API:
(void)setItem:(SettingItemType)itemType hidden:(BOOL)hidden;
Figure 5-4
参数 “itemType” 的值可以参考如下的表格,其对应View setting bar上的菜单项。
| item | itemType |
| Single page mode | SINGLE |
| Double page mode | DOUBLEPAGE |
| Cover page mode | COVERPAGE |
| Continuous page mode | CONTINUOUS |
| Fit page mode | FITPAGE |
| Fit width mode | FITWIDTH |
| Auto-Brightness slider view | BRIGHTNESS |
| Night mode | NIGHTMODEL |
| Thumbnail | THUMBNAIL |
| Reflow mode | REFLOW |
| Crop mode | CROPPAGE |
| Speech | SPEECH |
| Rotate page | ROTATE |
| Screen lock | LOCKSCREEN |
| Pan and Zoom | PANZOOM |
在本节中,我们在 “samples” 文件夹下的 “complete_pdf_viewer” (Objective-C) 和 “complete_pdf_viewer_swift” (Swift) demos中以 “Reflow” 菜单为例展示如何通过APIs来显示或者隐藏View setting bar上的UI元素。对于其他的UI元素,您只需要修改参数 “itemType“。
在Xcode中打开该demos。将示例代码加入到 “ViewController.m” (Objective-C) 或者 “ViewController.swift” (Swift) 中 (加在UIExtensionsManager初始化之后) 。
示例1:隐藏View setting bar上面的Reflow菜单。
Objective-C:
[self.extensionsMgr.settingBar setItem:REFLOW hidden:YES];
Swift:
extensionsMgr.settingBar.setItem(.REFLOW, hidden: true)
修改前: 修改后:
对于View setting bar中的其他菜单项,您可以参考上面的示例,只需要修改setItem接口中的 “itemType“ 参数的值。
显示View setting bar中某个UI菜单元素,只需要在上述示例中将”hidden” 设置为 “false”即可。
自定义显示/隐藏More Menu菜单上的UI元素
显示或者隐藏More Menu View上的UI元素 (见Figure 5-5,在首页右上角点击 查看),您可以使用Table 5-2 中列出的APIs:
Table 5-2
| (void)setMoreViewItemHiddenWithGroup: (NSUInteger)groupTag hidden:(BOOL)isHidden | 根据”groupTag”的值显示或者隐藏该group。 |
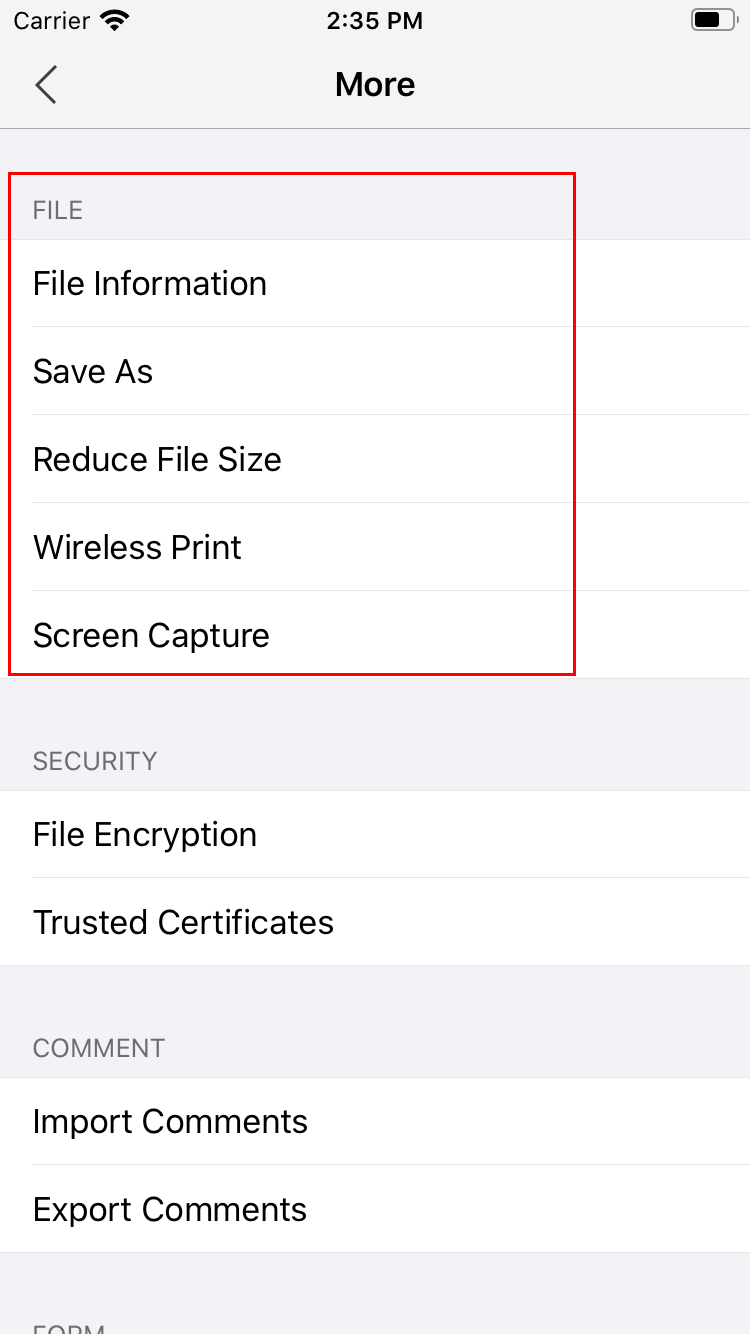
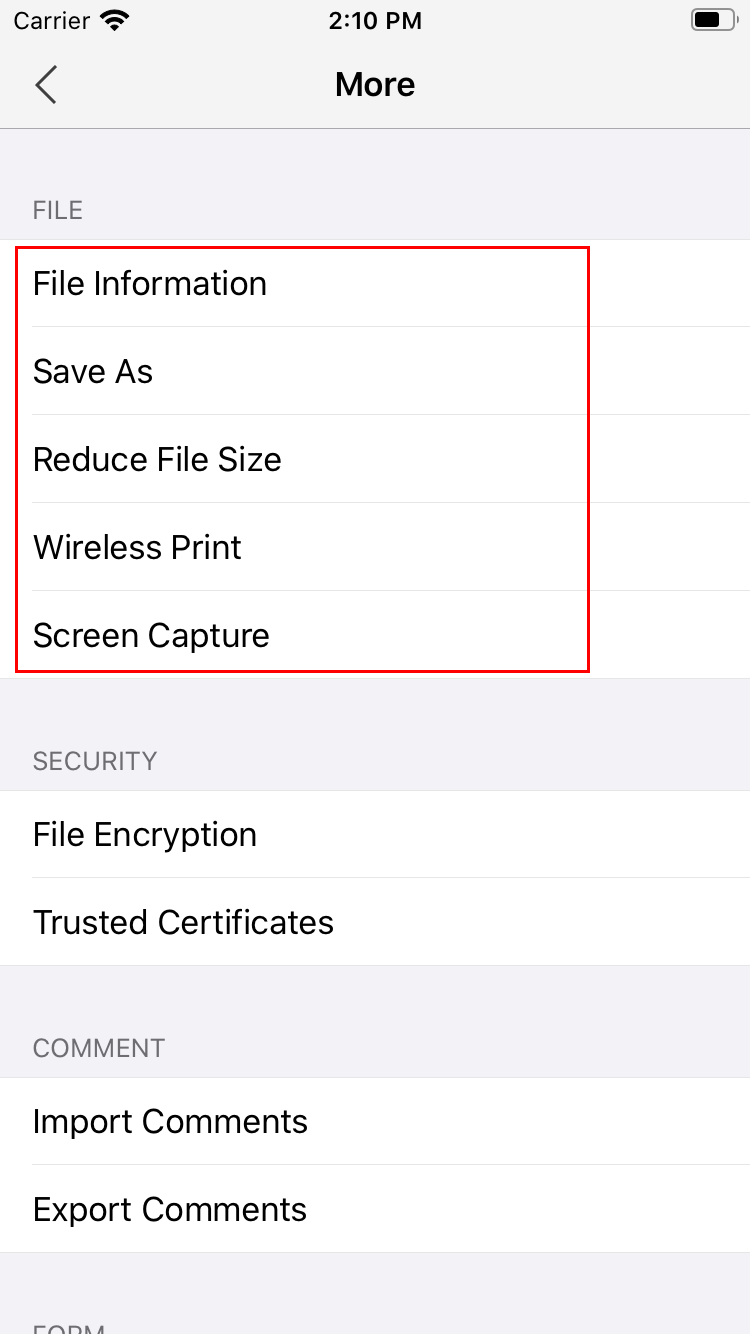
| (void)setMoreViewItemHiddenWithGroup: (NSUInteger)groupTag andItemTag:(NSUInteger)itemTag hidden:(BOOL)isHidden | 根据”groupTag” 和 “itemTag”的值显示或者隐藏group中的子菜单项。 |
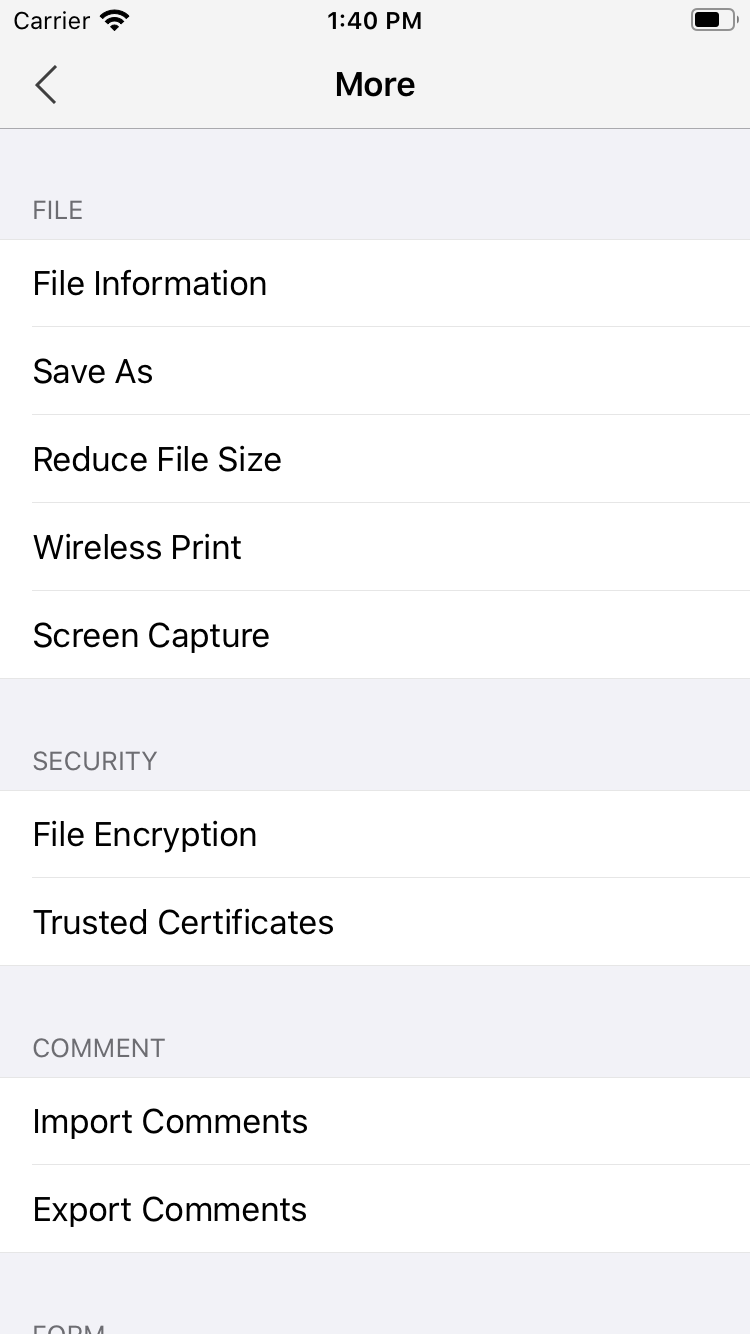
Figure 5-5
setMoreViewItemHiddenWithGroup接口中的 “groupTag” 和 “itemTag” 参数可以设置如下所示:
| groupTag | NSUInteger |
| TAG_GROUP_FILE | 1 |
| TAG_GROUP_PROTECT | 4 |
| TAG_GROUP_COMMENT | 6 |
| TAG_GROUP_FORM | 7 |
| groupTag | itemTag | NSUInteger |
| TAG_GROUP_FILE | TAG_ITEM_FILEINFO | 10 |
| TAG_ITEM_SAVE_AS | 11 | |
| TAG_ITEM_REDUCEFILESIZE | 12 | |
| TAG_ITEM_WIRELESSPRINT | 14 | |
| TAG_ITEM_SCREENCAPTURE | 16 | |
| TAG_GROUP_PROTECT | TAG_ITEM_PASSWORD | 17 |
| TAG_ITEM_CERTIFICATE | 18 | |
| TAG_GROUP_COMMENT | TAG_ITEM_IMPORTCOMMENT | 12 |
| TAG_ITEM_EXPORTCOMMENT | 13 | |
| TAG_GROUP_FORM | TAG_ITEM_CREATEFORM | 23 |
| TAG_ITEM_RESETFORM | 24 | |
| TAG_ITEM_IMPORTFORM | 25 | |
| TAG_ITEM_EXPORTFORM | 26 |
备注:显示或者隐藏group组中的某个itemTag子菜单项,请确保其对应的groupTag没有被隐藏。否则,设置itemTag的显示或隐藏设置将不会有任何效果。
在本节中,我们在 “samples” 文件夹下的 “complete_pdf_viewer” (Objective-C) 和 “complete_pdf_viewer_swift” (Swift) demos中以 “TAG_GROUP_FILE” (File) 和”TAG_ITEM_FILEINFO” (File Information) 为例展示如何通过APIs来显示或者隐藏More Menu view上的UI元素。对于其他的UI元素,您可以参考下面的示例,只需要修改setMoreViewItemHiddenWithGroup接口中的参数值。
在Xcode中打开该demos。将示例代码加入到 “ViewController.m” (Objective-C) 或者 “ViewController.swift” (Swift) 中 (加在UIExtensionsManager初始化之后) 。
示例1:隐藏More Menu view上面的“File“菜单组。
Objective-C:
[self.extensionsMgr.more setMoreViewItemHiddenWithGroup🙁TAG_GROUP_FILE) hidden:YES];
Swift:
self.extensionsMgr.more.setMoreViewItemHiddenWithGroup(UInt(TAG_GROUP_FILE), hidden: true)
修改前: 修改后:
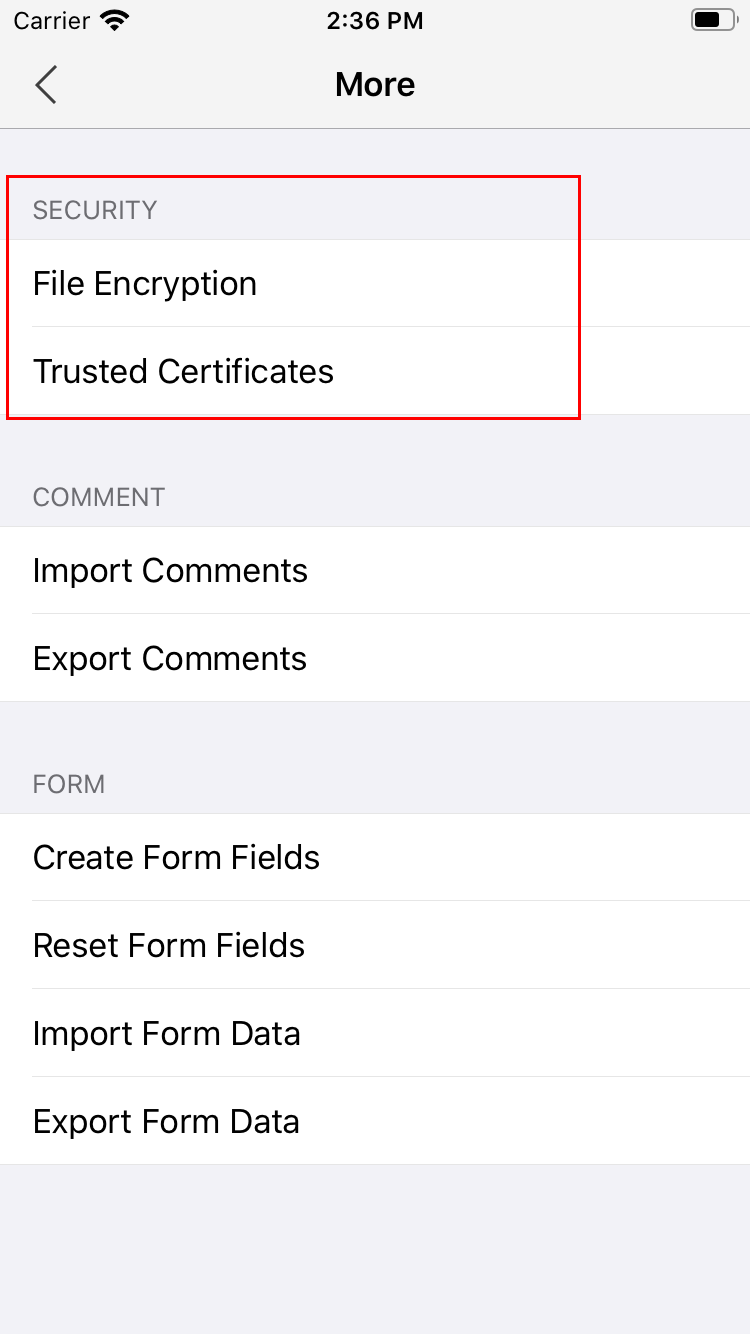
示例2:隐藏More Menu view上面的“File Information“菜单。
Objective-C:
[self.extensionsMgr.more setMoreViewItemHiddenWithGroup:TAG_GROUP_FILE andItemTag:TAG_ITEM_FILEINFO hidden:YES];
Swift:
self.extensionsMgr.more.setMoreViewItemHiddenWithGroup(UInt(TAG_GROUP_FILE), andItemTag: UInt(TAG_ITEM_FILEINFO), hidden: true)
修改前: 修改后:
对于More Menu view上面的其他菜单项,您可以参考上述的示例,只需要修改setMoreViewItemHiddenWithGroup接口的参数值即可。
显示More Menu view上的UI元素,只需要将上述示例中的”hidden” 设置为 “false”即可。
通过源代码自定义UI实现
在前面的章节中,我们详细地介绍了如何通过配置文件或者APIs对UI进行自定义。这些修改是基于Foxit PDF SDK for iOS的内置UI框架的。如果您不想使用当前现成的UI框架,您可以通过修改UI Extensions组件中的源代码来重新设计UI。
有一点需要注意。 UI Extensions 组件的源代码是用Objective-C编写的,因此,您需要使用Objective-C来修改UI布局。如果您是Swift开发人员并且对Objective-C不太熟悉,那么您可能只能自定义那些不需要编写代码的UI外观,比如图标和其他UI资源等。
为了自定义UI实现,您可以按照下面的步骤:
首先,在您的工程中添加如下的文件,
- FoxitRDK.framework – 该framework包含Foxit PDF SDK for iOS的动态库和相关头文件。该framework在”libs” 文件夹下。
- uiextensions工程 – 是一个开源库,包含了一些即用型的UI模块实现和应用程序基本的UI设计,可以帮助开发人员快速将功能齐全的PDF阅读器嵌入到他们的iOS应用中。当然,开发人员也不是必须要使用默认的UI,可以通过”uiextensions”工程为特定的应用灵活自定义和设计UI。该工程在 “libs/uiextensions_src” 文件夹下。
技巧:内置UI的自定义可以直接在uiextensions工程中完成,然后编辑该工程,将生成的uiextensionsDynamic.framework添加到您的应用程序,这样就不用将整个uiextensions项目添加到您的应用程序中。
其次,在uiextensions工程中定位到您需要自定义的UI的相关代码或者图片,然后根据您的需求进行修改。
为方便起见,我们将在”sample”文件夹下的”viewer_ctrl_demo” 中向您展示如何自定义UI实现。
UI自定义示例
步骤1:向 “viewer_ctrl_demo” 中添加uiextensions工程。
备注:为了方便查看自定义修改结果,我们将添加uiextensions工程到demo中。该demo已经包含了FoxitRDK.framework,因此,只需要添加uiextensions工程。
在Xcode中打开”viewer_ctrl_demo” 工程。将下载解压包中”libs/uiextensions_src”下的”uiextensions.xcodeproj“拖拽到”viewer_ctrl_demo” 工程中,如Figure 5-6所示。
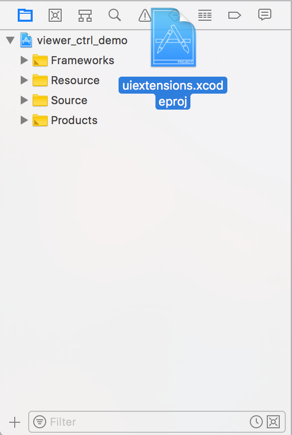
Figure 5-6
然后会弹出一个对话框提示您是否保存该工程到一个新的workspace,如Figure 5-7所示。点击Save。
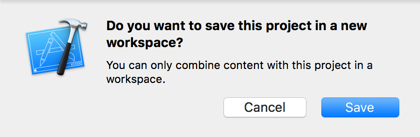
Figure 5-7
保存新的workspace到”samples” 文件夹,并且命名为”custom_viewer”,如Figure 5-8所示。点击Save。
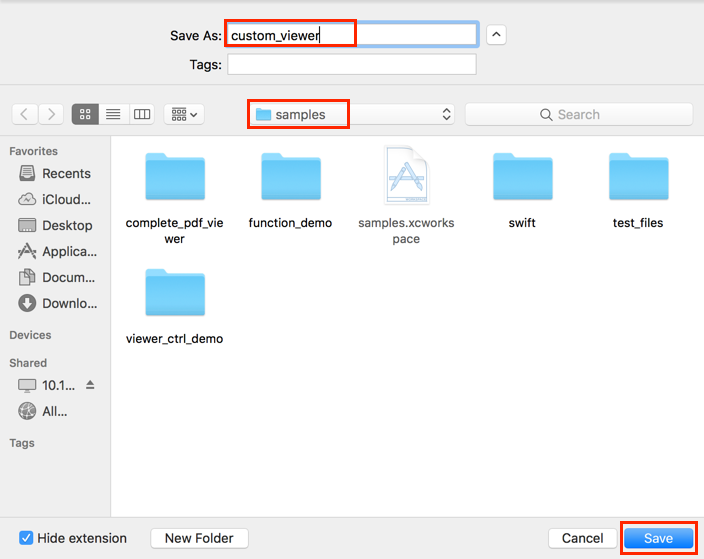
Figure 5-8
则,新的workspace将如Figure 5-9所示。
Figure 5-9
恭喜您!您已经完成了第一步。
步骤2:查找和修改与您需要自定义的UI相关的布局文件。定位到您需要自定义的UI的相关代码或者图片,然后根据需求进行修改。
现在,我们将向您展示一个简单的示例,在搜索面板中修改button的图标,如Figure 5-10所示。
技巧:如果您只需要更改UI元素的图标,可以直接使用uiextensionsDynamic.framework,而不需要导入uiextensions工程源代码。但同样的是,您都需要找到图标的名称。
![]()
Figure 5-10
要替换图标,我们只需要找到存储该button图标的位置,然后使用另一个具有相同名称的图标来替换它。
备注:Foxit PDF SDK for iOS为不同的设备提供了三组图标,以确保您的应用程序可以在不同设备上顺畅运行。以下说明了带有不同后缀的图片所适用的设备:
√ Image.png: 用于非Retina显示屏的旧设备 (比如,iPad 2)。
√ Image@2x.png: 用于 iPhone 4/4s/5/5s/6/6s/7/7s/8/11。
√ Image@3x.png: 用于 iPhone 6/6s/7/7s/8/11 Plus、iPhone X等具有高分辨率的设备。
本节使用iPhone 8模拟器来运行该demo。在uiextensions 工程中,点击 “uiextensionsDynamic -> Resource -> png -> Search.xcassets“,如Figure 5-11所示。很容易找到我们需要替换的图片。资源文件是根据功能来存储的,因此您可以通过图标的名称找到相关的代码。
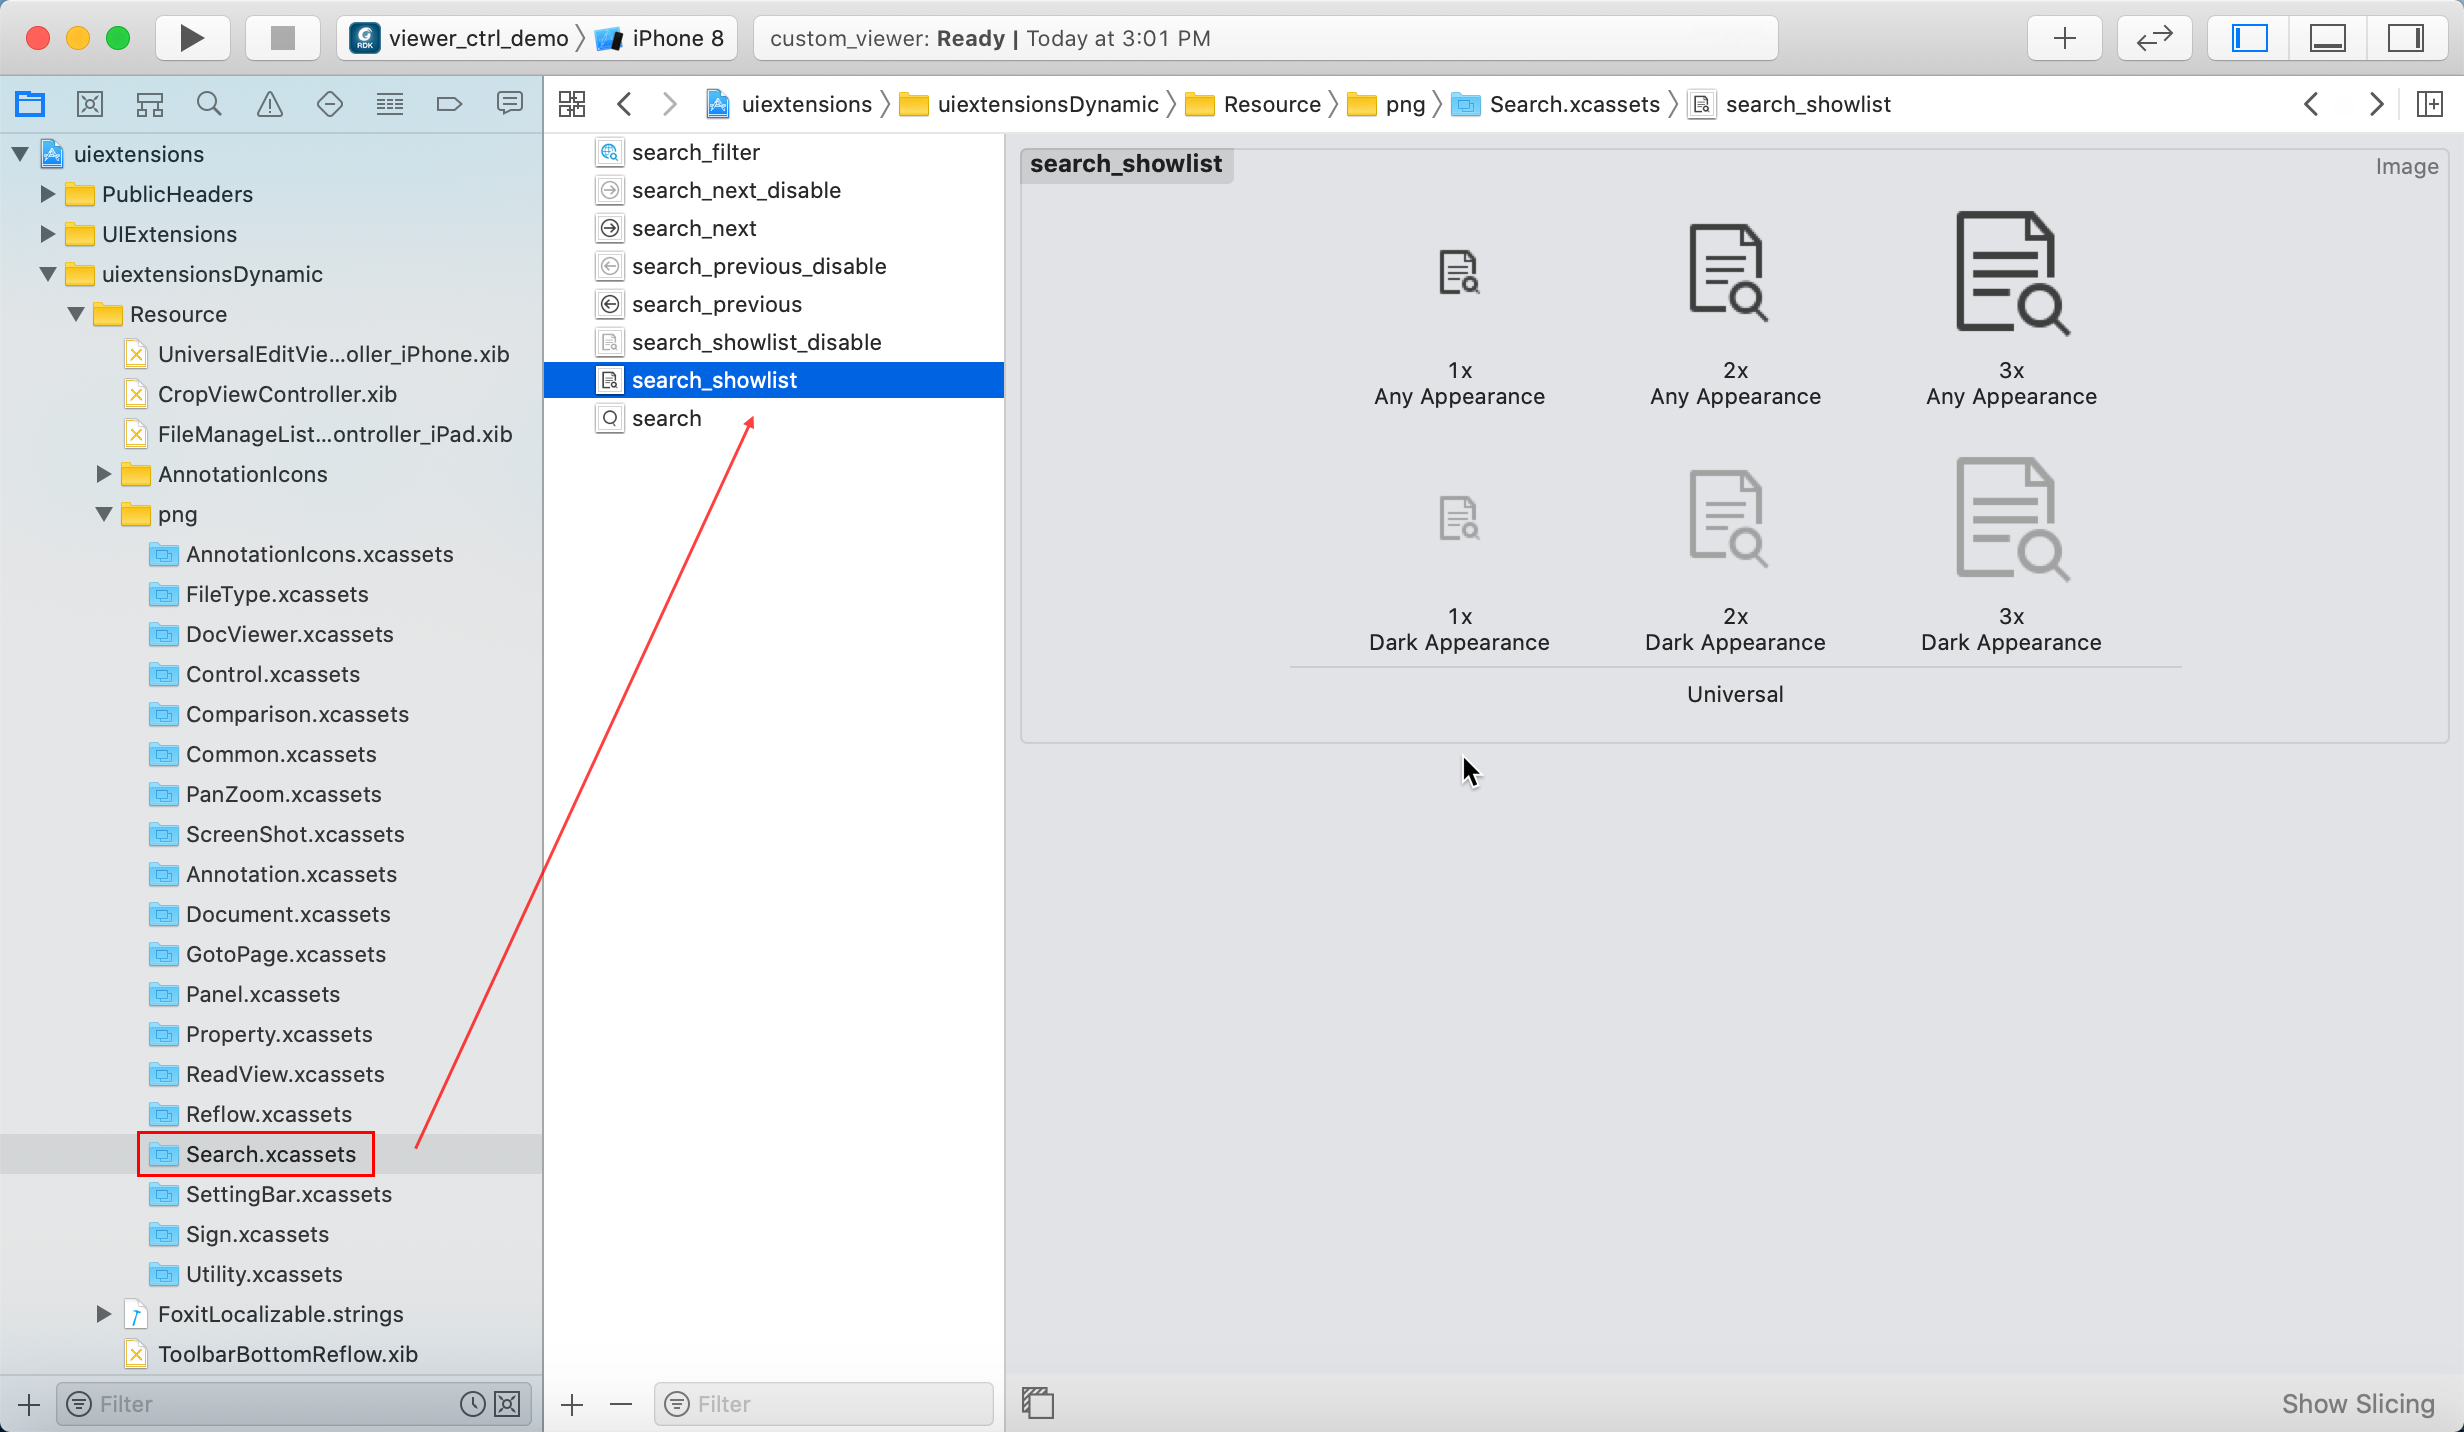
Figure 5-11
现在,只需要在”libs\uiextensions_src\UIExtensions\Resource\png\Search.xcassets\search_showlist.imageset” 文件夹下,用您自己的图标替换”search_showlist@2x.png”即可。例如,使用顶部的搜索按钮 (search@2x.png) 来替换它。
替换完成后,首先编译和运行uiextensionsDynamic_aggregate 工程,如Figure 5-12所示。
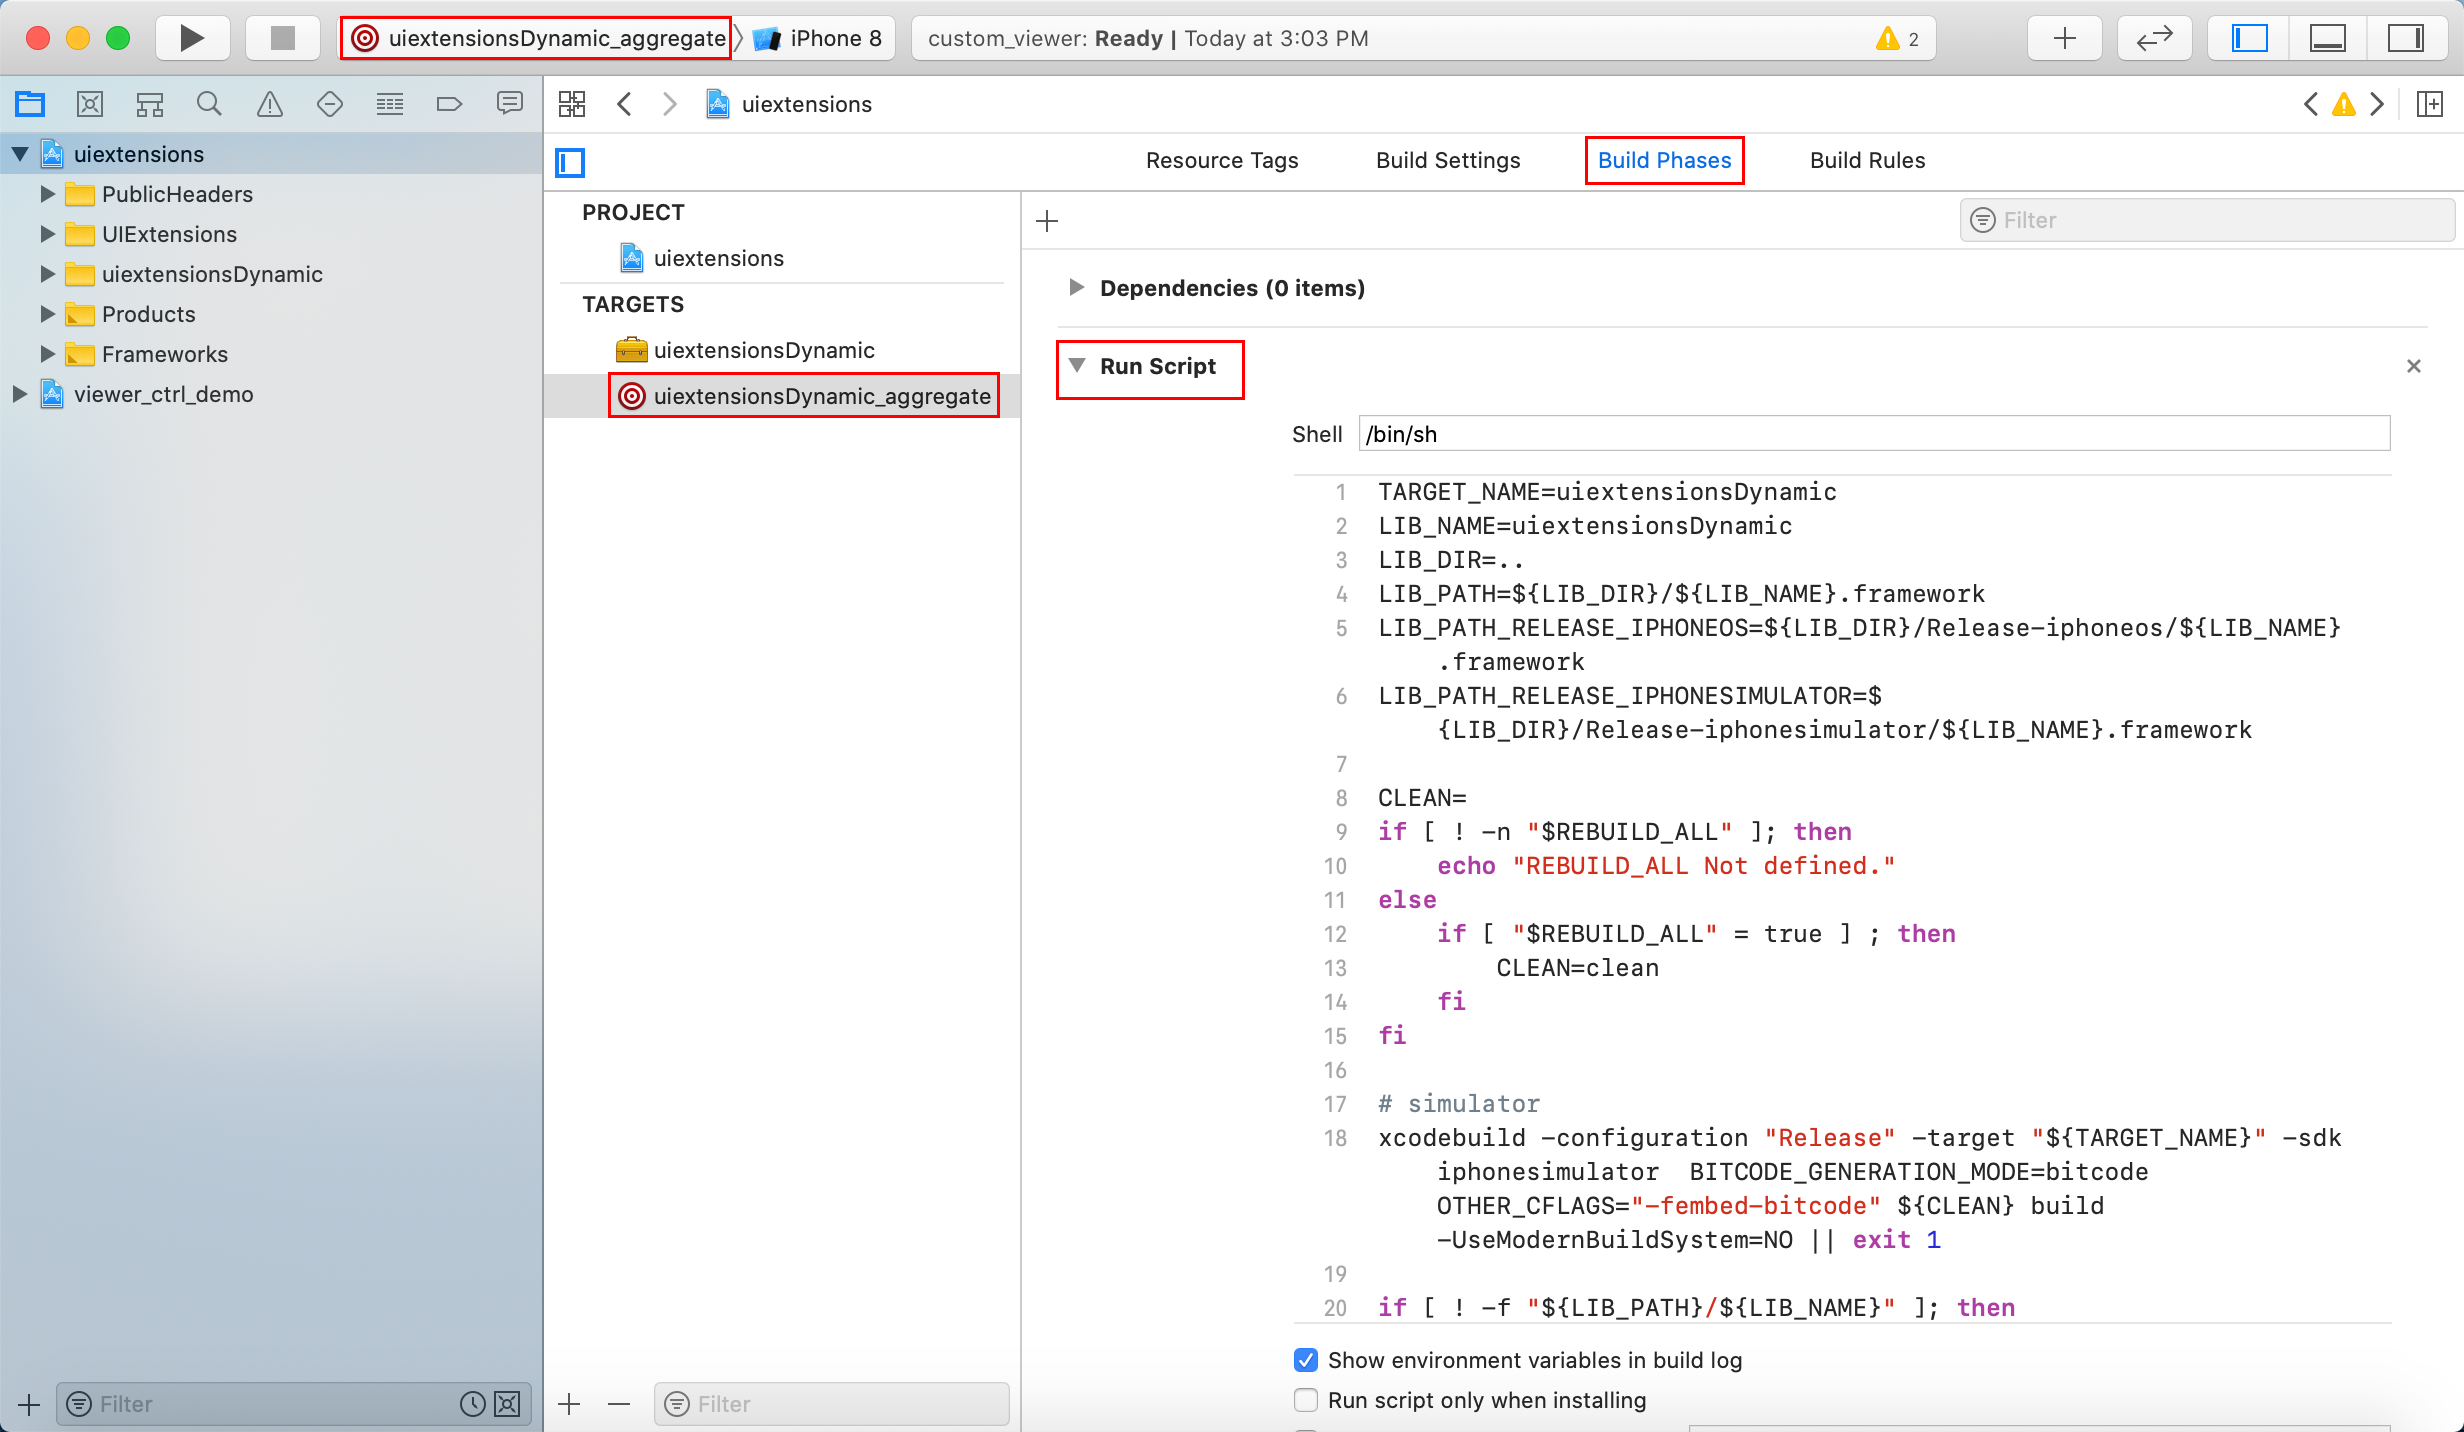
Figure 5-12
备注:uiextensions 工程可以通过编译uiextensions_aggregate 生成通用的 “.a“ 库,也可以通过编译uiextensionsDynamic_aggregate生成通用的framework,可用于模拟器或者iOS真机设备。在本节中,我们编译uiextensionsDynamic_aggregate。uiextension 工程中用于生成通用framework的脚本如Figure 5-12所示。
当成功编译uiextensionsDynamic_aggregate工程后,下载解压包”libs”文件夹下的uiextensionsDynamic.framework将会被新生成的framework覆盖。
然后,编译和运行”viewer_ctrl_demo” 工程。成功编译后,使用搜索功能,可以看到底部的搜索按钮的图标已更改,如Figure 5-13所示。
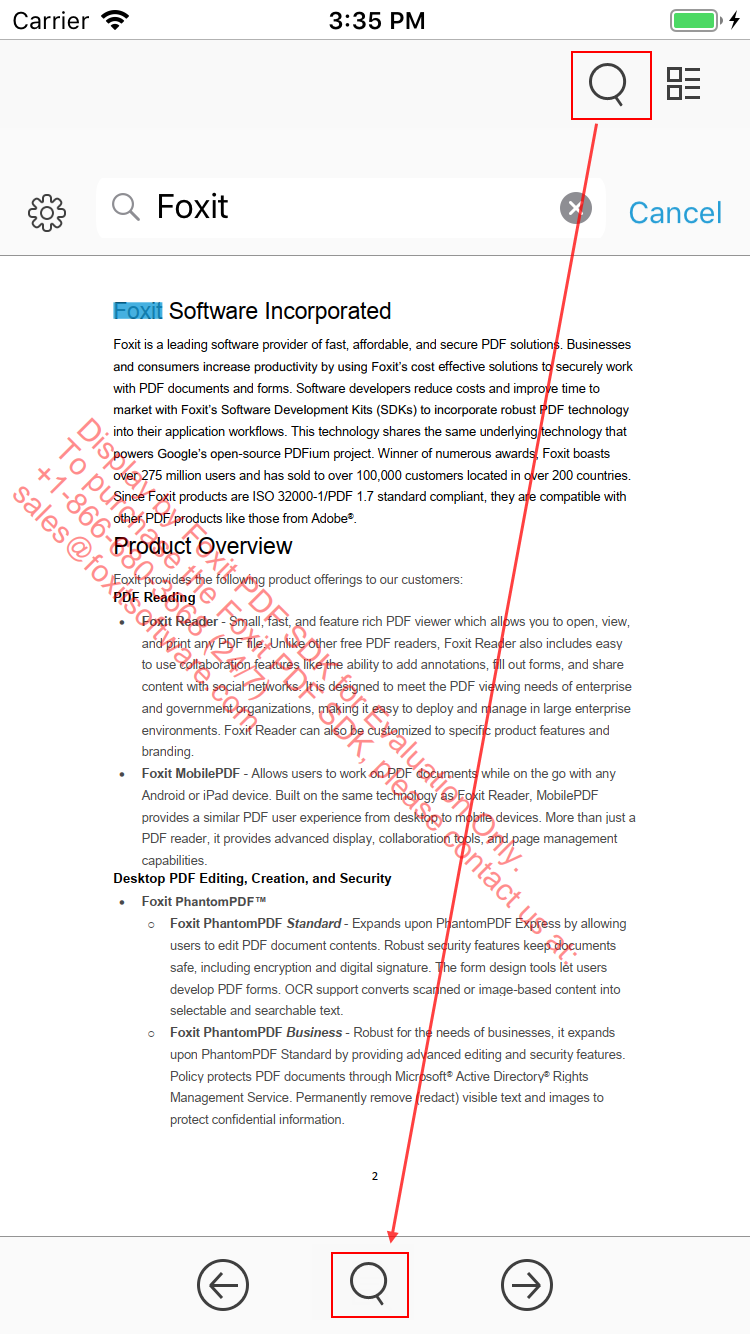
Figure 5-13
这只是一个简单的示例用来展示如何自定义UI实现。您可以作为参考,通过uiextensions工程您可以自由的对特定的应用程序进行UI自定义和设计。
使用SDK API
Foxit PDF SDK for iOS将所有功能实现封装在UI Extensions 组件中。如果您对功能实现的详细过程感兴趣,请参考本节内容。
在本节中,我们将介绍Foxit PDF SDK for iOS的主要功能,并列举相关示例来展示如何使用Foxit PDF SDK Core API实现这些功能。
Render
PDF渲染是通过Foxit渲染引擎实现的,Foxit渲染引擎是一个图形引擎,用于将页面渲染到位图或平台设备上下文。 Foxit PDF SDK提供了APIs用来设置渲染选项/flags,例如设置 flag来决定是否渲染表单域和签名,是否绘制图像反锯齿 (anti-aliasing) 和路径反锯齿。可以使用以下APIs进行渲染:
- 渲染页面和注释时,首先使用FSRenderer::setRenderContentFlags接口来决定是否同时渲染页面和注释,然后使用FSRenderer::startRender接口进行渲染。FSRenderer::startQuickRender接口也可以用来渲染页面,但仅用于缩略图。
- 渲染单个annotation注释,使用FSRenderer::renderAnnot接口。
- 在位图上渲染,使用FSRenderer::startRenderBitmap接口。
- 渲染一个重排的页面,使用FSRenderer::startRenderReflowPage 接口。
在Foxit PDF SDK中,Widget注释常与表单域和表单控件相关联。渲染widget注释,推荐使用如下的流程:
- 加载PDF页面后,首先渲染页面以及该页面上所有的注释 (包括widget注释)。
- 然后,如果使用FSFiller对象来填表,则应使用FSFiller::render接口来渲染当前获取到焦点的表单控件,而不是使用FSRenderer::renderAnnot接口。
Example:
如何将指定的PDF页面渲染到bitmap
#import "ViewController.h"
#import <FoxitRDK/FSPDFViewControl.h>
...

-(FSBitmap*)renderPageToBitmap:(FSPDFPage*) pdfPage drawWidth:(int)drawPageWidth drawHeight:(int)drawPageHeight
{
    // If the page hasn't been parsed yet, throw an exception.
    if(![pdfPage isParsed])
        @throw [NSException exceptionWithName:NSGenericException reason:@"PDF Page should be parsed first" userInfo:nil];

    // Pepare matrix to render on the bitmap.
    FSMatrix2D* matrix = [pdfPage getDisplayMatrix:0 top:0 width:drawPageWidth height:drawPageHeight rotate:FSRotation0];
    // Create a bitmap according to the required drawPageWidth and drawPageHeight.
    FSBitmap* bitmap = [[FSBitmap alloc] initWithWidth:drawPageWidth height:drawPageHeight format:FSBitmapDIBRgb];
    // Fill the bitmap with white color.
    [bitmap fillRect:0xFFFFFFFF rect:nil];
    FSRenderer* renderer = [[FSRenderer alloc] initWithBitmap:bitmap is_rgb_order:YES];
    // Set the render flag, both page content and annotation will be rendered.
    [renderer setRenderContentFlags:FSRendererRenderPage | FSRendererRenderAnnot];
    // Start to render the page progressively.
    FSProgressive* progress = [renderer startRender:pdfPage matrix:matrix pause:nil];
    if(progress) {
        FSProgressiveState state = [progress resume];
        while (state == FSProgressiveToBeContinued) {
            state = [progress resume];
        }
        if(state != FSProgressiveFinished)
            return nil;
    }
    return bitmap;
}
如何将指定的PDF页面渲染到平台设备上下文
#import "ViewController.h"
#import <FoxitRDK/FSPDFViewControl.h>
...

-(void)renderPageToContext:(FSPDFPage*) pdfPage context:(CGContextRef)context
{
    // If the page hasn't been parsed yet, throw an exception.
    if(![pdfPage isParsed])
        @throw [NSException exceptionWithName:NSGenericException reason:@"PDF Page should be parsed first" userInfo:nil];

    // We set the width of drawing page to be equal to screen width, the drawing page height is calculated according to the ratio of page height and width.
    CGFloat scale = [UIScreen mainScreen].scale;
    int drawPageWidth = (int)[[UIScreen mainScreen] bounds].size.width * scale;
    float pageWidth = [pdfPage getWidth];
    float pageHeight = [pdfPage getHeight];
    int drawPageHeight = (int)drawPageWidth * (pageHeight/pageWidth) * scale;

    // Erase the background of context with white color.
    CGContextSaveGState(context);
    CGContextSetRGBFillColor(context, 1.0, 1.0, 1.0, 1.0);
    CGContextFillRect(context, CGRectMake(0, 0, drawPageWidth, drawPageHeight));

    // Render to screen in the device coordinate, left:0, top:0, right:drawPageWidth, bottom:drawPageHeight.
    FSMatrix2D* matrix = [pdfPage getDisplayMatrix:0 top:0 width:drawPageWidth height:drawPageHeight rotate:FSRotation0];
    FSRenderer* renderer = [[FSRenderer alloc] initWithContext:context device_type:FSRendererDeviceDisplay];
    [renderer setRenderContentFlags:FSRendererRenderPage | FSRendererRenderAnnot];
    // Start to render the page progressively.
    FSProgressive* progress = [renderer startRender:pdfPage matrix:matrix pause:nil];
    if(progress) {
        FSProgressiveState state = [progress resume];
        while (state == FSProgressiveToBeContinued) {
            state = [progress resume];
        }
    }
    CGContextRestoreGState(context);
}
Text Page
Foxit PDF SDK提供APIs来提取,选择,搜索和检索PDF文档中的文本。 PDF文本内容存储在与特定页面相关的FSTextPage对象中。FSTextPage类可用于检索PDF页面中文本的信息,例如单个字符,单个单词,指定字符范围或矩形内的文本内容等。它还可用于构造其他文本相关类的对象,用来对文本内容执行更多操作或从文本内容访问指定信息:
- 在PDF页面的文本内容中搜索文本,使用FSTextSearch对象来构建FSTextPage对象。
- 访问类似超文本链接的文本,使用FSTextPage对象来构建FSPageTextLinks对象。
- 高亮PDF页面上的选中文本,构建一个FSTextPage对象来计算选中文本区域。
Example:
如何通过选择获取页面上的文本区域
#import "ViewController.h"
#import <FoxitRDK/FSPDFViewControl.h>
...

// Get the text area on a page by selection. The starting selection position and ending selection position are specified by startPos and endPos.
-(NSArray<FSRectF*>*)getTextRectsBySelection:(FSPDFPage*)page startPos:(FSPointF*)startPos endPos:(FSPointF*)endPos {
    if(![page isParsed])
        @throw [NSException exceptionWithName:NSGenericException reason:@"PDF Page should be parsed first" userInfo:nil];

    // Create a text page from the parsed PDF page.
    FSTextPage* textPage = [[FSTextPage alloc] initWithPage:page flags:FSTextPageParseTextNormal];
    if(!textPage || [textPage isEmpty])
        return nil;
    int startCharIndex = [textPage getIndexAtPos:startPos.x y:startPos.y tolerance:5];
    int endCharIndex = [textPage getIndexAtPos:endPos.x y:endPos.y tolerance:5];
    // API getTextRectCount requires that start character index must be lower than or equal to end character index.
    startCharIndex = startCharIndex<endCharIndex?startCharIndex:endCharIndex;
    endCharIndex = endCharIndex>startCharIndex?endCharIndex:startCharIndex;
    int count = [textPage getTextRectCount:startCharIndex count:endCharIndex-startCharIndex];
    if(count)
    {
        NSMutableArray<FSRectF*>* array = [[NSMutableArray<FSRectF*> alloc] init];
        for(int i=0; i<count; i++) {
            FSRectF* rect = [textPage getTextRect:i];
            if(!rect || [rect isEmpty])
                continue;
            [array addObject:rect];
        }
        // The return rects are in PDF unit, if caller need to highlight the text rects on the screen, then these rects should be converted in device unit first.
        return array;
    }
    return nil;
}
...
Text Search
Foxit PDF SDK 提供APIs来搜索PDF文档、XFA文档、文本页面或者PDF注释中的文本。它提供了文本搜索和获取搜索结果的函数:
- 指定搜索模式和选项,使用FSTextSearch::setPattern、FSTextSearch::setStartPage (仅对PDF文档中的文本搜索有用)、FSTextSearch::setEndPage (仅对PDF文档中的文本搜索有用)、和FSTextSearch::setSearchFlags接口。
- 进行搜索,使用FSTextSearch::findNext和FSTextSearch::findPrev接口。
- 获取搜索结果,使用FSTextSearch::getMatchXXX() 接口。
Example:
如何在PDF文档中搜索指定的文本模型
#import "ViewController.h"
#import <FoxitRDK/FSPDFViewControl.h>
...

NSString *pdfPath = [[NSBundle mainBundle] pathForResource:@"Sample" ofType:@"pdf"];
FSPDFDoc *doc = [[FSPDFDoc alloc] initWithPath:pdfPath];

// Create a text search handler for searching in PDF document.
FSTextSearch *textSearch = [[FSTextSearch alloc] initWithDocument:doc  cancel:nil flag:FSTextPageParseTextNormal];
// Set the start page index which searching will begin. By default, end page will be the last page.
[textSearch setStartPage:0];
// Set the text to be searched.
[textSearch setPattern:@"foxit"];
// Set the search flags to be matching case and matching whole word.
[textSearch  setSearchFlags:FSTextSearchSearchMatchCase|FSTextSearchSearchMatchWholeWord];
// Start to search from the start page to end.
while([textSearch findNext]) {
        // If true, then we found a matched result.
        // Get the found page index.
        int pageIndx = [textSearch getMatchPageIndex];
        // Get the start character index of the matched text on the found page.
        int startCharIndex = [textSearch getMatchStartCharIndex];
        // Get the end character index of the matched text on the found page.
        int endCharIndex = [textSearch getMatchEndCharIndex];
        // Get the rectangular region of the matched text on the found page.
        FSRectFArray* matchRects = [textSearch getMatchRects];
    }
}
...
Bookmark (Outline)
Foxit PDF SDK提供了名为Bookmarks的导航工具,允许用户在PDF文档中快速定位和链接他们感兴趣的部分。PDF书签也称为outline,每个书签包含一个目标位置或动作来描述它链接到的位置。它是一个树形的层次结构,因此在访问bookmark 树之前,必须首先调用接口FSPDFDoc::getRootBookmark以获取整个bookmark树的root。这里,”root bookmark”是一个抽象对象,它只有一些child bookmarks,没有next sibling bookmarks, 也没有任何数据 (包括bookmark数据,目标位置数据和动作数据)。因为它没有任何数据,因此无法在应用程序界面上显示,能够调用的接口只有FSBookmark::getFirstChild。
在检索root bookmark后,就可以调用以下的接口去访问其他的bookmarks:
- 访问parent bookmark,使用FSBookmark::getParent接口。
- 访问第一个child bookmark,使用FSBookmark::getFirstChild接口。
- 访问next sibling bookmark,使用 FSBookmark::getNextSibling接口。
- 插入一个新的bookmark,使用FSBookmark::insert接口。
- 移动一个bookmark,使用FSBookmark::moveTo接口。
Example:
如何使用深度优先顺序遍历PDF文档的bookmarks
#import "ViewController.h"
#import <FoxitRDK/FSPDFViewControl.h>
...

- (void)DepthFistTravelBookmarkTree:(FSBookmark*)bookmark  document:(FSPDFDoc*)doc {
    if(!bookmark || [bookmark isEmpty])
        return;
    [self DepthFistTravelBookmarkTree:[bookmark getFirstChild] document:doc];
    while(true) {
        // Get bookmark title.
        NSString* title = [bookmark getTitle];
        FSDestination* dest = [bookmark getDestination];
        if(dest && ![dest isEmpty])
        {
            float left,right,top,bottom;
            float zoom;
            int pageIndex = [dest getPageIndex:doc];
            // left, right, top, bottom, zoom are only meaningful with some special zoom modes.
            FSDestinationZoomMode mode = [dest getZoomMode];
            switch (mode) {
                case FSDestinationZoomXYZ:
                    left = [dest getLeft];
                    top = [dest getTop];
                    zoom = [dest getZoomFactor];
                    break;
                case FSDestinationZoomFitPage:
                    break;
                case FSDestinationZoomFitHorz:
                    top = [dest getTop];
                    break;
                case FSDestinationZoomFitVert:
                    left = [dest getLeft];
                    break;
                case FSDestinationZoomFitRect:
                    left = [dest getLeft];
                    bottom = [dest getBottom];
                    right = [dest getRight];
                    top = [dest getTop];
                    break;
                case FSDestinationZoomFitBBox:
                    break;
                case FSDestinationZoomFitBHorz:
                    top = [dest getTop];
                    break;
                case FSDestinationZoomFitBVert:
                    left = [dest getLeft];
                    break;
                default:
                    break;
            }
        }
        bookmark = [bookmark getNextSibling];
        if(bookmark == nil || [bookmark isEmpty])
            break;
        [self DepthFistTravelBookmarkTree:[bookmark getFirstChild] document:doc];
    }
}
Reading Bookmark
Reading bookmark不是PDF bookmark,换句话说,它不是PDF outlines。Reading bookmark是应用层的书签。它存储在目录的元数据(XML格式)中,允许用户根据他们的阅读偏好添加或删除reading bookmark,并通过选择reading bookmark可以轻松导航到一个PDF页面。
为了检索reading bookmark,可以调用FSPDFDoc::getReadingBookmarkCount接口来计算其个数,并且可以调用FSPDFDoc::getReadingBookmark接口以索引方式获取相应的reading bookmark。
此类提供了接口用来获取/设置reading bookmarks属性,比如标题,目标页面索引,以及创建/修改日期时间
Example:
如何添加自定义reading bookmark并枚举所有的reading bookmarks
#import "ViewController.h"
#import <FoxitRDK/FSPDFViewControl.h>
...

// Add a new reading bookmark to pdf document, the returned bookmark stores the title and the page index.
- (FSReadingBookmark*)addReadingBookmark:(FSPDFDoc*)pdfDoc title:(NSString*)title pageIndex:(int)pageIndex {
    int count = [pdfDoc getReadingBookmarkCount];
    return [pdfDoc insertReadingBookmark:count title:title dest_page_index:pageIndex];
}

// Enumerate all the reading bookmarks from the pdf document.
- (void)getReadingBookmark:(FSPDFDoc*) pdfDoc {
    int count = [pdfDoc getReadingBookmarkCount];
    for(int i=0; i<count; i++) {
        FSReadingBookmark* bm = [pdfDoc getReadingBookmark:i];
        if([bm isEmpty]) continue;
        // Get bookmark title.
        NSString* title = [bm getTitle];
        // Get the page index which associated with the bookmark.
        int pageIndex = [bm getPageIndex];
        // Get the creation date of the bookmark.
        FSDateTime* creationDate = [bm getDateTime:YES];
        // Get the modification date of the bookmark.
        FSDateTime* modificationDate = [bm getDateTime:NO];
    }
}
Attachment
在Foxit PDF SDK中,attachments指的是文档附件而不是文件附件注释。它允许将整个文件封装在文档中,就像电子邮件附件一样。Foxit PDF SDK提供应用程序APIs来访问附件,例如加载附件,获取附件,插入/删除附件,以及访问附件的属性。
Example:
如何将指定文件嵌入到PDF文档
#import "ViewController.h"
#import <FoxitRDK/FSPDFViewControl.h>
...

NSString* filePath = @"/xxx/fileToBeEmbedded.xxx";
FSPDFNameTree* nameTree = [[FSPDFNameTree alloc] initWithDocument:self.fspdfdoc type:FSPDFNameTreeEmbeddedFiles];
FSAttachments* attachments = [[FSAttachments alloc] initWithDoc:self.fspdfdoc nametree:nameTree];
FSFileSpec* fileSpec = [[FSFileSpec alloc] initWithDocument:self.fspdfdoc];
[fileSpec setFileName:[filePath lastPathComponent]];
if(![fileSpec embed:filePath])
   return;
[attachments addEmbeddedFile:[filePath lastPathComponent] file_spec:fileSpec];
...
如何从PDF文档中导出嵌入的附件文件,并将其另存为单个文件
#import "ViewController.h"
#import <FoxitRDK/FSPDFViewControl.h>
...

// Extract the embedded attachment file.
int count = [attachments getCount];
for(int i=0; i<count; i++) {
   NSString* key = [attachments getKey:i];
   if(key) {
       FSFileSpec* fileSpec = [attachments getEmbeddedFile:key];
       NSString* exportedFile = [@"/somewhere/" stringByAppendingString: [fileSpec getFileName]];
       if(fileSpec && ![fileSpec isEmpty]) {
           fileSpec exportToFile:exportedFile];
       }
   }
}
...
Annotation
一个annotation注释将对象(如注释,线条和高亮)与PDF文档页面上的位置相关联。 PDF包括如Table 6-1中列出的各种标准注释类型。在这些注释类型中,许多被定义为标记注释,因为它们主要用于标记PDF文档。Table 6-1中的 “Markup” 列用来说明是否为标记注释。
Foxit PDF SDK支持PDF Reference中定义的大多数注释类型。Foxit PDF SDK提供了注释创建,属性访问和修改,外观设置和绘制的APIs。
Table 61
| Annotation type | Description | Markup | Supported by SDK |
| Text(Note) | Text annotation | Yes | Yes |
| Link | Link Annotation | No | Yes |
| FreeText (TypeWriter/TextBox/Callout) |
Free text annotation | Yes | Yes |
| Line | Line annotation | Yes | Yes |
| Square | Square annotation | Yes | Yes |
| Circle | Circle annotation | Yes | Yes |
| Polygon | Polygon annotation | Yes | Yes |
| PolyLine | PolyLine annotation | Yes | Yes |
| Highlight | Highlight annotation | Yes | Yes |
| Underline | Underline annotation | Yes | Yes |
| Squiggly | Squiggly annotation | Yes | Yes |
| StrikeOut | StrikeOut annotation | Yes | Yes |
| Stamp | Stamp annotation | Yes | Yes |
| Caret | Caret annotation | Yes | Yes |
| Ink(pencil) | Ink annotation | Yes | Yes |
| Popup | Popup annotation | No | Yes |
| File Attachment | FileAttachment annotation | Yes | Yes |
| Sound | Sound annotation | Yes | No |
| Movie | Movie annotation | No | No |
| Widget* | Widget annotation | No | Yes |
| Screen | Screen annotation | No | Yes |
| PrinterMark | PrinterMark annotation | No | No |
| TrapNet | Trap network annotation | No | No |
| Watermark* | Watermark annotation | No | No |
| 3D | 3D annotation | No | No |
| Redact | Redact annotation | Yes | Yes |
备注: Foxit SDK支持名为PSI (pressure sensitive ink,压感笔迹) 的自定义注释类型。在PDF规范中没有对该注释进行描述。通常,PSI用于手写功能,Foxit SDK将其视为PSI注释,以便其他PDF产品可以对其进行相关处理。
Example:
如何向PDF页面中添加注释
#import "ViewController.h"
#import <FoxitRDK/FSPDFViewControl.h>
...

NSString *pdfPath = [[NSBundle mainBundle] pathForResource:@"Sample" ofType:@"pdf"];
FSPDFDoc *doc = [[FSPDFDoc alloc] initWithPath:pdfPath];
FSPDFPage *pdfPage = [doc getPage:0];
// Add text annot.
FSRectF *rect = [[FSRectF alloc] initWithLeft1:100 bottom1:100 right1:120  top1:120];
FSNote *note = [[FSNote alloc] initWithAnnot:[pdfPage addAnnot:FSAnnotNote  rect:rect]];
if (!note || [note isEmpty]) {
    return;
}
[note setIconName:@"Comment"];
// Set color to blue.
[note setBorderColor:0xff0000ff];
[note setContent:@"This is the note comment, write any content here."];
[note resetAppearanceStream];

// The following code demonstrates how to add hightlight annotation on the searched text.
FSTextSearch *textSearch = [[FSTextSearch alloc] initWithDocument:doc  cancel:nil flag:FSTextPageParseTextNormal];
if (!textSearch || [textSearch isEmpty]) {
    return;
}
// Suppose that the text for highlighting is "foxit".
[textSearch setPattern:@"foxit"];
BOOL bMatched = [textSearch findNext];
if (bMatched) {
    FSRectFArray *rects = [textSearch getMatchRects];
    int rectCount = [rects getSize];
    // Fill the quadpoints array according to the text rects of matched result.
    FSQuadPointsArray* arrayOfQuadPoints = [[FSQuadPointsArray alloc] init];
    for (int i = 0; i < rectCount; i++) {
        FSRectF *rect = [rects getAt:i];
        FSQuadPoints *quadPoints = [[FSQuadPoints alloc] init];
        FSPointF *point = [[FSPointF alloc] init];
        [point set:[rect getLeft] y:[rect getTop]];
        [quadPoints setFirst:point];
        [point set:[rect getRight] y:[rect getTop]];
        [quadPoints setSecond:point];

        [point set:[rect getLeft] y:[rect getBottom]];
        [quadPoints setThird:point];
        [point set:[rect getRight] y:[rect getBottom]];
        [quadPoints setFourth:point];
        [arrayOfQuadPoints add:quadPoints];
    }
    // Just set an empty rect to markup annotation, the annotation rect will be calculated according to the quadpoints that set to it later.
    FSRectF *rect = [[FSRectF alloc] initWithLeft1:0 bottom1:0 right1:0 top1:0];
    FSTextMarkup *textMarkup = [[FSTextMarkup alloc] initWithAnnot:[pdfPage  addAnnot:FSAnnotHighlight rect:rect]];
    // Set the quadpoints to this markup annot.
    [textMarkup setQuadPoints:arrayOfQuadPoints];
    // set to red.
    [textMarkup setBorderColor:0xffff0000];
    // set to thirty-percent opacity.
    [textMarkup setOpacity:0.3f];
    // Generate the appearance.
    [textMarkup resetAppearanceStream];
}
如何删除PDF页面中的注释
#import "ViewController.h"
#import <FoxitRDK/FSPDFViewControl.h>
...

NSString *pdfPath = [[NSBundle mainBundle] pathForResource:@"Sample" ofType:@"pdf"];
FSPDFDoc *doc = [[FSPDFDoc alloc] initWithPath:pdfPath];
FSPDFPage *pdfPage = [doc getPage:0];
// Remove an annot by index.
FSAnnot* annot = [pdfPage getAnnot:0];
if(!annot || [annot isEmpty])
   return;
// Remove the first annot,so the second annot will become first.
[pdfPage removeAnnot:annot];
Form
Form(AcroForm)是用于收集用户交互信息的表单域的集合。Foxit PDF SDK提供了以编程方式查看和编辑表单域的APIs。在PDF文档中,表单域通常用于收集数据。FSForm类提供了APIs用来检索表单域或表单控件,导入/导出表单数据,以及其他功能,例如:
- 检索表单域,使用FSForm::getFieldCount和FSForm::getField接口。
- 检索PDF页面中的表单控件,使用FSForm::getControlCount和FSForm::getControl接口。
- 从XML文件导入表单数据,使用FSForm::importFromXML接口;导出表单数据到XML文件,使用FSForm::exportToXML接口。
- 检索form filler对象,使用FSForm::getFormFiller接口。
从FDF/XFDF文件中导入表单数据,或者导出数据到FDF/XFDF文件,请参考FSPDFDoc::importFromFDF和FSPDFDoc::exportToFDF接口。
Example:
如何通过XML文件导入表单数据或将表单数据导出到XML文件
#import "ViewController.h"
#import <FoxitRDK/FSPDFViewControl.h>
...

NSString *pdfPath = [[NSBundle mainBundle] pathForResource:@"Sample" ofType:@"pdf"];
FSPDFDoc *doc = [[FSPDFDoc alloc] initWithPath:pdfPath];

// Check if the document has a form.
BOOL hasForm = [doc hasForm];
if(hasForm) {
   // Create a form object from document.
   FSForm* form = [[FSForm alloc] initWithDocument:doc];
   // Export the form data to a XML file.
   [form exportToXML:@"/somewhere/export.xml"];
   // Or import the form data from a XML file.
   [form importFromXML:@"/somewhere/export.xml"];
}
Security
Foxit PDF SDK提供了一系列加密和解密功能,以满足不同级别的文档安全保护。用户可以使用常规密码加密和证书驱动加密,或使用自己的安全处理机制来自定义安全实现。
Example:
如何使用密码加密PDF文件
#import "ViewController.h"
#import <FoxitRDK/FSPDFViewControl.h>
...

// Encrypt the source pdf document with specified owner password and user password, the encrypted PDF will be saved to the path specified by parameter savePath.
- (BOOL) encryptPDF:(FSPDFDoc*) pdfDoc ownerPassword:(NSString*)ownerPassword userPassword:(NSString*)userPassword savedPath:(NSString*)savedPath
{
    if(!pdfDoc || (!ownerPassword && !userPassword) || !savedPath)
        return NO;
    // The encryption setting data. Whether to encrypt meta data:YES, User permission: modify,assemble,fill form. Cipher algorithm:AES 128.
    FSStdEncryptData* encryptData = [[FSStdEncryptData alloc] initWithIs_encrypt_metadata:YES user_permissions🙁FSPDFDocPermModify| FSPDFDocPermAssemble|FSPDFDocPermFillForm) cipher:FSSecurityHandlerCipherAES key_length:16];
    FSStdSecurityHandler * stdSecurity = [[FSStdSecurityHandler alloc] init];
    if(![stdSecurity initialize:encryptData user_password:userPassword owner_password:ownerPassword])
        return NO;
    [pdfDoc setSecurityHandler:stdSecurity];
    if(![pdfDoc saveAs:savedPath save_flags:FSPDFDocSaveFlagNormal])
        return NO;
    return YES;
}
Signature
PDF签名可用于创建和签署PDF文档的数字签名,从而保护文档内容的安全性并避免文档被恶意篡改。它可以让接收者确保其收到的文档是由签名者发送的,并且文档内容是完整和未被经篡的。Foxit PDF SDK提供APIs用来创建数字签名,验证签名的有效性,删除现有的数字签名,获取和设置数字签名的属性,显示签名和自定义签名表单域的外观。
备注:Foxit PDF SDK提供了默认签名回调函数,支持如下两种类型的signature filter 和 subfilter:
(1) filter: Adobe.PPKLite subfilter: adbe.pkcs7.detached
(2) filter: Adobe.PPKLite subfilter: adbe.pkcs7.sha1
如果您使用以上任意一种的signature filter 和 subfilter,您可以直接签名PDF文档和验证签名的有效性,而不需要注册自定义回调函数。
Example:
如何对PDF文档进行签名,并验证签名
#import "ViewController.h"
#import <FoxitRDK/FSPDFViewControl.h>
...
- (void)addNewSignatureAndSign:(FSPDFPage*)page rect:(FSRectF*)rect {
    // Add a new signature on the specified page rect.
    FSSignature* signature = [page addSignature:rect];
    // Set the appearance flags, if the specified flag is on, then the associated key will be displayed on the signature appearance.
    [signature setAppearanceFlags:FSSignatureAPFlagLabel|FSSignatureAPFlagDN|FSSignatureAPFlagText|
     FSSignatureAPFlagLocation|FSSignatureAPFlagReason|FSSignatureAPFlagSigner];
    // Set signer.
    [signature setKeyValue:FSSignatureKeyNameSigner value:@"Foxit"];
    // Set location.
    [signature setKeyValue:FSSignatureKeyNameLocation value:@"AnyWhere"];
    // Set reason.
    [signature setKeyValue:FSSignatureKeyNameReason value:@"AnyReason"];
    // Set contact info.
    [signature setKeyValue:FSSignatureKeyNameContactInfo value:@"AnyInfo"];
    // Set domain name.
    [signature setKeyValue:FSSignatureKeyNameDN value:@"AnyDN"];
    // Set description.
    [signature setKeyValue:FSSignatureKeyNameText value:@"AnyContent"];
    // Filter "Adobe.PPKLite" is supported by default.
    [signature setFilter:@"Adobe.PPKLite"];
    // SubFilter "adbe.pkcs7.sha1" or "adbe.pkcs7.detached" are supported by default.
    [signature setSubFilter:@"adbe.pkcs7.detached"];

    // The input PKCS#12 format certificate, which contains the public and private keys.
    NSString* certPath = @"/somewhere/cert.pfx";
    // Password for that certificate.
    NSString* certPassword = @"123";
    NSString* signedPDFPath = @"/somewhere/signed.pdf";
    // Start to sign the signature, if everything goes well, the signed PDF will be saved to the path specified by "save_path".
    FSProgressive* progress = [signature startSign:certPath cert_password:certPassword digest_algorithm:FSSignatureDigestSHA1 save_path:signedPDFPath client_data:nil pause:nil];
    if(progress) {
        FSProgressiveState state = [progress resume];
        while(state == FSProgressiveToBeContinued)
            state = [progress resume];
        if(state != FSProgressiveFinished)
            return;
    }

    // Get the signatures from the signed PDF document, then verify them all.
    FSPDFDoc* pdfDoc = [[FSPDFDoc alloc] initWithPath:signedPDFPath];
    FSErrorCode err = [pdfDoc load:nil];
    if(err != FSErrSuccess) return;
    int count = [pdfDoc getSignatureCount];
    for(int i=0; i<count; i++) {
        FSSignature* signature = [pdfDoc getSignature:i];
        if(signature) {
            FSProgressive *progress = [signature startVerify:nil pause:nil];
            if (progress != nil) {
                FSProgressiveState state = [progress resume];
                while (FSProgressiveToBeContinued == state) {
                    state = [progress resume];
                }
                if(state != FSProgressiveFinished)
                    continue;
            }
            int verifiedState = [signature getState];
            if(verifiedState & FSSignatureStateVerifyValid)
                NSLog(@"Signature %d is valid.", i);
        }
    }
}
创建自定义工具
使用Foxit PDF SDK for iOS创建自定义工具非常简单。 UI Extensions Component中已经实现了一些工具,开发人员可以在这些工具的基础上进行二次开发,或者参考这些工具来创建新的工具。为了快速创建自己的工具,我们建议您参阅 “libs/uiextensions_src” 文件夹下的uiextensions工程。
创建一个新的自定义工具,最主要的步骤是创建一个类,然后实现 “IToolHandler” 接口。
在本节中,我们通过创建一个区域屏幕截图工具来展示如何使用Foxit PDF SDK for iOS创建一个自定义工具。该工具帮助用户在PDF页面中选择一个区域进行截图,并将其保存为图片。现在,让我们开始吧。
使用Objective-C语言创建一个区域屏幕截图工具
为方便起见,我们将基于 “samples” 文件夹下的 “viewer_ctrl_demo” 工程来构建该工具。实现该工具的步骤如下:
- 创建名为ScreenCaptureToolHandler的类,该类实现 “IToolHandler” 接口。
- 处理onPageViewLongPress和onDraw事件。
- 实例化ScreenCaptureToolHandler对象,然后将其注册到UIExtensionsManager.
- 将ScreenCaptureToolHandler对象设置为当前的tool handler。
步骤1: 创建一个名为ScreenCaptureToolHandler的类,该类实现”IToolHandler“接口。
a)在Xcode中打开”viewer_ctrl_demo” 工程。在 “Source” 文件夹下创建名为 “ScreenCaptureToolHandler” 的类,以及创建其对应的头文件。
b)ScreenCaptureToolHandler类实现IToolHandler接口,如下所示:
@interface ScreenCaptureToolHandler : NSObject<IToolHandler>
步骤 2: 处理onPageViewLongPress和onDraw事件。
更新ScreenCaptureToolHandler.h,如下所示:
#import <Foundation/Foundation.h>
#import <FoxitRDK/FSPDFViewControl.h>
#import <uiextensionsDynamic/UIExtensionsManager.h>
@protocol IToolHandler;
@class TaskServer;

@interface ScreenCaptureToolHandler : NSObject<IToolHandler>

- (instancetype)initWithUIExtensionsManager:(UIExtensionsManager*)extensionsManager taskServer:(TaskServer*)taskServer;
@end
更新 ScreenCaptureToolHandler.m,如下所示:
#import "ScreenCaptureToolHandler.h"
#import <ImageIO/ImageIO.h>
#import <ImageIO/CGImageDestination.h>
#import <MobileCoreServices/UTCoreTypes.h>

@interface ScreenCaptureToolHandler ()

@end

@implementation ScreenCaptureToolHandler {
    UIExtensionsManager* _extensionsManager;
    FSPDFViewCtrl* _pdfViewCtrl;
    TaskServer* _taskServer;

    CGPoint startPoint;
    CGPoint endPoint;

}
@synthesize type;

- (instancetype)initWithUIExtensionsManager:(UIExtensionsManager*)extensionsManager taskServer:(TaskServer*)taskServer
{
    self = [super init];
    if (self) {
        _extensionsManager = extensionsManager;
        _pdfViewCtrl = extensionsManager.pdfViewCtrl;
        _taskServer = taskServer;
    }
    return self;
}

-(NSString*)getName
{
    return @" ";
}

-(BOOL)isEnabled
{
    return YES;
}

-(void)onActivate
{

}

-(void)onDeactivate
{

}

// Save the image to a specified path.
- (void)saveJPGImage:(CGImageRef)imageRef path:(NSString *)path
{
    NSURL *fileURL = [NSURL fileURLWithPath:path];
    CGImageDestinationRef dr = CGImageDestinationCreateWithURL((__bridge CFURLRef)fileURL, kUTTypeJPEG , 1, NULL);

    CGImageDestinationAddImage(dr, imageRef, NULL);
    CGImageDestinationFinalize(dr);

    CFRelease(dr);
}

// Handle the PageView Gesture and Touch event
- (BOOL)onPageViewLongPress:(int)pageIndex recognizer:(UILongPressGestureRecognizer *)recognizer
{
    if (recognizer.state == UIGestureRecognizerStateBegan)
    {
        startPoint = [recognizer locationInView:[_pdfViewCtrl getPageView:pageIndex]];
        endPoint = startPoint;
    }
    else if (recognizer.state == UIGestureRecognizerStateChanged)
    {

        endPoint = [recognizer locationInView:[_pdfViewCtrl getPageView:pageIndex]];

        // Refresh the page view, then the onDraw event will be triggered.
        [_pdfViewCtrl refresh:pageIndex];
    }
    else if (recognizer.state == UIGestureRecognizerStateEnded || recognizer.state == UIGestureRecognizerStateCancelled)
    {
        // Get the size of the Rect.
        CGSize size = {fabs(endPoint.x-startPoint.x), fabs(endPoint.y-startPoint.y)};
        CGPoint origin = {startPoint.x<endPoint.x?startPoint.x:endPoint.x, startPoint.y<endPoint.y?startPoint.y:endPoint.y};
        // Get the Rect.
        CGRect rect = {origin, size};

        int newDibWidth = rect.size.width;
        int newDibHeight = rect.size.height;
        if (newDibWidth < 1 || newDibHeight < 1)
        {
            return YES;
        }

        UIView* pageView = [_pdfViewCtrl getPageView:pageIndex];
        CGRect bound = pageView.bounds;

        // Create a bitmap with the size of the selected area.
        int imgSize = newDibWidth*newDibHeight*4;
        void* pBuff = malloc(imgSize);
        NSData* buff = [NSData dataWithBytes:pBuff length:imgSize];

        FSBitmap* fsbitmap = [[FSBitmap alloc] initWithWidth:newDibWidth height:newDibHeight format:FSBitmapDIBArgb buffer: buff pitch:newDibWidth*4];
        [fsbitmap fillRect:0xFFFFFFFF rect:nil];
        FSRenderer* fsrenderer = [[FSRenderer alloc] initWithBitmap:fsbitmap is_rgb_order:YES];
        FSPDFPage* page = [_pdfViewCtrl.currentDoc getPage:pageIndex];

        // Calculate the display matrix.
        FSMatrix2D* fsmatrix = [page getDisplayMatrix: -rect.origin.x top:-rect.origin.y width:bound.size.width height:bound.size.height rotate:0];

        // Set the render content, then start to render the selected area to the bitmap.
        [fsrenderer setRenderContentFlags:FSRendererRenderPage|FSRendererRenderAnnot];
        FSProgressive *progressive = [fsrenderer startRender:page matrix:fsmatrix pause:nil];
        if (progressive) {
            while (true) {
                if ([progressive resume] != FSProgressiveToBeContinued) {
                    break;
                }
            }
        }

        // Convert FSBitmap to CGImage.
        CGDataProviderRef provider = CGDataProviderCreateWithData(NULL, buff.bytes, imgSize, nil);
        CGColorSpaceRef colorSpace = CGColorSpaceCreateDeviceRGB();
        CGBitmapInfo bitmapInfo = kCGBitmapByteOrderDefault|kCGImageAlphaLast;

        CGImageRef image = CGImageCreate(newDibWidth,newDibHeight, 8, 32, newDibWidth * 4,
                                         colorSpace, bitmapInfo,
                                         provider, NULL, YES, kCGRenderingIntentDefault);

        // Save the image to a specified path.
        NSString* jpgPath = @"/Users/Foxit/Desktop/ScreenCapture.jpg";
        [self saveJPGImage:image path:jpgPath];

        UIAlertView *alert = [[UIAlertView alloc]initWithTitle:@""
                                                       message:@" The selected area was saved as a JPG stored in the /Users/Foxit/Desktop/ScreenCapture.jpg" delegate:nil cancelButtonTitle:NSLocalizedString(@"OK", @"OK") otherButtonTitles:nil];
        [alert show];

        return YES;
    }
    return YES;
}

// Handle the drawing event.
-(void)onDraw:(int)pageIndex inContext:(CGContextRef)context
{
    if (_extensionsManager.currentToolHandler != self) {
        return;
    }

    CGContextSetLineWidth(context, 2);
    CGContextSetLineCap(context, kCGLineCapSquare);
    UIColor *color = [UIColor redColor];
    CGContextSetStrokeColorWithColor(context, [color CGColor]);
    CGPoint points[] = {startPoint,CGPointMake(endPoint.x, startPoint.y),endPoint,CGPointMake(startPoint.x, endPoint.y)};
    CGContextAddLines(context,points,4);
    CGContextClosePath(context);
    CGContextStrokePath(context);
}

- (BOOL)onPageViewTap:(int)pageIndex recognizer:(UITapGestureRecognizer *)recognizer
{
    return NO;
}

- (BOOL)onPageViewPan:(int)pageIndex recognizer:(UIPanGestureRecognizer *)recognizer
{
    return NO;

}

- (BOOL)onPageViewShouldBegin:(int)pageIndex recognizer:(UIGestureRecognizer *)gestureRecognizer
{
    if (_extensionsManager.currentToolHandler != self) {
        return NO;
    }
    return YES;
}


- (BOOL)onPageViewTouchesBegan:(int)pageIndex touches:(NSSet*)touches withEvent:(UIEvent*)event
{
    return NO;
}

- (BOOL)onPageViewTouchesMoved:(int)pageIndex touches:(NSSet *)touches withEvent:(UIEvent *)event
{
    return NO;
}

- (BOOL)onPageViewTouchesEnded:(int)pageIndex touches:(NSSet *)touches withEvent:(UIEvent *)event
{
    return NO;
}

- (BOOL)onPageViewTouchesCancelled:(int)pageIndex touches:(NSSet *)touches withEvent:(UIEvent *)event
{
    return NO;
}

@end
备注:在上述的代码中,您需要指定一个存在的路径来保存截图的图片。这里,路径是“@“/Users/Foxit/Desktop/ScreenCapture.jpg““,请使用一个有效的路径替换它。
步骤 3: 在 ViewController.m中,实例化一个ScreenCaptureToolHandler对象,然后将其注册到UIExtensionsManager。
#import "ScreenCaptureToolHandler.h"
...

@property (nonatomic, strong) ScreenCaptureToolHandler* screenCaptureToolHandler;
...

self.screenCaptureToolHandler = [[ScreenCaptureToolHandler alloc] initWithUIExtensionsManager: self.extensionsManager taskServer:nil];
[self.extensionsManager registerToolHandler:self.screenCaptureToolHandler];
步骤4: 在 ViewController.m中,将ScreenCaptureToolHandler对象设置为当前的tool handler。
注册Doc监听事件:
@interface ViewController () <ISearchEventListener,UIExtensionsManagerDelegate, IDocEventListener>
...
[self.pdfViewCtrl registerDocEventListener:self];
在onDocOpened 函数中设置当前的tool handler:
- (void)onDocOpened:(FSPDFDoc *)document error:(int)error {
    [self.extensionsManager setCurrentToolHandler:self.screenCaptureToolHandler];
}
现在,我们已经使用Objective-C完成了自定义工具的创建。然后,使用iPhone 8模拟器来编译和运行该demo。当成功编译该demo后,长按并选择一个矩形区域,则会弹出如Figure 7-1所示的消息框。该消息框提示了所选区域被保存的位置。
Figure 7-1
为了验证该工具是否成功截取和保存了所选区域,我们需要找到保存的屏幕截图。在桌面上,可以看到如Figure 7-2所示的图片。

Figure 7-2
如您所见,我们已成功使用Objective-C创建了区域屏幕截图工具。这只是一个示例,用来说明如何使用Foxit PDF SDK for iOS创建自定义工具。您可以参考该示例或者我们的demos来开发您需要的工具。
使用Swift语言创建一个区域屏幕截图工具
为方便起见,我们将基于 “samples\swift” 文件夹下的 “viewer_ctrl_demo_swift” 工程来构建该工具。实现该工具的步骤如下:
- 创建名为ScreenCaptureToolHandler的类,该类实现 “IToolHandler” 接口。
- 处理onPageViewLongPress和onDraw事件。
- 实例化ScreenCaptureToolHandler对象,然后将其注册到UIExtensionsManager.
- 将ScreenCaptureToolHandler对象设置为当前的tool handler。
步骤 1: 创建一个名为ScreenCaptureToolHandler的类,该类实现”IToolHandler“接口。
a)在Xcode中打开”viewer_ctrl_demo_swift” 工程。在 “Source” 文件夹下创建名为 “ScreenCaptureToolHandler” 的类。
b)ScreenCaptureToolHandler类实现IToolHandler接口,如下所示:
class ScreenCaptureToolHandler: NSObject, IToolHandler { }
步骤 2: 处理onPageViewLongPress和onDraw事件。
更新 ScreenCaptureToolHandler.swift,如下所示:
import Foundation
import MobileCoreServices
import ImageIO

class ScreenCaptureToolHandler: NSObject, IToolHandler {
    public var type: FSAnnotType

    var extensionManager: UIExtensionsManager!
    var pdfViewCtrl: FSPDFViewCtrl!

    var startPoint = CGPoint()
    var endPoint = CGPoint()

    init(extensionsManager: UIExtensionsManager) {
        self.extensionManager = extensionsManager
        self.pdfViewCtrl = extensionsManager.pdfViewCtrl
        self.type = FSAnnotType.annotUnknownType
        super.init()
    }

    func getName() -> String {
        return " "
    }

    func isEnabled() -> Bool {
        return true
    }

    func onActivate() {
    }

    func onDeactivate() {
    }

    // Save the image to a specified path.
    func saveJPGImage(imageRef: CGImage, path: String) {
        let fileURL: CFURL = NSURL.fileURL(withPath: path) as CFURL
        let dr = CGImageDestinationCreateWithURL(fileURL, kUTTypeJPEG, 1, nil)!
        CGImageDestinationAddImage(dr, imageRef, nil)
        CGImageDestinationFinalize(dr)
    }

    // Handle the PageView Gesture and Touch event
    func onPageViewLongPress(_ pageIndex: Int32, recognizer: UILongPressGestureRecognizer) -> Bool {

        if recognizer.state == UIGestureRecognizerState.began {
            startPoint = recognizer.location(in: pdfViewCtrl.getPageView(pageIndex))
            endPoint = startPoint
        }
        else if recognizer.state == UIGestureRecognizerState.changed {

            endPoint = recognizer.location(in: pdfViewCtrl.getPageView(pageIndex))

            // Refresh the page view, then the onDraw event will be triggered.
            pdfViewCtrl.refresh(pageIndex)
        }
        else if recognizer.state == UIGestureRecognizerState.ended || recognizer.state == UIGestureRecognizerState.cancelled {

            // Get the size of the Rect.
            let size = CGSize(width: fabs(endPoint.x - startPoint.x), height: fabs(endPoint.y - startPoint.y))
            let origin = CGPoint(x: (startPoint.x < endPoint.x) ? startPoint.x : endPoint.x, y: (startPoint.y<endPoint.y) ? startPoint.y : endPoint.y)
            // Get the Rect.
            let rect = CGRect(origin: origin, size: size)

            let newDibwidth = rect.size.width
            let newDibHeight = rect.size.height
            if newDibwidth < 1 || newDibHeight < 1 {
                return true
            }

            let pageView = pdfViewCtrl.getPageView(pageIndex)
            let bound = pageView.bounds

            // Create a bitmap with the size of the selected area.
            let imgSize = newDibwidth * newDibHeight * 4
            let capacity: Int = Int(newDibwidth) * Int(newDibHeight) * 4

            let buff = UnsafeMutablePointer<UInt8>.allocate(capacity: capacity)
            let pBuff = NSData.init(bytes: UnsafeRawPointer(buff), length: capacity)


            let pitch: Int = Int(newDibwidth) * 4
            guard let fsbitmap = FSBitmap.init(width: Int32(newDibwidth), height: Int32(newDibHeight), format:FSBitmapDIBFormat.dibArgb , buffer: pBuff as Data, pitch: Int32(pitch)) else {
                return false
            }
            fsbitmap.fillRect(0xFFFFFFFF, rect: nil)
            let fsrenderer = FSRenderer.init(bitmap: fsbitmap, is_rgb_order: true)
            let page = pdfViewCtrl.currentDoc?.getPage(pageIndex)

            // Calculate the display matrix.
            let fsmatrix = page?.getDisplayMatrix(-Int32(rect.origin.x), top: -Int32(rect.origin.y), width: Int32(bound.size.width), height: Int32(bound.size.height), rotate: FSRotation.rotation0)

            // Set the render content, then start to render the selected area to the bitmap.
            fsrenderer?.setRenderContentFlags(UInt32(UInt8(FSRendererContentFlag.renderPage.rawValue) | UInt8(FSRendererContentFlag.renderAnnot.rawValue)))
            let progress = fsrenderer?.startRender(page, matrix: fsmatrix, pause: nil)
            if ((progress) != nil) {

                while (true) {
                    if (progress?.resume() != FSProgressiveState.toBeContinued)
                    {
                        break
                    }
                }
            }

            // Convert FSBitmap to CGImage.
            let releaseData: CGDataProviderReleaseDataCallback = {
                (info: UnsafeMutableRawPointer?, data:UnsafeRawPointer, size:Int) -> Void in
            }

            let provider: CGDataProvider = CGDataProvider.init(dataInfo: nil, data: pBuff.bytes, size: Int(imgSize), releaseData: releaseData)!
            let colorSpace = CGColorSpaceCreateDeviceRGB()
            let bitmapInfo: CGBitmapInfo = .byteOrderMask

            let image = CGImage(width: Int(newDibwidth), height: Int(newDibHeight), bitsPerComponent: 8, bitsPerPixel: 32, bytesPerRow: Int(newDibwidth) * 4, space: colorSpace, bitmapInfo: bitmapInfo, provider: provider, decode: nil, shouldInterpolate: true, intent: CGColorRenderingIntent.defaultIntent)

            // Save the image to a specified path.
            let jpgPath = "/Users/Foxit/Desktop/ScreenCapture.jpg"
            self.saveJPGImage(imageRef: image!, path: jpgPath)

            let alert = UIAlertView(title: "", message: " The selected area was saved as a JPG stored in the /Users/Foxit/Desktop/ScreenCapture.jpg", delegate: nil, cancelButtonTitle: NSLocalizedString("OK", comment: "OK"))
            alert.show()
            return true
        }
        return true
    }

    // Handle the drawing event.
    func onDraw(_ pageIndex: Int32, in context: CGContext) {
        context.setLineWidth(CGFloat(2))
        context.setLineCap(.square)
        let color = UIColor.red
        context.setStrokeColor(color.cgColor)
        let points = [startPoint, CGPoint(x: CGFloat(endPoint.x), y: CGFloat(startPoint.y)), endPoint, CGPoint(x: CGFloat(startPoint.x), y: CGFloat(endPoint.y))]
        context.addLines(between: points)
        context.closePath()
        context.strokePath()
    }

    func onPageViewTap(_ pageIndex: Int32, recognizer: UITapGestureRecognizer?) -> Bool {
        return false
    }

    func onPageViewPan(_ pageIndex: Int32, recognizer: UIPanGestureRecognizer) -> Bool {
        return false
    }

    func onPageViewShouldBegin(_ pageIndex: Int32, recognizer gestureRecognizer: UIGestureRecognizer) -> Bool {
        return true
    }

    func onPageViewTouchesBegan(_ pageIndex: Int32, touches: Set<AnyHashable>, with event: UIEvent) -> Bool {
        return false
    }

    func onPageViewTouchesMoved(_ pageIndex: Int32, touches: Set<AnyHashable>, with event: UIEvent) -> Bool {
        return false
    }

    func onPageViewTouchesEnded(_ pageIndex: Int32, touches: Set<AnyHashable>, with event: UIEvent) -> Bool {
        return false
    }

    func onPageViewTouchesCancelled(_ pageIndex: Int32, touches: Set<AnyHashable>, with event: UIEvent) -> Bool {
        return false
    }
}
备注:在上述的代码中,您需要指定一个存在的路径来保存截图的图片。这里,路径是“/Users/Foxit/Desktop/ScreenCapture.jpg“,请使用一个有效的路径替换它。
步骤 3: 在ViewController.swift 中,实例化一个ScreenCaptureToolHandler对象,然后将其注册到UIExtensionsManager。
var screenCaptureToolHandler: ScreenCaptureToolHandler!
...

self.screenCaptureToolHandler = ScreenCaptureToolHandler.init(extensionsManager: self.extensionsManager)
self.extensionsManager.register(self.screenCaptureToolHandler)
步骤 4: 在ViewController.swift 中,将ScreenCaptureToolHandler对象设置为当前的tool handler。
注册Doc监听事件:
class ViewController: UIViewController, UISearchBarDelegate, ISearchEventListener, IDocEventListener
...
self.pdfViewCtrl.register(self)
在onDocOpened 函数中设置当前的tool handler:
func onDocOpened(_ document: FSPDFDoc?, error: Int32) {
    self.extensionsManager.currentToolHandler = self.screenCaptureToolHandler
}
现在,我们已经使用Swift完成了自定义工具的创建。然后编译和运行该demo。当成功编译后,长按并选择一个矩形区域,则会弹出如Figure 7-1所示的消息框。在桌面上,可以看到如Figure 7-2所示的图片。
这只是一个示例,用来说明如何使用Foxit PDF SDK for iOS和Swift语言创建自定义工具。您可以参考该示例或者我们的demos来开发您需要的工具。
使用Cordova实现Foxit PDF SDK for iOS
在开发跨平台移动应用程序时,Apache Cordova是一个理想的开源框架。 ‘cordova-plugin-foxitpdf’是我们提供的使用Foxit PDF SDK for iOS的移动框架插件之一。该插件帮助您可以使用Cordova框架实现强大的PDF viewing功能。通过此插件,您可以预览任何PDF文件,包括PDF 2.0标准的文件,XFA文档和受RMS加密的文档,您还可以注释和编辑PDF文档。
本节将帮助您开始使用Foxit PDF SDK for iOS 7.4和Cordova 7.4插件。对于7.4版本之前的插件的用法,请参阅网站https://github.com/foxitsoftware/cordova-plugin-foxitpdf。
系统要求
- NPM
- Cordova
- iOS 10 or higher
- Xcode 9 or higher
- Foxit PDF SDK For iOS 7.4
备注: Foxit PDF SDK for iOS版本应与 ‘cordova-plugin-foxitpdf’插件的版本相匹配。在安装时,您指定插件版本。如果不指定,则将安装最新版本。
安装Cordova 命令行工具
请参阅Apache Cordova website https://cordova.apache.org/ – getstarted来安装Cordova命令行工具。
下载 和安装Node.js。
打开命令行终端,输入sudo npm install -g cordova。
使用Foxit PDF SDK for iOS构建一个Cordova工程
新建一个Cordova工程
打开终端,导航到您要创建工程的目录,输入cordova create <path> 命令。例如,输入如下的命令创建一个cordova工程:
cordova create test_cordova com.app testCordova
添加平台
创建Cordova工程后,导航到该工程目录下 (cd test_cordova),然后输入如下的命令添加iOS平台来编译您的应用程序。
cd test_cordova
cordova platform add ios
备注:后面所有的命令也都是在工程项目目录下执行。
安装插件
安装 ‘cordova-plugin-foxitpdf’ 插件
选择下面的其中一种方式来安装 ‘cordova-plugin-foxitpdf’:
- 从npm下载插件,然后在工程目录下安装:
// 安装特定的插件版本,比如7.4版本:
cordova plugin add cordova-plugin-foxitpdf@7.4
// 安装最新的插件版本 (不指定版本号):
cordova plugin add cordova-plugin-foxitpdf
- 通过repo url直接安装 (通常,这种方式会安装最新的插件版本):
cordova plugin add https://github.com/foxitsoftware/cordova-plugin-foxitpdf.git
备注:本教程只介绍7.4版本插件的用法,因此请确保安装7.4版本的插件。
安装 ‘cordova-plugin-file’ 插件
由于Apple的沙盒机制,文件路径受限于应用程序的沙盒。我们需要 ‘cordova-plugin-file’ 插件来进行文件路径转换以获取文件的绝对路径。转换时请注意目录权限。输入以下的命令来安装’cordova-plugin-file’ 插件:
cordova plugin add cordova-plugin-file
集成 Foxit PDF SDK for iOS
备注:在本节中,我们只介绍如何使用Cordova插件来打开一个PDF文档。关于插件的更多API介绍,请参考网站https://github.com/foxitsoftware/cordova-plugin-foxitpdf。
下载Foxit PDF SDK for iOS (7.4) 包并解压,然后按照如下的步骤操作:
1)将解压包中的 “libs” 文件夹拷贝到 “test_cordova/platforms/ios”目录。
2)双击”test_cordova/platforms/ios”文件夹下的”testCordova.xcodeproj”,在Xcode中打开该Cordova工程。
3)将 “test_cordova/platforms/ios/libs” 文件夹下的FoxitRDK.framework 和 uiextensionsDynamic.framework动态framework添加到工程。如果您需要集成scan模块,则还需要添加FoxitPDFScanUI.framework。
右击testCordova工程,选择Add Files to “testCordova“,然后定位并选择动态framework,将其添加到工程中。
4)嵌入动态framework。单击工程,在General选项卡下找到Frameworks, Libraries, and Embedded Content,然后选择 “Embed & Sign”,如Figure 8-1所示。
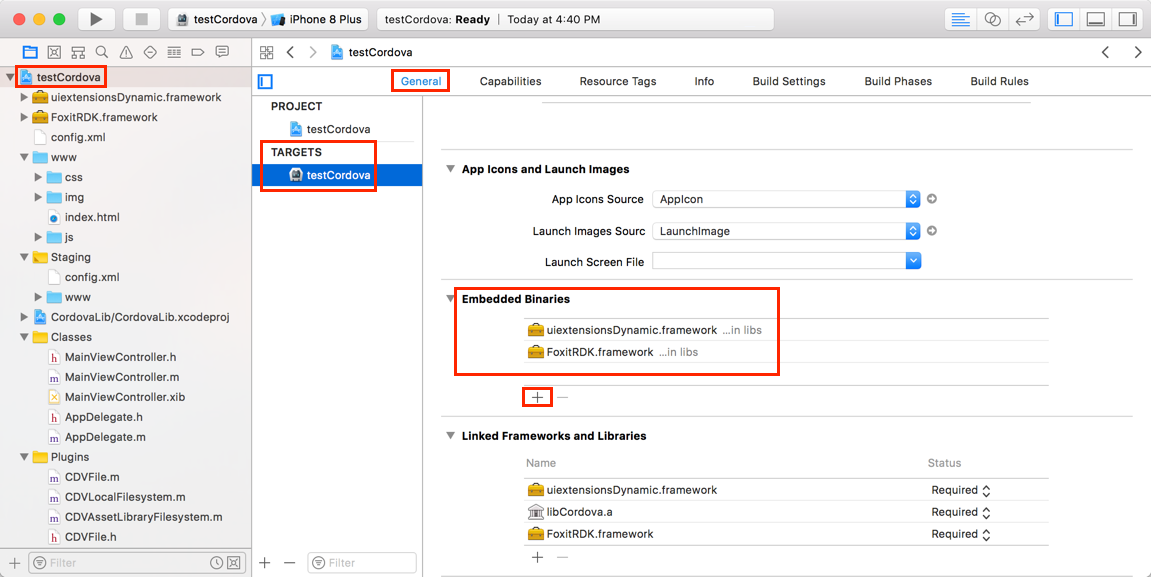
Figure 8-1
5)添加 “WebKit.framework” 到Xcode的Frameworks, Libraries, and Embedded Content.
单击testCordova工程,找到Frameworks, Libraries, and Embedded Content,点击 + 按钮,在搜索框中输入”web” 从而快速定位并选择 “WebKit.framework”,如Figure 8-2所示,然后点击Add。
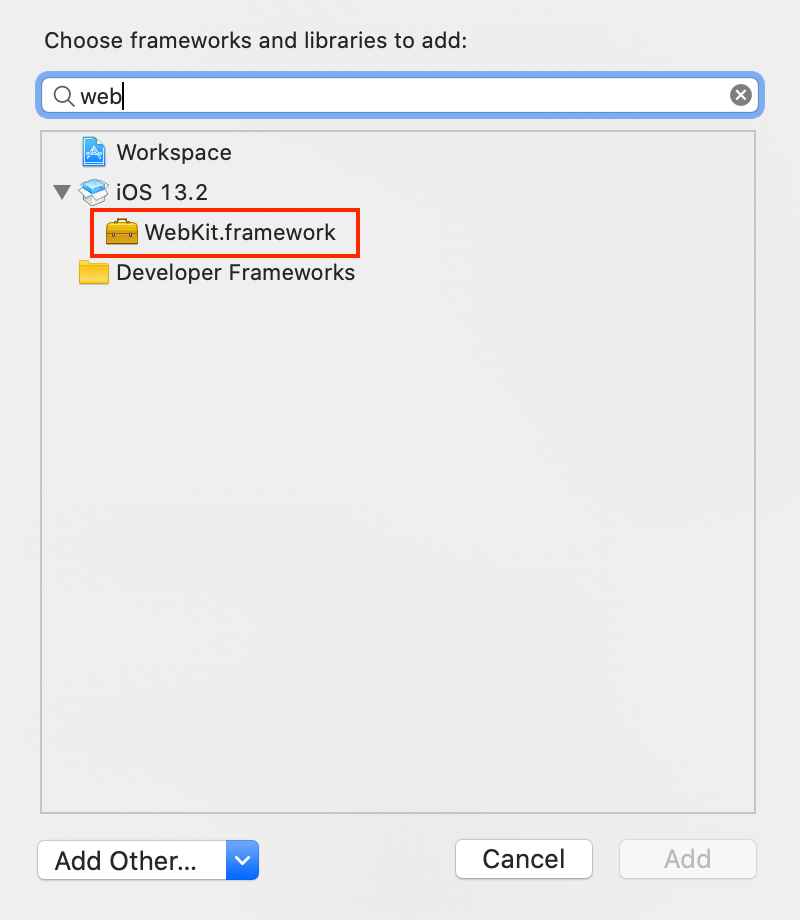
Figure 8-2
则Frameworks, Libraries, and Embedded Content将如Figure 8-3所示。
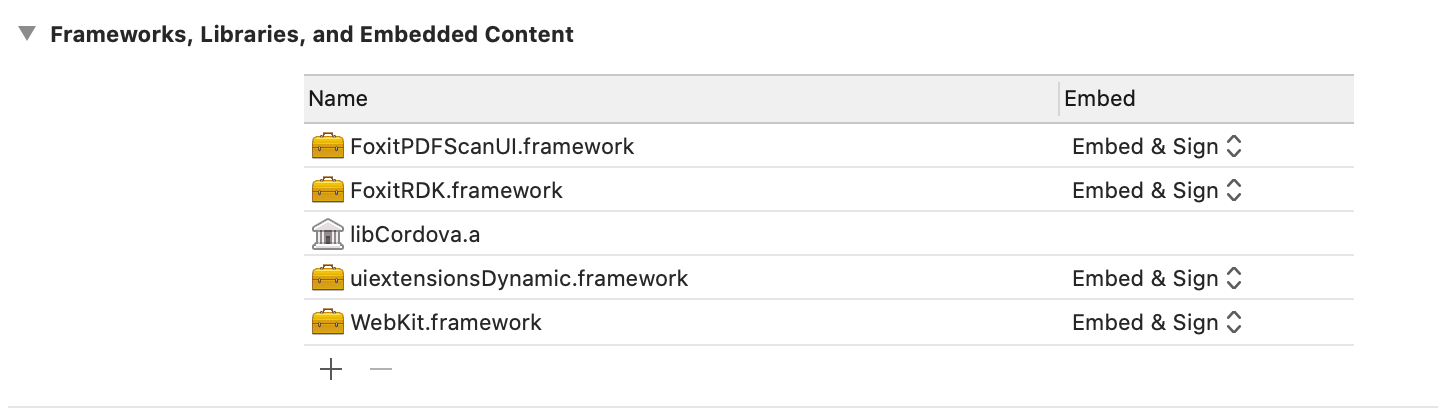
Figure 8-3
6)在工程中添加一个PDF文档作为测试文档。
将需要作为测试的文档拖拽到testCordova 工程,或者直接将文档添加到Xcode的Copy Bundle Resources (单击testCordova工程,找到TARGETS -> Build Phases -> Copy Bundle Resources,点击 + 按钮,选择PDF文档进行添加)。例如,添加Foxit PDF SDK for iOS解压包的 “samples/test_files” 文件夹下的 “complete_pdf_viewer_guide_ios.pdf” 文档,如Figure 8-4所示。
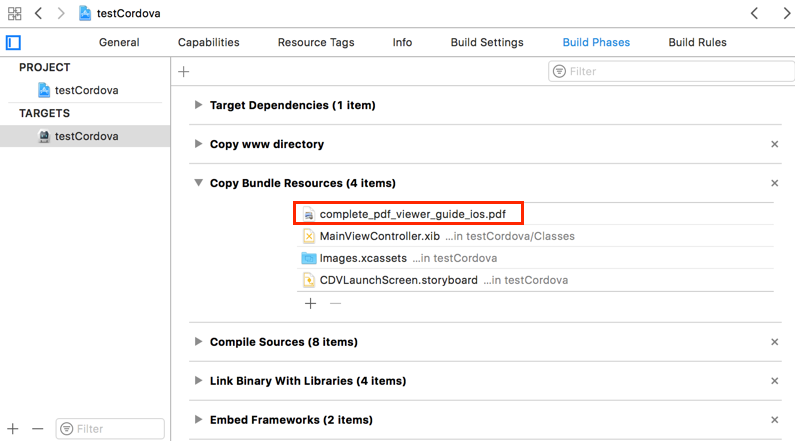
Figure 8-4
7)在 “test_cordova/www/js/index.js” 文件中,添加代码打开一个PDF文档。
您需要首先调用window.FoxitPdf.initialize 接口来初始化SDK库,然后调用window.FoxitPdf.openDocument接口来打开一个PDF文档。添加如Figure 8-5所示的代码。
备注:License文件 “rdk_sn.txt“ 和 “rdk_key.txt“ 在Foxit PDF SDK for iOS包的 “libs“ 文件夹下。
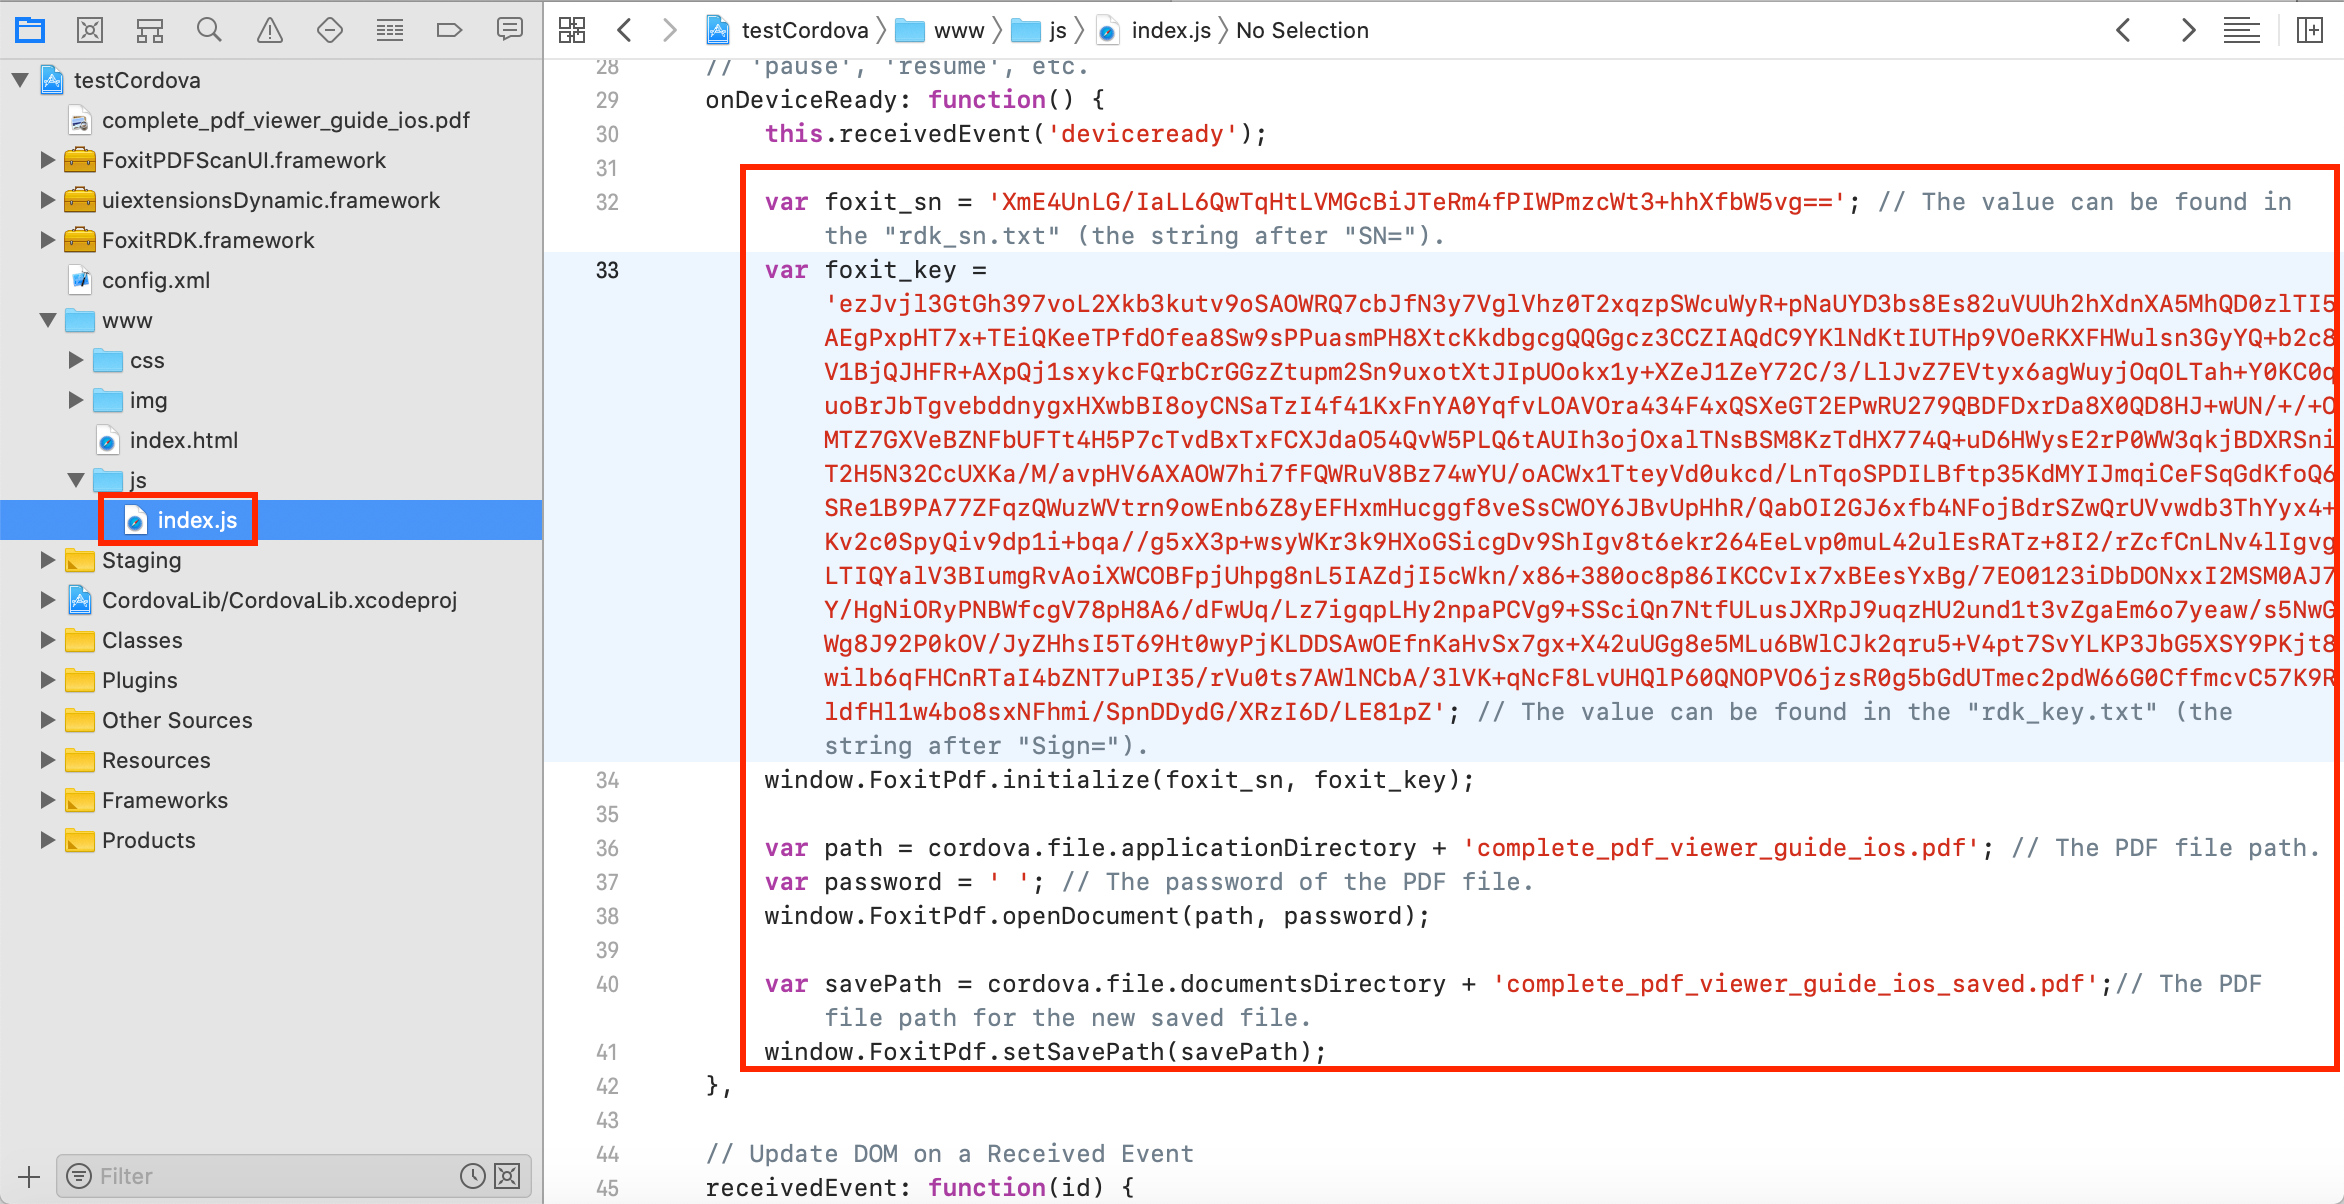
Figure 8-5
var foxit_sn = 'xxx'; // The value can be found in the "rdk_sn.txt" (the string after "SN=").
var foxit_key = 'xxx'; // The value can be found in the "rdk_key.txt" (the string after "Sign=").
window.FoxitPdf.initialize(foxit_sn, foxit_key);

var path = cordova.file.applicationDirectory + 'complete_pdf_viewer_guide_ios.pdf'; // The PDF file path.
var password = ' '; // The password of the PDF file.
window.FoxitPdf.openDocument(path, password);

var savePath = cordova.file.documentsDirectory + 'complete_pdf_viewer_guide_ios_saved.pdf';// The PDF file path for the new saved file.
window.FoxitPdf.setSavePath(savePath);
8)将 “test_cordova”目录下的”www”文件内容部署到平台 (test_cordova/platforms/ios/www)下的 “www”文件中。在终端,导航到工程目录,输入如下的命令:
cordova prepare ios
运行工程
使用如下的命令或者直接在Xcode中运行该工程。
导航到工程目录,输入如下的命令:
cordova run ios                         // 针对真机设备
cordova emulate ios                  // 针对模拟器
cordova emulate ios --target iPhone-8-Plus   // 针对指定的模拟器
备注:如果您使用的Xcode版本是10或更高版本,在命令行中运行时,需要指定 –buildFlag=“-UseModernBuildSystem=0“。例如,cordova run ios –buildFlag=’-UseModernBuildSystem=0′。关于更详细的信息,请访问https://github.com/apache/cordova-ios/issues/407。
当成功运行该工程后,”complete_pdf_viewer_guide_ios.pdf” 文档将显示如Figure 8-6所示。
Figure 8-6
自定义UI
通过一个配置文件来自定义UI
您可以通过一个名为”uiextensions_config.json”的JSON文件来自定义UI,包括功能模块,权限管理和UI元素的属性,该文件位于”test_cordova\platforms\ios\testCordova\Resources” 文件夹下。
自定义UI,只需要根据需求修改JSON文件,然后重新运行工程。有关JSON文件的更详细信息,请参阅4.1.2小节 配置项描述 .
通过源代码自定义UI
UI实现封装在 “libs” 文件夹下的uiextensionsDynamic.framework中。如果您不想使用现有的UI框架,您可以通过修改源代码来进行重新设计。在 “foxitpdfsdk_7_4_iOS\libs\uiextensions_src” 文件夹下找到源代码工程 “uiextensions“,在Xcode中打开该工程,根据您的需要进行修改。然后,重新编译该工程,并重新打包uiextensionsDynamic.frameworK文件,并将您cordova工程中的该文件进行替换。
如果您需要自定义扫描功能UI,您可以在 “foxitpdfsdk_7_4_ios\libs” 文件夹下找到源代码工程 “pdfscan“,在Xcode中打开该工程,根据您的需要进行修改。然后,重新编译该工程,并重新打包FoxitPDFScanUI.framework文件,并将您cordova工程中的该文件进行替换。
使用React Native实现Foxit PDF SDK for iOS
React Native是一个使用JavaScript和React构建native应用程序的开源移动开发框架。’react-native-foxitpdf’是我们提供的使用Foxit PDF SDK for iOS的移动框架插件之一。该插件帮助您可以使用React Native框架实现强大的PDF viewing功能。通过此插件,您可以预览任何PDF文件,包括PDF 2.0标准的文件,XFA文档和受RMS加密的文档,您还可以注释和编辑PDF文档。
本节将帮助您开始使用Foxit PDF SDK for iOS 7.4和React Native7.4插件。有关7.4插件版本之前的用法,请参阅网站https://github.com/foxitsoftware/react-native-foxitpdf。
系统要求
- NPM
- React-Native >= 0.60.0
- iOS 10 or higher
- Xcode 9 or newer
- Foxit PDF SDK for iOS 7.4
备注: Foxit PDF SDK for iOS版本应与 ‘react-native-foxitpdf’插件的版本相匹配。在安装时,您可以指定插件版本。如果不指定,则将安装最新版本。
安装React Native命令行工具
在iOS平台构建React Native应用程序,您需要Node,Watchman,React Native命令行工具,以及Xcode。
请参阅官方的getting started guide 安装React Native命令行工具。
- 打开终端,安装brew。
- 通过brew install node 和 brew install watchman命令安装Node 和 Watchman。
- 通过sudo npm install -g react-native-cli命令安装React Native命令行工具。
使用Foxit PDF SDK for iOS构建一个React Native工程
新建一个React Native工程
打开终端,导航到您要创建工程的目录,输入react-native init <ProjectName> 命令。例如,输入如下的命令创建一个名为”testRN”的react-native工程:
react-native init testRN
安装 ‘react-native-foxitpdf’ 插件
从npm下载插件,然后在工程目录下安装。您可以安装特定版本或最新版本的插件。
- // 安装特定的插件版本,比如7.4版本:
cd testRN
npm install @foxitsoftware/react-native-foxitpdf@7.4
- // 安装最新的插件版本 (不指定版本号):
cd testRN
npm install @foxitsoftware/react-native-foxitpdf
备注:
- 后面所有的命令也都是在工程项目目录下执行。
- 本教程只介绍7.4插件版本的用法,因此请确保安装的插件版本是7.4。
集成 Foxit PDF SDK for iOS
备注:在本节中,我们只介绍如何使用React Native插件来打开一个PDF文档。关于插件的更多API介绍,请参考网站https://github.com/foxitsoftware/react-native-foxitpdf。
下载Foxit PDF SDK for iOS包 (7.4版本) 并解压,然后按照如下的步骤:
1)将解压包中的 “libs” 文件夹拷贝到 “testRN/ios” 目录。
2)将FoxitPDF 添加到 <PROJECT_ROOT>/ios/Podfile 文件中。
添加如下的代码到 “testRN/ios” 文件夹下的 “Podfile” 文件中 (见Figure 9-1).
pod 'FoxitPDF', :path=>'./libs/FoxitPDF.podspec'
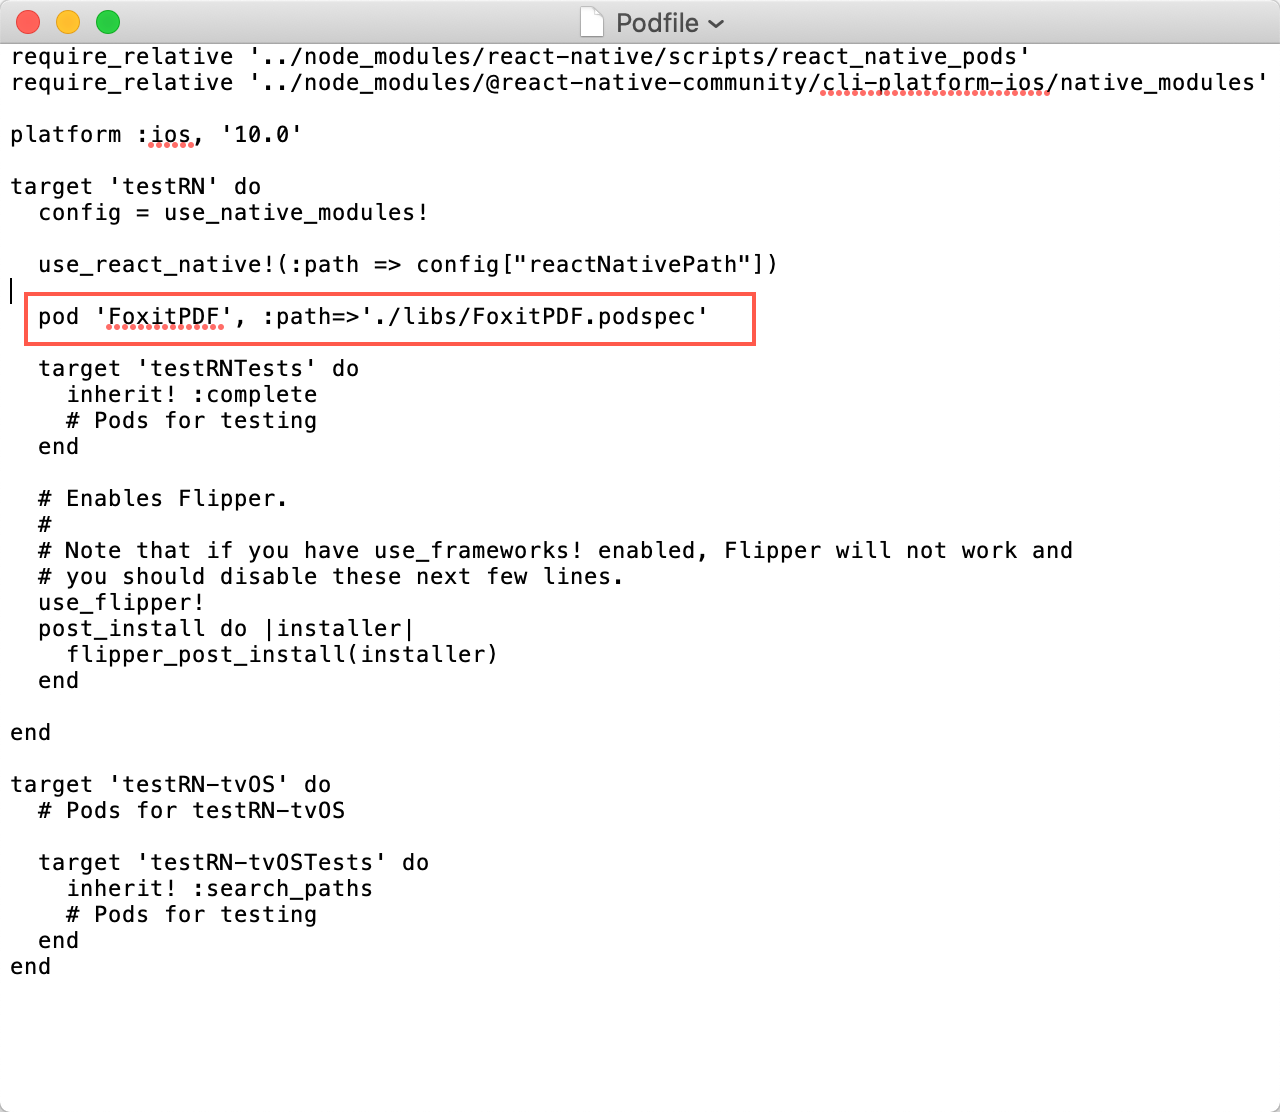
Figure 9-1
3)导航到 “testRN/ios” 文件夹,输入如下的命令安装工程依赖:
cd testRN/ios
pod install
4)使用插件打开一个PDF文档。
在 “testRN\App.js” 文件中,使用如下的代码导入插件:
import FoxitPDF from '@foxitsoftware/react-native-foxitpdf';
调用如下的函数初始化SDK库:
FoxitPDF.initialize("foxit_sn", "foxit_key");
备注: “foxit_sn“的值在“rdk_sn.txt“中 (“SN=“后面的字符串),“foxit_key“的值在 “rdk_key.txt“中 (“Sign=“后面的字符串)。License文件 “rdk_sn.txt“ 和 “rdk_key.txt“ 在Foxit PDF SDK for iOS包的 “libs“ 文件夹下。
然后,调用如下的函数打开一个PDF文档:
FoxitPDF.openDocument('/sample.pdf');
备注:您需要事先将PDF文档放入到App’s Document的目录下。在本教程中,我们使用Foxit PDF SDK for iOS包中 “samples/test_files“文件夹下的 “complete_pdf_viewer_guide_ios.pdf“ 文档。
更新 “App.js” 文件,如下所示,添加一个button用来打开PDF文档:
import React, {Component} from 'react';
import {Platform, StyleSheet, Text, View, TouchableOpacity} from 'react-native';
import FoxitPDF from '@foxitsoftware/react-native-foxitpdf';

const instructions = Platform.select({
  ios: 'Press Cmd+R to reload,\n' + 'Cmd+D or shake for dev menu',
  android:
    'Double tap R on your keyboard to reload,\n' +
    'Shake or press menu button for dev menu',
});

type Props = {};
export default class App extends Component<Props> {

  constructor(props) {
    super(props);
    // The "foxit_sn" can be found in the "rdk_sn.txt" file (the string after "SN=").
    // The "foxit_key" can be found in the "rdk_key.txt" file (the string after "Sign=").
    FoxitPDF.initialize("foxit_sn", "foxit_key");
  }

  onPress() {
    FoxitPDF.openDocument('/complete_pdf_viewer_guide_ios.pdf');
  }

  render() {
    return (
      <View style={styles.container}>
        <TouchableOpacity
          style={styles.button}
          onPress={this.onPress}
        >
          <Text> Open PDF </Text>
        </TouchableOpacity>
      </View>
    );
  }
}

const styles = StyleSheet.create({
  container: {
    flex: 1,
    justifyContent: 'center',
    alignItems: 'center',
    backgroundColor: '#F5FCFF',
  },
  button: {
    alignItems: 'center',
    backgroundColor: '#DDDDDD',
    padding: 10
  },

});
备注:新加接口FoxitPDF.openDocument的用法等同于FoxitPDF.openPDF,但是我们推荐使用FoxitPDF.openDocument接口,因为FoxitPDF.openPDF接口在以后的版本中可能会被弃用。在调用FoxitPDF.openDocument之前,您必须首先调用FoxitPDF.initialize初始化SDK库。
运行工程
使用如下的命令或者直接在Xcode中运行该工程。
导航到工程目录,输入如下的命令:
react-native run-ios
备注:上述的命令会自动默认在iOS模拟器中运行该工程。如果您需要在真机设备中运行,请参阅该说明。
当成功运行后,点击”Open PDF” 按钮,”complete_pdf_viewer_guide_ios.pdf” 文档将显示如
Figure 9-2所示。

Figure 9-2
使用Xamarin实现Foxit PDF SDK for iOS
Xamarin是一个使用共享C#代码库构建native应用程序的跨平台开发框架。我们为Android和iOS平台分别提供了对应的bindings for Android and iOS (‘foxit_xamarin_android’和’foxit_xamarin_ios’),以便开发人员可以将Foxit PDF SDK强大的PDF功能无缝地集成到他们的Xamarin应用程序中。
本节将帮助您开始使用Foxit PDF SDK for iOS 7.4和Xamarin 7.4插件。有关7.4插件版本之前的用法,请参阅网站https://github.com/foxitsoftware/xamarin-foxitpdf。
系统要求
- Visual Studio 2019 for Mac
- Xcode 10.1
- MacOS 10.13.6 or higher
- iOS 10 or higher
- Foxit PDF SDK for iOS 7.4
备注: Foxit PDF SDK for iOS版本应与 ‘foxit_xamarin_ios‘ 插件的版本相匹配。
在 Visual Studio 2019 for Mac上安装Xamarin
请参阅官方安装教程 在Visual Studio 2019 for Mac上安装Xamarin。
集成Foxit PDF SDK到您的Xamarin工程中
集成Foxit PDF SDK到您的Xamarin工程中,有如下的两种方式:
- 通过 NuGet集成 (从6.3版本开始支持)
- 通过编译和引用DLLs的方式手动集成
通过NuGet集成
通过NuGet包将Foxit PDF SDK集成到您的xamarin项目中的方式比第二种 “通过编译和引用DLLs的方式手动集成” 更简单,并且可以为您节省大量时间。
通过NuGet包将Foxit PDF SDK集成到您的xamarin项目中,请按照如下的步骤:
1)在Solution中,右击工程的Packages 节点,点击Manage NuGet Packages…,如 Figure 10-1所示。
Figure 10-1
2)在Manage NuGet Packages窗口,搜索Foxit.iOS,Foxit.iOS.UIExtensions 和Foxit.iOS.Scanning.UI (scan模块需要),如图Figure 10-2所示,点击Add Packages 安装以上三个包。
Figure 10-2
安装完成后,工程的Packages将如Figure 10-3所示。
Figure 10-3
通过编译和引用DLLs的方式手动集成
手动集成Foxit PDF SDK到您的应用程序中,您需要首先编译DLLs,然后在您的工程中引用该DLLs.
编译 DLLs
从GitHub上下载 ‘foxit_xamarin_ios‘ (7.4版本)并解压,然后按照如下的步骤编译Foxit.iOS, Foxit.iOS.UIExtensions 和 Foxit.iOS.Scanning.UI (scan模块需要) 工程,获取相应的DLLs:
1)下载Foxit PDF SDK for iOS (7.4版本) 包并解压,将包中 “libs” 文件夹下的如下文件(库和licenses) 拷贝到 “foxit_xamarin_ios/libs” 目录下:
FoxitRDK.framework
uiextensionsDynamic.framework
FoxitPDFScanUI.framework
rdk_key.txt
rdk_sn.txt
2)编译获取 Foxit.iOS.dll,Foxit.iOS.UIExtensions.dll和Foxit.iOS.Scanning.UI.dll (如果需要使用扫描功能)。
- Foxit.iOS.dll是SDK的核心,包含了Foxit PDF SDK for iOS的核心功能。
- Foxit.iOS.UIExtensions.dll扩展了PDF相关更强大的功能,包括相关UI和资源文件。
- Foxit.iOS.Scanning.UI.dll 用于扫描模块,包括扫描功能所需要的库文件和相关UI。
分别编译Foxit.iOS, Foxit.iOS.UIExtensions 和 Foxit.iOS.Scanning.UI工程来获取对应的DLLs。例如,双击 “foxit_xamarin_ios/Foxit.iOS” 文件夹下的Foxit.iOS.sln在Visual Studio 2019 for Mac中打开该工程。选择Build -> Build Foxit.iOS,然后在 “foxit_xamarin_ios/Foxit.iOS/Foxit.iOS/bin/Debug (or release)” 目录下将生成Foxit.iOS.dll。
备注:快速获取以上三个DLLs,您只需要双击 “foxit_xamarin_ios/Foxit.iOS.Scanning.UI” 文件夹下的Foxit.iOS.Scanning.UI.sln,选择Build -> Build All。然后在“foxit_xamarin_ios/Foxit.iOS.Scanning.UI/Foxit.iOS.Scanning.UI/bin/Debug (or release)”目录下将生成Foxit.iOS.dll, Foxit.iOS.UIExtensions.dll 和 Foxit.iOS.Scanning.UI.dll。
在工程中引用DLLs
请按照如下的步骤在您的工程中引用Foxit.iOS.dll, Foxit.iOS.UIExtensions.dll 和 Foxit.iOS.Scanning.UI.dll。假设您已经编译和生成以上三个DLLs,如果没有,请参阅编译DLLs首先编译Foxit.iOS, Foxit.iOS.UIExtensions 和 Foxit.iOS.Scanning.UI工程,从而生成Foxit.iOS.dll, Foxit.iOS.UIExtensions.dll 和 Foxit.iOS.Scanning.UI.dll。
1)在Solution中, 右击工程的References节点,选择Add References…,如 Figure 10-4所示。
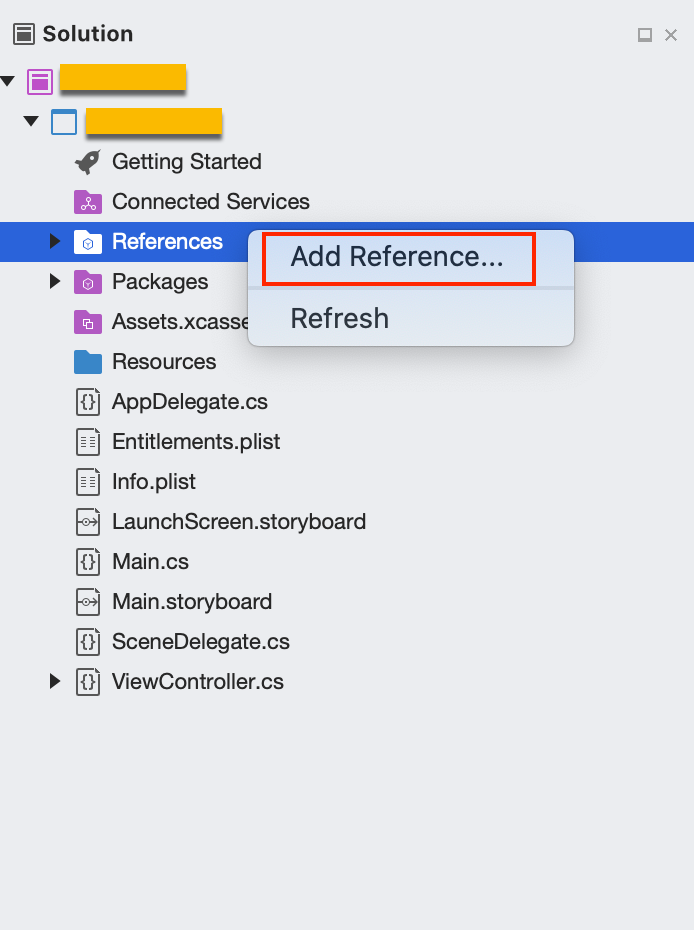
Figure 10-4
2)在References 对话框中,点击Browse… (见 Figure 10-5),定位到”foxit_xamarin_ios/Foxit.iOS.UIExtensions/Foxit.iOS.UIExtensions/bin/Debug (or release)” 文件夹下的Foxit.iOS.dll,选择该DLL,然后点击Open,如Figure 10-6所示。
使用和添加Foxit.iOS.dll同样的方式,添加Foxit.iOS.UIExtensions.dll 和 Foxit.iOS.Scanning.UI.dll。
Figure 10-5
Figure 10-6
然后,窗口的列表中将出现Foxit.iOS.dll,Foxit.iOS.UIExtensions.dll 和 Foxit.iOS.Scanning.UI.dll,并且已经被勾选 (见Figure 10-7)。
Figure 10-7
3)在完成以上步骤后,工程的References 将如Figure 10-8所示。
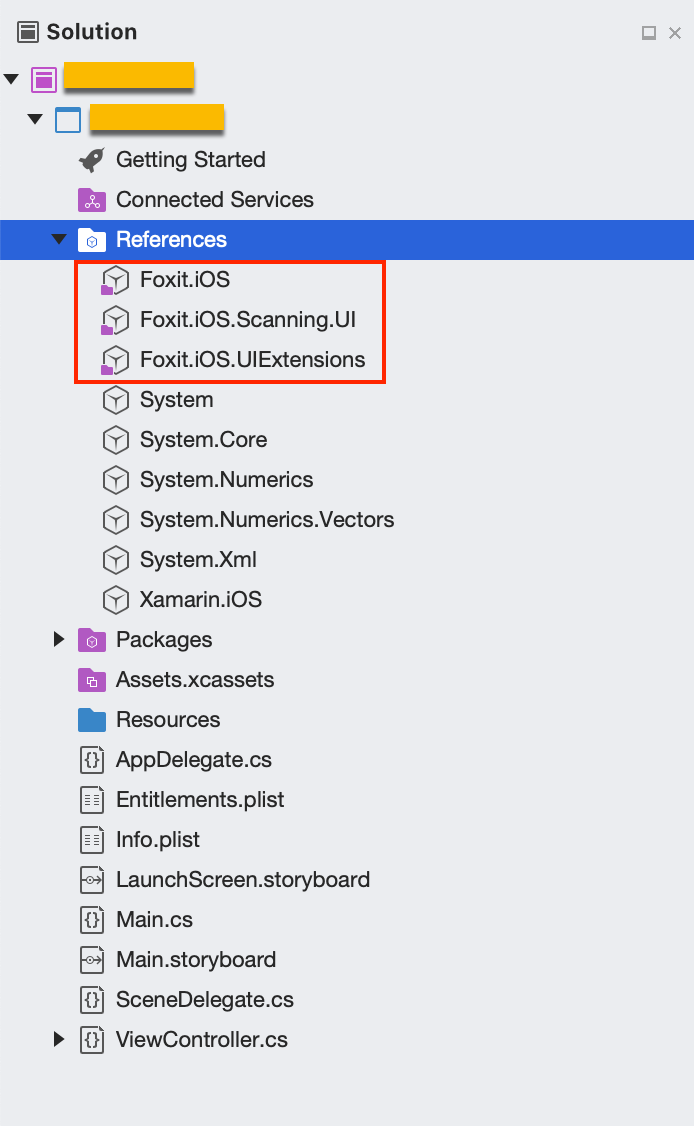
Figure 10-8
使用Foxit PDF SDK for iOS构建一个Xamarin iOS工程
本节将帮助您在Xamarin iOS平台上快速构建一个功能齐全的PDF阅读器,并提供详细的步骤说明。
创建一个新的Xamarin iOS工程
打开Visual Studio 2019 for Mac,选择File -> New Solution…,然后选择iOS -> App -> Single View App,如Figure 10-9所示。点击Next。
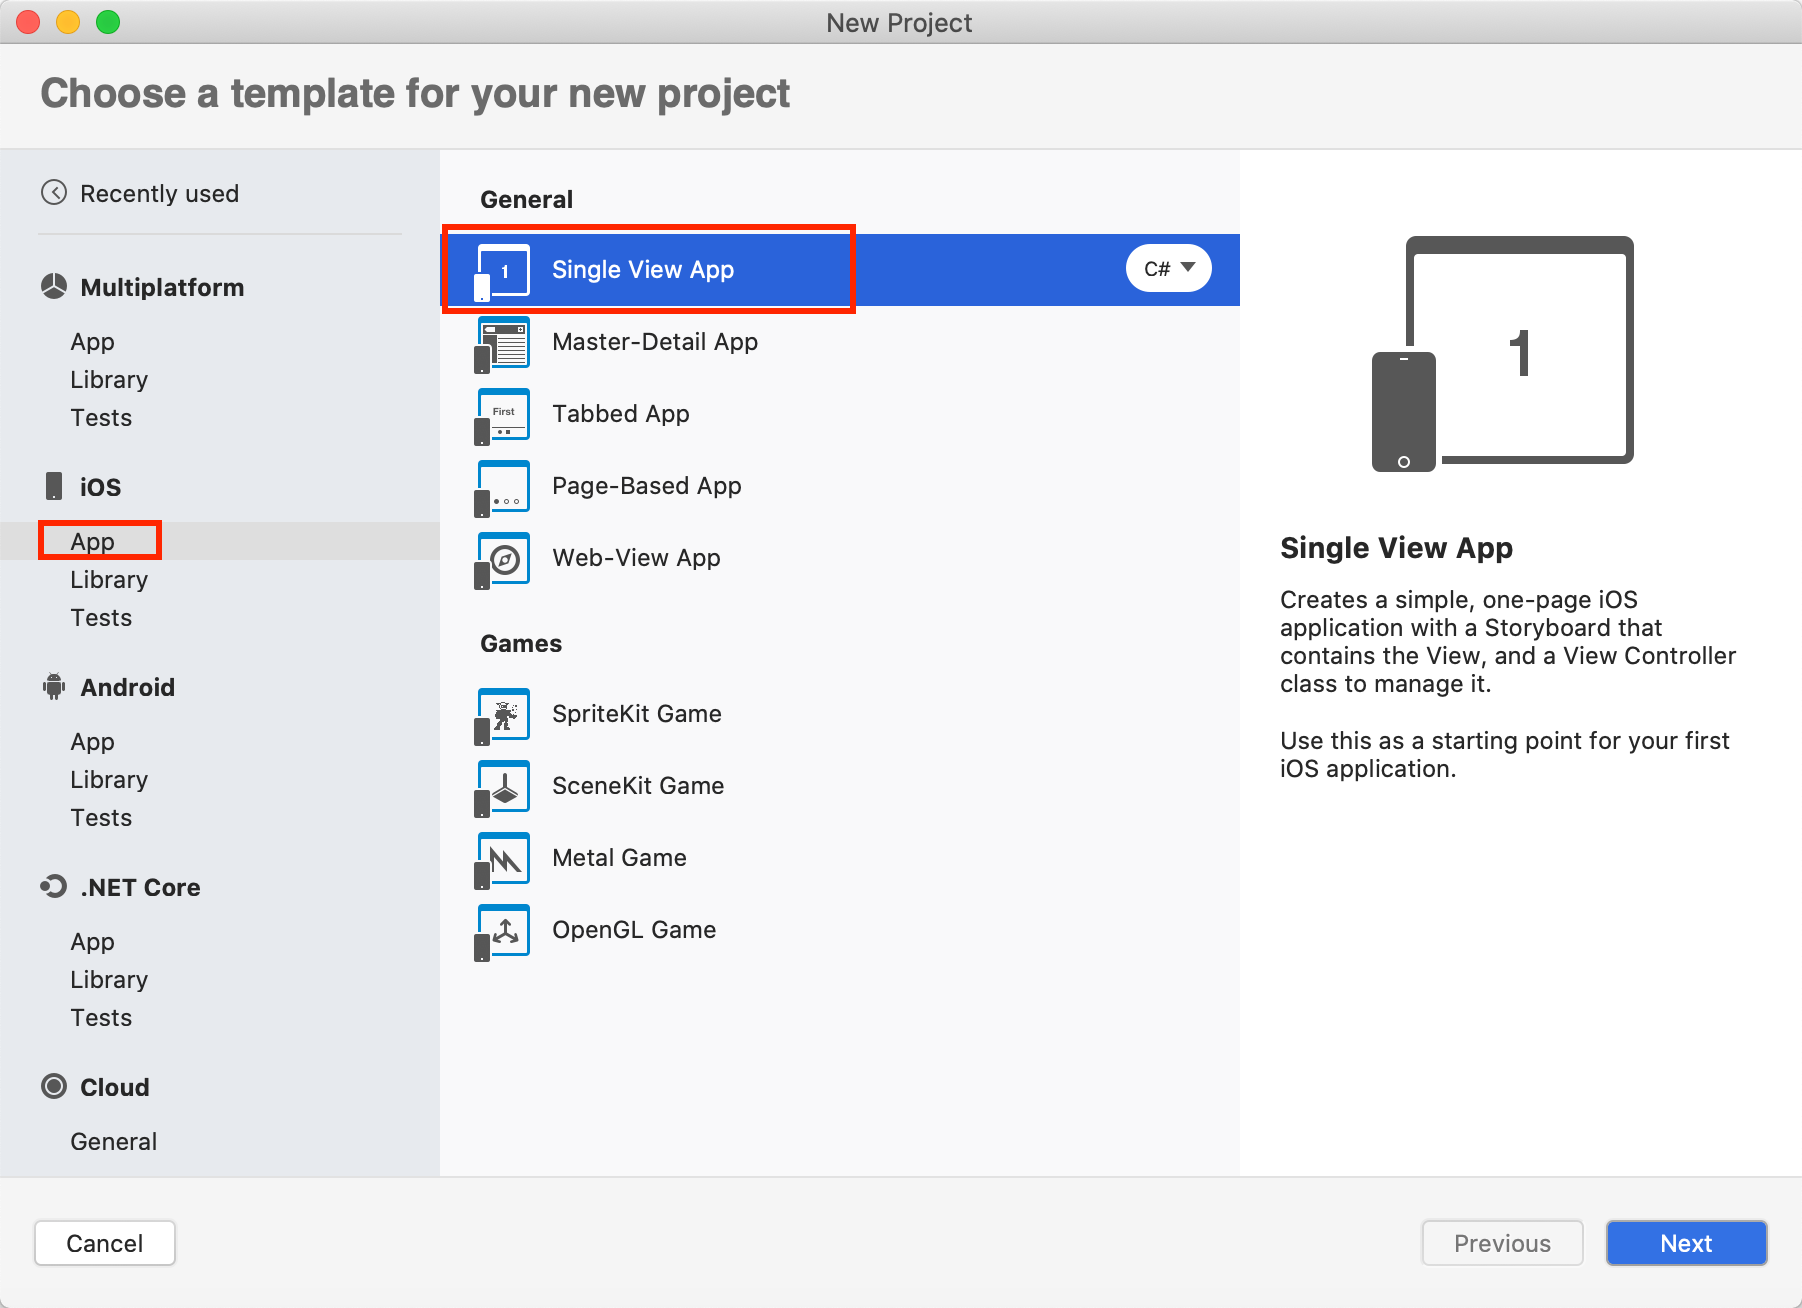
Figure 10-9
在Configure your iOS app 对话框,根据需要设置工程的选项。例如,将APP Name设置为”TestXamarin”,将Organization Identifier设置为 “com.foxit”,如Figure 10-10所示。然后,点击Next。
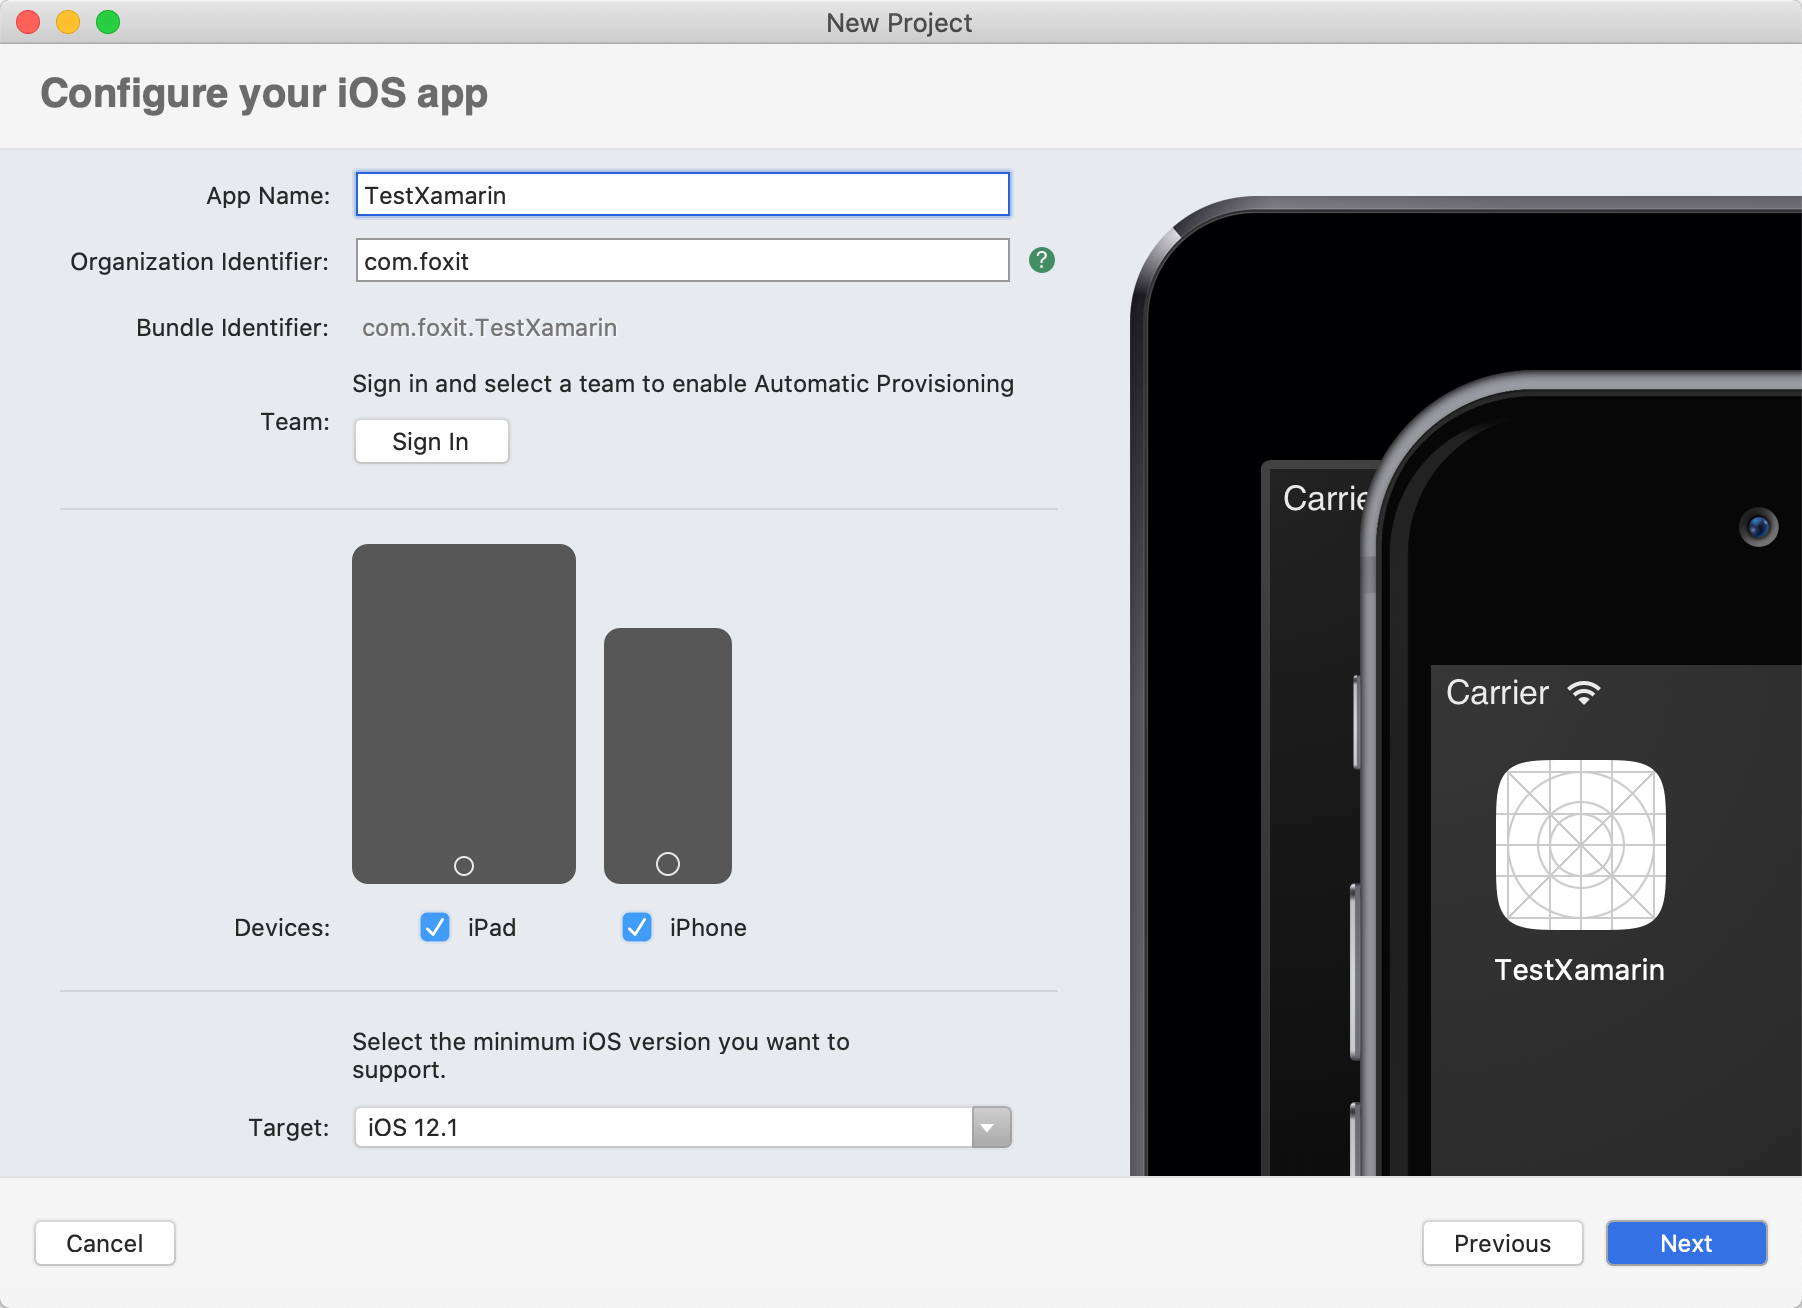
Figure 10-10
选择工程存放的位置。例如,将其存放在桌面,如Figure 10-11所示。点击Create。

Figure 10-11
集成Foxit PDF SDK到您的工程中
请参阅9.3小节 “集成Foxit PDF SDK到您的Xamarin工程中” 将Foxit PDF SDK集成到创建的工程中。我们推荐使用第一种方式 “通过NuGet集成“,该集成方式更简单和更方便。
初始化 Foxit SDK Library
在调用任何APIs之前,您需要首先使用FSLibrary::Initialize函数来初始化Foxit PDF SDK。在AppDelegate.cs 文件的FinishedLaunching 方法中完成Foxit PDF SDK的初始化。
using Foundation;
using UIKit;
using Foxit.iOS;

namespace TestXamarin
{
    // The UIApplicationDelegate for the application. This class is responsible for launching the
    // User Interface of the application, as well as listening (and optionally responding) to application events from iOS.
    [Register("AppDelegate")]
    public class AppDelegate : UIApplicationDelegate
    {
        // class-level declarations

        public override UIWindow Window
        {
            get;
            set;
        }

        public override bool FinishedLaunching(UIApplication application, NSDictionary launchOptions)
        {
            // Override point for customization after application launch.
            // If not required for your application you can safely delete this method

            // The value of "sn" can be found in the "rdk_sn.txt".
            // The value of "key" can be found in the "rdk_key.txt".
            string sn = "xxx";
            string key = "xxx";

            // Initialize the Foxit SDK library.
            var errCode = FSLibrary.Initialize(sn, key);
            if (errCode != FSErrorCode.Success)
                return false;

            return true;
        }


}
备注:参数 “sn“的值在 “rdk_sn.txt“中 (“SN=“后面的字符串),“key“的值在 “rdk_key.txt“中 (“Sign=“后面的字符串)。试用license文件 (rdk_sn.txt和 rdk_key.txt) 在 “foxit_xamarin_ios/libs“ 文件夹下,或者在Foxit PDF SDK for iOS包的 “libs“文件夹下。
使用PDFViewCtrl显示PDF文档
为了显示一个PDF文档,请首先在工程的Resources 目录下添加一个PDF文档,该文档将会作为测试文档。
在Solution中,右击Resources,选择Add -> Existing Files…,添加您需要的PDF文档。例如,Foxit PDF SDK for iOS 包中的 “samples/test_files”文件夹下的 “complete_pdf_viewer_guide_ios.pdf” 文档。当添加完成后,您可以看到如Figure 10-12所示的PDF文档。

Figure 10-12
然后,在ViewController.cs中加入如下的代码来打开并显示一个PDF文档。显示一个PDF文档很简单,您只需要获取一个PDF文档路径,实例化一个FSPDFViewCtrl对象,然后调用FSPDFViewCtrl::OpenDoc 函数打开和渲染该PDF文档。
更新 ViewController.cs,如下所示:
using System;

using UIKit;
using Foundation;
using Foxit.iOS;

namespace TestXamarin
{
    public partial class ViewController : UIViewController
    {
        private FSPDFViewCtrl pdfViewCtrl;

        protected ViewController(IntPtr handle) : base(handle)
        {
            // Note: this .ctor should not contain any initialization logic.
        }

        public override void ViewDidLoad()
        {
            base.ViewDidLoad();

            // Instantiate a PDFViewCtrl object.
            pdfViewCtrl = new FSPDFViewCtrl(new CoreGraphics.CGRect(0, 0, View.Frame.Size.Width, View.Frame.Size.Height));

            // Open a PDF document.
            string path = NSBundle.MainBundle.PathForResource("complete_pdf_viewer_guide_ios", "pdf");
            pdfViewCtrl.OpenDoc(path, null, null);

            // Add the pdfViewCtrl to the root view.
            View.AddSubview(pdfViewCtrl);

        }

        public override void DidReceiveMemoryWarning()
        {
            base.DidReceiveMemoryWarning();
            // Release any cached data, images, etc that aren't in use.
        }
    }
}
在本章中,将使用iPhone 8模拟器来编译和运行该工程。当成功编译后,您将看到”complete_pdf_viewer_guide_ios.pdf” 文档显示如Figure 10-13所示。该示例应用程序具有一些基本的PDF功能,比如放大/缩小和翻页。

Figure 10-13
构建一个功能齐全的PDF阅读器
构建一个功能齐全的PDF阅读器,您只需要实例化一个UIExtensionsManager对象,然后将其设置给FSPDFViewCtrl。
using Foxit.iOS.UIExtensions;
...
private UIExtensionsManager uiExtensionsManager;
...
// Instantiate a UIExtensionsManager object and set it to pdfViewCtrl.
uiExtensionsManager = new UIExtensionsManager(pdfViewCtrl);
pdfViewCtrl.ExtensionsManager = uiExtensionsManager;
ViewController.cs的完整更新如下:
using System;

using UIKit;
using Foundation;
using Foxit.iOS;
using Foxit.iOS.UIExtensions;

namespace TestXamarin
{
    public partial class ViewController : UIViewController
    {
        private FSPDFViewCtrl pdfViewCtrl;
        private UIExtensionsManager uiExtensionsManager;

        protected ViewController(IntPtr handle) : base(handle)
        {
            // Note: this .ctor should not contain any initialization logic.
        }

        public override void ViewDidLoad()
        {
            base.ViewDidLoad();

            // Instantiate a PDFViewCtrl object.
            pdfViewCtrl = new FSPDFViewCtrl(new CoreGraphics.CGRect(0, 0, View.Frame.Size.Width, View.Frame.Size.Height));

            // Open a PDF document.
            string path = NSBundle.MainBundle.PathForResource("complete_pdf_viewer_guide_ios", "pdf");
            pdfViewCtrl.OpenDoc(path, null, null);

            // Add the pdfViewCtrl to the root view.
            View.AddSubview(pdfViewCtrl);

            // Instantiate a UIExtensionsManager object and set it to pdfViewCtrl.
            uiExtensionsManager = new UIExtensionsManager(pdfViewCtrl);
            pdfViewCtrl.ExtensionsManager = uiExtensionsManager;

        }

        public override void DidReceiveMemoryWarning()
        {
            base.DidReceiveMemoryWarning();
            // Release any cached data, images, etc that aren't in use.
        }
    }
}
添加访问摄像头、麦克风和照片库的权限
为了访问摄像头、麦克风和照片库,您需要在 “Info.plist” 中添加相应的权限配置,如Figure 10-14所示。
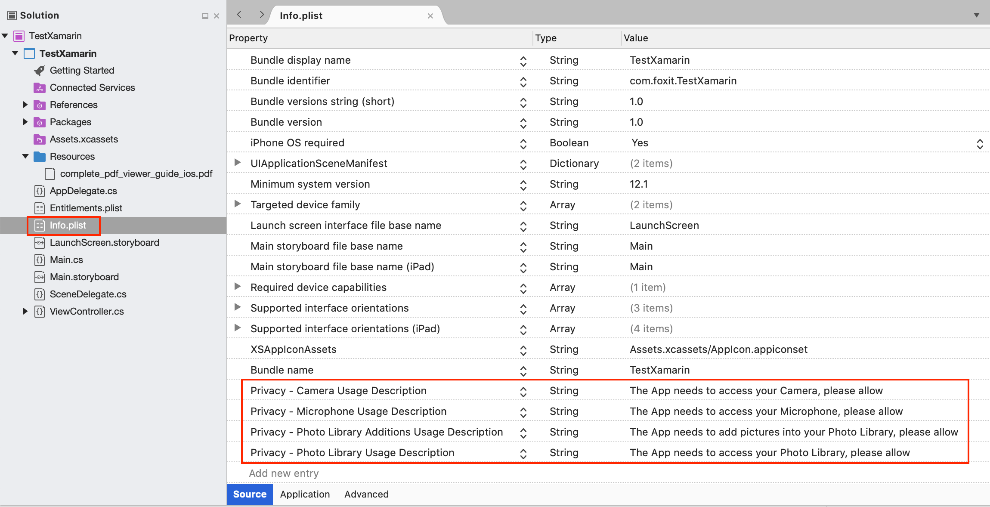
Figure 10-14
运行工程
当成功编译后,您将看到 “complete_pdf_viewer_guide_ios.pdf” 文档显示如Figure 10-15所示。到目前为止,该工程是一个功能齐全的PDF阅读器,包含Foxit PDF SDK for iOS中的所有功能,并且支持打开RMS加密的文档。
![]()
Figure 10-15
自定义UI
关于如何在您的Xamarin iOS工程中自定义UI,请参阅第4章 “自定义UI“。
FAQ
Bitcode 支持
什么是Bitcode?Foxit PDF SDK for iOS是否支持Bitcode?
Bitcode是被编译程序的一种中间形式的代码。Bitcode允许Apple在后期重新优化应用程序的二进制文件,而不需要向App Store重新提交一个新的版本。
是的。Foxit PDF SDK for iOS从3.0版本开始支持Bitcode。
从指定的PDF文件路径打开一个PDF文档
如何从指定的PDF文件路径打开一个PDF文档?
Foxit PDF SDK for iOS提供了多个接口用来打开PDF文档。您可以从指定的PDF文件路径或从内存缓冲区打开一个PDF文档。对于指定的PDF文件路径,有两种方法可以使用。
第一种是使用openDoc接口,该接口包括以下的操作:创建PDF文档对象(initWithPath),加载文档内容(load),以及将PDF文档对象设置给视图控件(setDoc)。以下是示例代码:
备注:openDoc接口仅可用于从文件路径打开PDF文档。如果需要自定义加载PDF文档,可以在回调函数 (FSFileReadCallback) 中实现,然后使用带有回调函数FireRead 的initWithHandler接口创建文档对象。接下来,使用load加载文档内容,并使用setDoc将PDF文档对象设置给视图控件。
#import "ViewController.h"
#import <FoxitRDK/FSPDFViewControl.h>

@interface ViewController : UIViewController

@end

@implementation ViewController
{

    FSPDFViewCtrl* pdfViewCtrl;
}

- (void)viewDidLoad {
    [super viewDidLoad];

    // Get the path of a PDF.
    NSString* pdfPath = [[NSBundle mainBundle] pathForResource:@"Sample" ofType:@"pdf"];

    // Initilize a FSPDFViewCtrl object with the size of the entire screen.
    pdfViewCtrl = [[FSPDFViewCtrl alloc] initWithFrame: [self.view bounds]];

    // Open an unencrypted PDF document from a specified PDF file path.
    [pdfViewCtrl openDoc:pdfPath password:nil completion:nil];

    // Add the pdfView to the root view.
    [self.view addSubview:pdfViewCtrl];
}
@end
第二种是使用initWithPath接口创建PDF文档对象,使用load 接口加载文档内容,然后使用setDoc将PDF文档对象设置给视图控件。以下是示例代码:
#import "ViewController.h"
#import <FoxitRDK/FSPDFViewControl.h>

@interface ViewController : UIViewController

@end

@implementation ViewController
{

    FSPDFViewCtrl* pdfViewCtrl;
}

- (void)viewDidLoad {
    [super viewDidLoad];

    // Get the path of a PDF.
    NSString* pdfPath = [[NSBundle mainBundle] pathForResource:@"Sample" ofType:@"pdf"];

    // Initialize a PDFDoc object with the path to the PDF file.
    FSPDFDoc* pdfdoc = [[FSPDFDoc alloc] initWithPath: pdfPath];

    // Load the unencrypted document content.
    if(FSErrSuccess != [pdfdoc load:nil]) {
        return;
    }

    // Initilize a FSPDFViewCtrl object with the size of the entire screen.
    pdfViewCtrl = [[FSPDFViewCtrl alloc] initWithFrame: [self.view bounds]];

    // Set the document to view control.
    [pdfViewCtrl setDoc:pdfdoc];

    // Add the pdfView to the root view.
    [self.view addSubview:pdfViewCtrl];
}
@end
打开PDF文档时显示指定的页面
如何在打开PDF文档时,显示指定的页面?
为了在打开PDF文档时显示指定的页面,您需要使用接口[pdfViewCtrl gotoPage: (int) animated: (BOOL)]。Foxit PDF SDK for iOS使用多线程来提高渲染速度,因此您需要确保在使用gotoPage接口之前,文档已经被成功加载。有两种方法可以实现该功能。
第一种是在openDoc接口中创建条件语句,以确保仅在文档加载完成时,再调用gotoPage。如果文档没有加载完成,gotoPage接口是不会起作用的,那么打开文档时将显示第一页。这是因为gotoPage接口启动了一个新的线程来执行操作。以下是示例代码:
#import "ViewController.h"
#import <FoxitRDK/FSPDFViewControl.h>

@interface ViewController : UIViewController

@end

@implementation ViewController
{

    FSPDFViewCtrl* pdfViewCtrl;
}

- (void)viewDidLoad {
    [super viewDidLoad];

    // Get the path of a PDF.
    NSString* pdfPath = [[NSBundle mainBundle] pathForResource:@"Sample" ofType:@"pdf"];

    // Initilize a FSPDFViewCtrl object with the size of the entire screen.
    pdfViewCtrl = [[FSPDFViewCtrl alloc] initWithFrame: [self.view bounds]];

    // Open an unencrypted PDF document from a specified PDF file path, and go to the third page when completing the document loading.
    [pdfViewCtrl openDoc:pdfPath password:nil completion:^(enum FSErrorCode error){

        if(error == FSErrSuccess)

            // Display the third page.
            [pdfViewCtrl gotoPage:2 animated:NO];
    }];

    // Add the pdfView to the root view.
    [self.view addSubview:pdfViewCtrl];
}
@end
第二种是实现<IDocEventListener> 协议,然后在onDocOpened 事件中调用gotoPage 接口。以下是示例代码:
#import "ViewController.h"
#import <FoxitRDK/FSPDFViewControl.h>

@interface ViewController : UIViewController <IDocEventListener>


@end

@implementation ViewController
{
    FSPDFViewCtrl* pdfViewCtrl;
}

- (void)viewDidLoad {
    [super viewDidLoad];

    // Get the path of a PDF
    NSString* pdfPath = [[NSBundle mainBundle] pathForResource:@"Sample" ofType:@"pdf"];

    // Initilize a FSPDFViewCtrl object with the size of the entire screen.
    pdfViewCtrl = [[FSPDFViewCtrl alloc] initWithFrame: [self.view bounds]];

    // Register the PDF document event listener.
    [pdfViewCtrl registerDocEventListener:self];

    // Open an unencrypted PDF document from a specified PDF file path.
    [pdfViewCtrl openDoc:pdfPath password:nil completion:nil];

    // Add the pdfView to the root view.
    [self.view addSubview:pdfViewCtrl];

}

#pragma IDocEventListener

-(void)onDocOpened:(FSPDFDoc *)document error:(int)error
{
    // display the third page.
    [pdfViewCtrl gotoPage:2 animated:NO];
}
@end
License key和序列号无法正常工作
从网站下载的SDK包,未进行任何更改,为什么license key和序列号无法正常工作?
通常,上传到网站的包,里面的license key和序列号是可以正常工作的。在上传到网站之前是经过测试的。因此,如果您发现license key和序列号无法使用,则可能是由设备的日期引起的。如果您设备的时间在下载包 “libs” 文件夹下rdk_key.txt文件中的StartDate之前,则 “librdk.so” 库将无法解锁。请检查您设备的日期。
在PDF文档中添加link注释
如何在PDF文档中添加link注释?
为了将link注释添加到PDF文档,首先需要调用FSPDFPage::addAnnot将一个link注释添加到指定页面,然后调用FSAction::Create创建一个action,并将该action设置给刚添加的link注释。以下是在PDF首页添加一个URI link注释的示例代码:
#define DOCUMENT_PATH [NSSearchPathForDirectoriesInDomains(NSDocumentDirectory, NSUserDomainMask, YES) objectAtIndex:0]
...
// Get the path of a PDF
NSString* pdfPath = [[NSBundle mainBundle] pathForResource:@"Sample" ofType:@"pdf"];

// Initialize a PDFDoc object with the path to the PDF file.
FSPDFDoc *document = [[FSPDFDoc alloc] initWithPath: pdfPath];

// load the unencrypted document content.
 [document load:nil];

// Get the first page of the PDF file.
FSPDFPage *page = [document getPage:0];

// Add a link annotation to the first page.
FSRectF *rect = [[FSRectF alloc] initWithLeft1:250 bottom1:650 right1:450 top1:750];
FSLink *linkAnnot = [[FSLink alloc] initWithAnnot:[page addAnnot: FSAnnotLink rect:rect]];

// Create a URI action and set the URI.
FSURIAction *uriAction = [[FSURIAction alloc] initWithAction:[FSAction create:document action_type:FSActionTypeURI]];
[uriAction setURI:@"https://www.foxitsoftware.com"];

// Set the action to link annotation.
[linkAnnot setAction:uriAction];

// Reset appearance stream.
 [linkAnnot resetAppearanceStream];

// Save the document that has added the link annotaiton.
[document saveAs:[DOCUMENT_PATH stringByAppendingString:@"Sample_annot.pdf"] save_flags:FSPDFDocSaveFlagNormal];
向PDF文档中插入图片
如何向PDF文档中插入图片?
向PDF文档中插入图片,可以调用FSPDFPage::addImageFromFilePath 接口。以下是将图片插入到PDF文档首页的示例代码:
备注:在调用FSPDFPage::addImageFromFilePath接口之前,您需要获取并解析将要添加图片的页面。
#define DOCUMENT_PATH [NSSearchPathForDirectoriesInDomains(NSDocumentDirectory, NSUserDomainMask, YES) objectAtIndex:0]
...
// Get the path of a PDF.
NSString* pdfPath = [[NSBundle mainBundle] pathForResource:@"Sample" ofType:@"pdf"];

// Initialize a PDFDoc object with the path to the PDF file.
FSPDFDoc *document = [[FSPDFDoc alloc] initWithPath: pdfPath];

// load the unencrypted document content.
[document load:nil];

// Get the first page of the PDF file.
FSPDFPage *page = [document getPage:0];

// Parse the page.
if (![page isParsed]) {
    FSProgressive* progressive = [page startParse: FSPDFPageParsePageNormal pause:nil is_reparse:NO];
    while ([progressive resume] == FSProgressiveToBeContinued) {
        continue;
    }
}

// Get the image path.
NSString* imagePath = @"/Users/xiaole/Desktop/1.png";

// Add an image to the first page.
FSPointF* point = [[FSPointF alloc] init];
[point set:100 y:300];
[page addImageFromFilePath:imagePath position:point width:100 height:120 auto_generate_content:YES];

// Save the document that has added the link annotaiton.
[document saveAs:[DOCUMENT_PATH stringByAppendingString:@"Sample_image.pdf"] save_flags:FSPDFDocSaveFlagNormal];
高亮PDF文档中的links和设置高亮颜色
如何设置是否高亮PDF文档中的links? 以及如何设置高亮的颜色?
默认情况下,高亮PDF文档中的links功能是启用的。如果您想要禁用它或者设置高亮颜色,可以通过JSON文件 (仅支持6.3及以上版本) 或调用API进行设置。
备注:如果您需要设置高亮的颜色,请确保links高亮的功能是启用的。
通过JSON文件
设置 ““highlightLink“: false,” 在PDF文档中禁用links高亮功能。
设置 ““highlightLinkColor“: “#16007000“,” 设置高亮颜色 (输入您需要的颜色值)。
通过调用API
UIExtensionsManager.enableHighlightLinks属性用来设置是否在PDF文档中启用links高亮的功能。如果您不需要启用该功能,请将其参数设置为 “false”,如下所示:
// Assume you have already Initialized a UIExtensionsManager object
extensionsManager.enableHighlightLinks = false;
UIExtensionsManager.linksHighlightColor 属性用来设置高亮的颜色。以下是设置该属性的示例代码:
// Assume you have already Initialized a UIExtensionsManager object
extensionsManager.linksHighlightColor = [UIColor colorWithRed:0 green:0 blue:1 alpha:0.3];
高亮PDF文档中的表单域和设置高亮颜色
如何设置是否高亮PDF文档中的表单域? 以及如何设置高亮的颜色?
默认情况下,高亮PDF文档中的表单域功能是启用的。如果您需要设置高亮的颜色,请确保表单域高亮的功能是启用的。
从6.3版本开始,您可以通过JSON配置文件轻松地启用/禁用表单域高亮功能,以及设置高亮的颜色,只需要设置如下的两个配置项:
"highlightForm": true,
"highlightFormColor": "#200033cc",
对于6.3之前的版本,如果您需要启用/禁用表单域高亮功能,或者设置高亮的颜色,您需要使用FSFormFiller::highlightFormFields 和 FSFormFiller::setHighlightColor 接口修改UI Extensions 组件的源代码。
FSFormFiller::highlightFormFields接口用来设置是否启用PDF文档中的表单域高亮功能。请参考4.3小节 “通过源代码自定义UI实现” 将 “libs/uiextensions_src” 文件夹下的 “uiextensions” 工程添加到您的工程中。然后,在 “UIExtensions/Form/FormAnnotHandler.m” 文件中找到onDocOpened函数,将FSFormFiller::highlightFormFields的参数设置为 “false”,如下所示:
- (void)onDocOpened:(FSPDFDoc* )document error:(int)error
{
...
...

    [_formFiller highlightFormFields:false];
}
FSFormFiller::setHighlightColor接口用来设置高亮的颜色。以下是调用此API的示例代码:
- (void)onDocOpened:(FSPDFDoc* )document error:(int)error
{
...
...

    [_formFiller highlightFormFields:ture];
    [_formFiller setHighlightColor:0x4b00ff00];
}
支持全文索引搜索
Foxit PDF SDK for iOS是否支持全文索引搜索?如果支持,如何搜索在我的移动设备上离线存储的PDF文件?
是的。Foxit PDF SDK for iOS支持全文索引搜索。
要使用此功能,请按照如下的步骤:
a)根据目录来创建一个文档来源,该目录为文档的搜索目录。
-(id)initWithDirectory: (NSString *)directory;
b)创建一个全文文本搜索对象,以及设置用于存储索引数据的数据库路径。
-(id)init;
-(void)setDataBasePath:(NSString *)path_of_data_base;
c)开始索引文档来源中的PDF文档。
-(FSProgressive*)startUpdateIndex: (FSDocumentsSource*)source pause: (id<FSPauseCallback>)pause reUpdate:(BOOL)reUpdate;
备注:您可以索引指定的PDF文件。例如,如果某个PDF文档的内容发生了更改,您可以使用以下的API对其重新进行索引:
-(BOOL)updateIndexWithFilePath: (NSString *)file_path;
d)从索引数据源中搜索指定的内容。搜索的结果将通过指定的回调函数来返回给外部,每找到一个匹配结果,则调用一次回调函数。
-(BOOL)searchOf: (NSString *)match_string rank_mode:(FSFullTextSearchRankMode)rank_mode callback: (id<FSSearchCallback>)Callback;
如下是使用全文索引搜索的示例代码:
- (void)FullTextSearch {

    NSString *directory = @"INPUT_DIRECTORY";
    FSDocumentsSource* docs = [[FSDocumentsSource alloc] initWithDirectory:directory];
    FSFullTextSearch* fulltextSearch = [FSFullTextSearch init];

    NSString* dbPath = @"The path of data base to store the indexed data...";
    [fulltextSearch setDataBasePath:dbPath];

    FSProgressive* progressive = [fulltextSearch startUpdateIndex:docs pause:nil reUpdate:NO];
    if (progressive) {
        while (true) {
            if ([progressive resume] != FSProgressiveToBeContinued) {
                break;
            }
        }
    }

    [fulltextSearch searchOf:@"Foxit" RankMode:FSFullTextSearchRankNone callback:[[FSSearchCallbackImp alloc] init]];
}

@end
回调函数的示例代码如下所示:
@interface FSSearchCallbackImp: NSObject<FSSearchCallback>

@end

@implementation FSSearchCallbackImp

-(int)retrieveSearchResult:(NSString*)file_path page_index:(int)page_index match_result:(NSString*)match_result match_start_text_index:(int)match_start_text_index match_end_text_index:(int)match_end_text_index
{
    NSLog (@"file_path: %@\n", file_path);
    NSLog (@"page_index: %i, match_start_text_index: %i, match_end_text_index: %i\n", page_index, match_start_text_index, match_end_text_index);
    NSLog (@"match_result: %@\n\n", match_result);
    return 0;
}

@end
Note:
- Foxit PDF SDK for Android提供的全文索引搜索将以递归的方式遍历整个目录,以便搜索目录下的文件和文件夹都会被索引。
- 如果需要中止索引进程,可以将pause回调参数传递给startUpdateIndex接口。其回调函数NeedPauseNow都会被调用,一旦完成一个PDF文档的索引。因此,调用者可以在回调函数NeedPauseNow返回 “true“ 时中止索引进程。
- 索引数据库的位置由setDataBasePath接口设置。如果要清除索引数据库,请手动清除。目前,不支持从索引函数中删除指定文件相关的索引内容。
- searchOf接口的每个搜索结果都由指定的回调返回到外部。一旦searchOf接口返回“true“或 “false“,则表示搜索已完成。
打印PDF文档
Foxit PDF SDK for iOS是否支持打印PDF文档?如果支持,如何使用?
是的。Foxit PDF SDK for iOS从5.1版本开始支持打印PDF文档的功能。您可以在Complete PDF viewer demo的More Menu View菜单中点击Wireless Print 按钮来打印PDF文档。此外,您可以调用以下API来打印PDF文档:
// for iPhone and iTouch
(void)printDoc:(FSPDFDoc *)doc animated:(BOOL)animated jobName:(nullable NSString *)jobName delegate:(nullable id<UIPrintInteractionControllerDelegate>)delegate completionHandler:(nullable UIPrintInteractionCompletionHandler)completion;
// for iPad
(void)printDoc:(FSPDFDoc *)doc fromRect:(CGRect)rect inView:(UIView *)view animated:(BOOL)animated jobName:(nullable NSString *)jobName delegate:(nullable id<UIPrintInteractionControllerDelegate>)delegate completionHandler:(nullable UIPrintInteractionCompletionHandler)completion;
使用PDF打印功能的示例代码:
UIPrintInteractionCompletionHandler completion = ^(UIPrintInteractionController *_Nonnull printInteractionController, BOOL completed, NSError *_Nullable error) {
    if (error) {
       UIAlertAction* action = [UIAlertAction actionWithTitle:[@"Warning:" stringByAppendingString:error.localizedDescription] style:UIAlertActionStyleDefault handler:nil];
       UIAlertController* controller = [[UIAlertController alloc] init];
       [controller addAction:action];

       [self showViewController:controller sender:nil];
    }
};
NSString *fileName = @"xxx.pdf";
FSPDFDoc* doc = [[FSPDFDoc alloc] initWithPath:fileName];
[UIExtensionsManager printDoc: doc animated:YES jobName:fileName delegate:nil completionHandler:completion];
夜间模式颜色设置
如何设置夜间模式颜色?
从6.3版本开始,您可以在JSON配置文件中轻松地设置夜间模式的颜色,只需要设置以下两个配置项:
"mapForegroundColor": "#5d5b61",
"mapBackgroundColor": "#000056",
从5.1版本开始,设置夜间模式颜色,需要首先设置FSPDFViewCtrl.mappingModeBackgroundColor 和 FSPDFViewCtrl.mappingModeForegroundColor属性,然后将FSPDFViewCtrl.colorMode设置为FSRendererColorModeMapping。
备注:如果FSPDFViewCtrl.colorMode已经设置为FSRendererColorModeMapping,在更新FSPDFViewCtrl.mappingModeBackgroundColor 和 FSPDFViewCtrl.mappingModeForegroundColo属性之后,您仍然需要再次设置。否则,颜色设置可能不会起作用。
上述的属性需要在UI Extensions组件的源代码中修改,请参考4.3小节 “通过源代码自定义UI实现” 将 “libs/uiextensions_src” 文件夹下的 “uiextensions” 工程添加到您的工程中。然后在”UIExtensions/UIExtensionsManager.m” 文件中定位到settingBar 函数,根据您的需要修改属性的颜色。
设置夜间模式颜色的示例代码:
- (void)settingBar:(SettingBar *)settingBar setNightMode:(BOOL)isNightMode {
    if (isNightMode) {
        // Set background color.
        self.pdfViewCtrl.mappingModeBackgroundColor = [UIColor redColor];
        // Set foreground color.
        self.pdfViewCtrl.mappingModeForegroundColor = [UIColor greenColor];
        // Set color mode.
        self.pdfViewCtrl.colorMode = FSRendererColorModeMapping;
        // set the background color for the areas that are out of the pdfviewctrl.
        self.pdfViewCtrl.backgroundColor = [UIColor colorWithRed:20.0/255.0 green:20.0/255.0 blue:20.0/255.0 alpha:1.0];
    }
    else {
        self.pdfViewCtrl.colorMode = FSRendererColorModeNormal;
        self.pdfViewCtrl.backgroundColor = [UIColor colorWithRed:230.0/255.0 green:230.0/255.0 blue:230.0/255.0 alpha:1.0];
    }
    self.hiddenSettingBar = YES;
}
Foxit SDK Framework 上传到Apple App Store
为什么当我在上传嵌入Foxit PDF SDK framework的应用程序到Apple App Store时,会出现“Invalid Binary Architecture“ 警告和 “Code signing “FoxitRDK.framework“ failed“ 错误?
Foxit SDK Framwork包括arm64,armv7,i386和x86_64架构,但是i386和x86_64架构的framework不允许上传到Apple App Store,因此,如果您直接使用这两种架构的framework就会遇到 “Invalid Binary Architecture” 的警告和 “Code signing “FoxitRDK.framework” failed” 错误。
为了解决这个问题,Foxit SDK在 “libs” 文件夹下提供了一个名为 “prepare-framework-to-publish-to-appstore.sh” 的脚本来剥离arm架构,然后将剥离出的库保存在 “./device/FoxitRDK.framework” 目录下。您应该在工程中使用此库,这样您的应用程序才能被上传到Apple App Store。
输出exception/crash日志信息
如何在应用程序抛出异常或者crash时,输出exception/crash日志信息?
如果您需要输出exception/crash日志信息,您只需要实现<IExceptionLogger>协议,然后调用FSPDFViewControl::setExceptionLogger接口即可。
本地化设置
如何使用Foxit PDF SDK for iOS更改本地化设置?
默认情况下,Foxit PDF SDK for iOS会根据您系统的当前语言自动切换UI语言,前提是Foxit PDF SDK for iOS支持该语言。
当前,Foxit PDF SDK for iOS 支持如下的语言:英语(English),韩语(Korean) 和 中文(Chinese,简体中文和繁体中文)。这些语言的资源文件位于”libs\uiextensions_src\UIExtensions\Resource\FoxitLocalizable”文件夹下。
如果您需要使用自己本地的语言 (而该语言是Foxit PDF SDK for iOS当前不支持的语言),请参考如下的说明:
- 对于SDK 6.4版本,您可以参阅文章https://developers.foxitsoftware.com/kb/article/change-localization-settings-pdf-sdk-ios/ 来进行本地化设置,需要在UIExtensions组件中进行相关的设置。
- 对于SDK 7.0及以上版本,您可以直接在您的工程中进行设置。首先,在工程中添加您需要的本地语言,然后将生成的语言文件中的所有字段都翻译成您需要的本地语言。其次,调用FSLocalization::addLanguage 接口添加新加的语言。最后,修改您系统的当前语言为您本地的语言,或者调用FSLocalization::setCurrentLanguage接口使其生效。
技术支持
问题报告
Foxit为其产品提供全天候24小时支持,并拥有PDF行业优秀的技术支持工程师开发团队。如果您在使用Foxit PDF SDK for iOS时遇到任何技术问题或bug,请在http://tickets.foxitsoftware.com/create.php 网页上将问题报告提交给Foxit技术支持团队。为了更好地帮助您解决问题,请提供以下信息:
- 联系方式
- Foxit PDF SDK产品和版本
- 您使用的操作系统和IDE版本
- 问题的详细说明
- 任何其他相关信息,例如日志文件或错误信息截图
联系方式
您可以直接联系Foxit,请使用以下的联系方式:
线上支持:
联系销售:
- 电话: 1-866-680-3668
- 邮箱: sales@foxitsoftware.com
联系技术支持团队:
- 电话: 1-866-MYFOXIT or 1-866-693-6948
- 邮箱: support@foxitsoftware.com