Foxit PDF SDK 简介
您是否曾经想要构建一个可以对PDF文档进行任何操作的应用程序?如果您的答案是”Yes”, 那么恭喜您!您找到了业界中可以构建稳定、安全、高效且功能齐全的PDF应用的优选解决方案。
Foxit PDF SDK提供高性能的开发库,帮助软件开发人员使用最流行的开发语言和环境在不同平台 (包括Windows、Mac、Linux、Web、Android、iOS 和 UWP) 的企业版、移动版和云应用程序中添加强大的PDF功能。
为什么选择Foxit PDF SDK
Foxit 是领先的PDF软件解决方案供应商,专注于PDF显示、编辑、创建、管理以及安全方面。Foxit PDF SDK 开发库已在当今许多知名的应用程序中使用,并且经过长期的测试证明Foxit PDF SDK的质量、性能和功能正是业界大部分应用程序所需要的。选择Foxit PDF SDK 产品的几大理由:
易于集成
开发人员可以将SDK无缝集成到他们自己的应用程序中。
轻量级
部署简单快速,占用系统资源少。
支持跨平台
支持当前主流的平台,比如Windows、Mac、Linux、Web、Android、iOS和UWP。
基于福昕高保真的PDF渲染引擎
Foxit PDF SDK的核心技术是基于世界众多知名企业所信赖的福昕PDF引擎。福昕强大的PDF引擎可快速解析和渲染文档,不受设备环境的约束。
优秀的技术支持
福昕对自己的开发产品提供了优秀的技术支持,当您在开发关键重要的产品时,可以提供高效的帮助和支持。福昕拥有一支PDF行业优秀的技术支持工程师团队,同时将定期地进行版本更新发布,通过添加新的功能和增强已有的功能来提升用户体验。
Foxit PDF SDK for Java
使用Foxit PDF SDK的应用程序开发人员可以利用Foxit强大、符合标准的PDF技术来安全地显示、创建、编辑、注释、格式化、组织、打印、共享、保护、搜索文档,以及填写PDF表单。此外,Foxit PDF SDK (C++和.NET) 包含一个内置可嵌入的PDF Viewer,使开发过程更容易和更快捷。有关更多详细信息,请访问网站https://developers.foxitsoftware.cn/pdf-sdk/。
在本手册中,我们专注于介绍Windows和Linux平台的Foxit PDF SDK for Java API。
Foxit PDF SDK for Java API提供简单易用的API,帮助Java开发人员将强大的PDF技术无缝集成到他们自己的Windows和Linux平台项目中。并且提供了PDF文档相关的丰富功能,比如PDF浏览、书签导航、文本选择/复制/搜索、PDF签名、PDF表单、权限管理、PDF注释以及全文搜索等。
评估
用户可申请下载Foxit PDF SDK的试用版本进行试用评估。试用版除了有试用期10天时间的限制以及生成的PDF页面上会有试用水印以外,其他都和标准认证版一样。当试用期到期后,用户需联系福昕销售团队并购买licenses以便继续使用Foxit PDF SDK.
授权
程序开发人员需购买licenses授权才能在其解决方案中使用Foxit PDF SDK。Licenses授予用户发布基于Foxit PDF SDK开发的应用程序的权限。然而,在未经福昕软件公司授权下,用户不能将Foxit PDF SDK包中的任何文档、示例代码以及源代码分发给任何第三方机构。
关于此文档
此文档适用于需要使用Java开发语言将Foxit PDF SDK集成到自己的应用程序中的开发人员。它旨在介绍SDK 包结构和SDK的用法。
入门指南
安装并集成Foxit PDF SDK非常简单。本手册将提供SDK包的简要介绍。本章的主要内容是介绍系统要求、SDK包结构、以及如何运行demo和创建自己的项目。
系统要求
| 平台 | 系统要求 | JDK 版本 | 备注 |
| Windows | Windows XP, Vista, 7, 8 和 10 (32-bit 和 64-bit) Windows Server 2003, 2008 和 2012 (32-bit 和 64-bit) |
1.8或更高版本 | 仅支持 Windows 8/10经典样式,不支持Store APP和 Universal App。 |
| Linux | 32-bit 和 64-bit OS | 1.8或更高版本 |
包结构说明
Windows Java包命名为 “foxitpdfsdk_7_2_win_java.zip”,Linux Java包命名为”foxitpdfsdk_7_2_linux_java.zip”。它们具有相同的包结构,因此在本手册中主要以”foxitpdfsdk_7_2_win_java.zip” 为例来进行介绍。
下载Windows Java包,解压到一个新的目录如 “foxitpdfsdk_7_2_win_java”,如Figure 2-1所示。
备注:图片上面高亮的矩形区域指的是SDK的版本号,当前SDK的版本是7.2,则其代表7_2。手册中其他图片上面的高亮矩形也具有同样的含义。
其中解压包中包括如下的内容:
doc: API 手册,开发者指南
examples: 示例工程和demos
lib: SDK库和授权文件
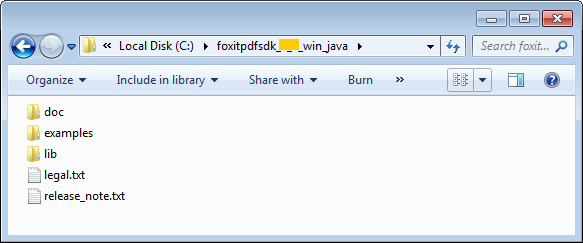
Figure 2-1
初始化Foxit PDF SDK
在调用任何APIs之前,应用程序必须使用license授权码初始化Foxit PDF SDK 库。静态初始化函数Library.initialize(sn, key) 在com.foxit.sdk.common.Library中。试用license文件在 “lib” 文件夹下。
初始化Foxit PDF SDK的示例:
// The value of "sn" can be got from "gsdk_sn.txt" (the string after "SN=").
// The value of "key" can be got from "gsdk_key.txt" (the string after "Sign=").
int error_code = Library.initialize("sn", "key");
if (error_code != e_ErrSuccess) {
  return;
}
运行demo
使用批处理脚本运行demo
Foxit PDF SDK在 “\examples\simple_demo” 目录下提供了一些简单示例demo。除了Windows平台下的ocr 和html2pdf demo,以及Windows和Linux平台下的compliance demo以外,其他demo都可以直接运行”\examples\simple_demo” 下的 “.bat” 或者 “.sh” 文件:
- 在 “\examples\simple_demo” 目录下,Windows平台运行 “RunAllDemo.bat”,Linux平台运行 “RunAllDemo.sh”。
- 如果您只需要运行某个特定的demo,请定位到该demo的目录,例如,定位到”\examples\simple_demo\annotation”,Windows平台运行 “RunDemo.bat”,Linux平台运行”RunDemo.sh”。
“\examples\simple_demo\input_files” 文件夹下包含了所有demo使用的输入文件。对于会生成输出文件 (pdf, 文本或者图片文件) 的demo,会在 “\examples\simple_demo\output_files\” 文件夹下生成以该demo名称命名的文件夹,并且输出文件将会在该文件夹下生成。
OCR 和Compliance demo
对于ocr 和 compliance demo,您需要首先构建一个资源目录,请联系Foxit支持团队或者销售团队获取相应的资源包。关于如何运行该demo的更详细的信息,请参考3.33小节 “OCR” 和3.34小节 “Compliance“.
HTML to PDF demo
对于html2pdf demo,您需要首先联系Foxit支持团队或者销售团队获取HTML 转PDF的引擎包。关于如何运行该demo的更详细的信息,请参考3.36小节 “HTML转PDF“。
使用Eclipse IDE运行demo
为了减少发布包的大小,Foxit没有提供demo的Eclipse工程。因此,如果您需要在Eclipse IDE中运行demo,请按照如下的步骤操作:
1)在Eclipse中创建一个Java工程,然后参照下一小节 “创建一个简单的工程” 中的步骤1) 到步骤3) 将SDK 库集成到工程中。
2)将您需要运行的demo的java文件拷贝到工程中。例如,对于image2pdf demo,将”\examples\simple_demo\image2pdf” 目录下的 “image2pdf.java” 文件拷贝到工程的 “src” 文件夹下。
3)打开Java文件,根据您的需要修改output_path 和 input_path 路径。例如,如果您需要使用代码中默认的测试文件,则需要使用绝对路径,该路径指向”examples\simple_demo” 目录下的”output_files” 和 “input_files”文件夹。
4)运行demo。右击工程,选择Run As -> Java Application运行该工程。
备注:
- 对于ocr 和 compliance demo,您需要构建一个资源目录,请参考3.33小节 “OCR” 和3.34小节 “Compliance“.
- 对于html2pdf demo,您需要首先获取HTML 转PDF的引擎包,然后指定html2pdf引擎目录,请参考3.36小节 “HTML转PDF”。
创建一个简单的工程
本节主要介绍如何使用Foxit PDF SDK for Windows Java (Linux Java的用法与Windows Java类似) 创建一个简单的工程,该工程将PDF文档的首页渲染成bitmap,然后将其另存为JPG图片。为了更易于编写代码,我们使用Eclipse IDE创建一个名为 “test” 的Java工程。然后按照如下的步骤操作:
1)将SDK包中的 “lib” 文件夹拷贝到工程文件夹下,然后刷新工程,test工程的结构将如Figure 2-2所示。
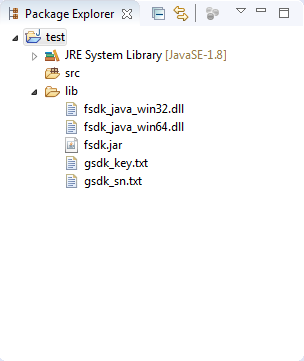
Figure 2-2
2)添加 “fsdk.jar”。右击test 工程,选择 “Build Path > Configure Build Path > Libraries > Add JARs”,然后选择 “test/lib” 下的 “fsdk.jar”,如Figure 2-3所示。
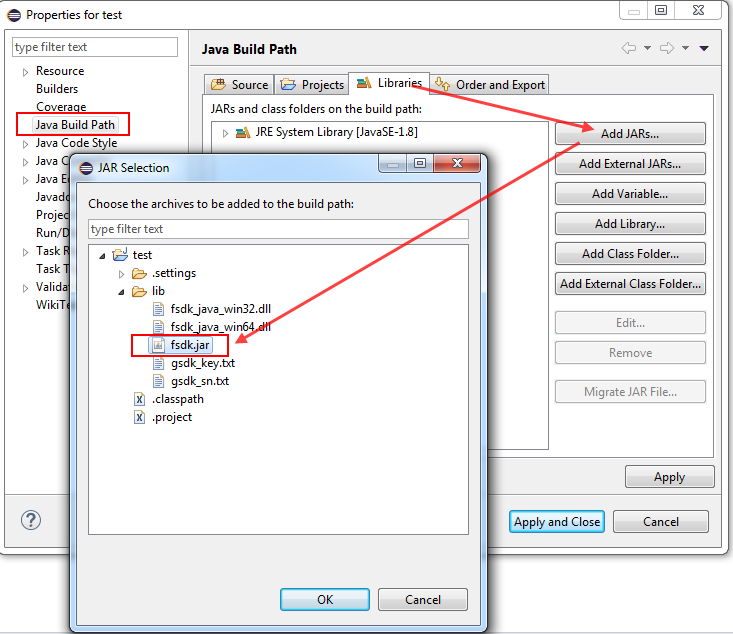
Figure 2-3
3)配置 .dll (Windows) 和 .so (Linux) 库的编译路径。右击test 工程,选择 “Build Path > Configure Build Path > Source > Native library location: (None) > Edit”,然后定位到 “test/lib” 文件夹,如Figure 2-4所示。
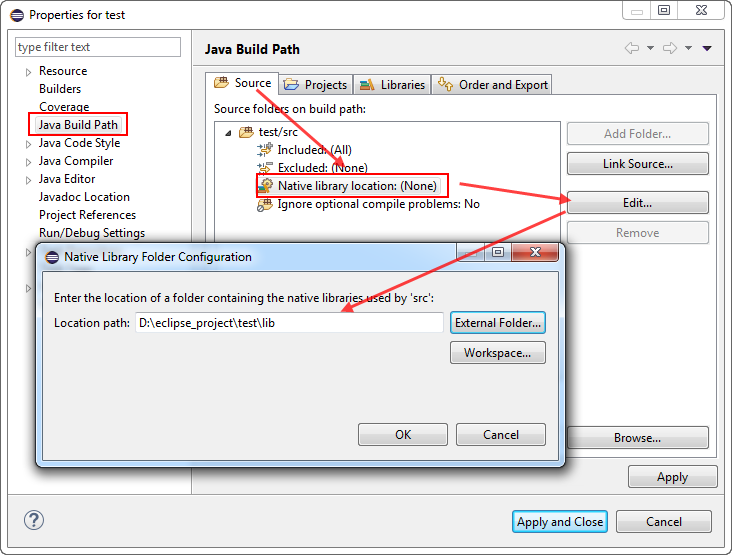
Figure 2-4
4)在 “test/src/test” 目录下新建一个名为 “test.java” 的类。
5)打开 “test.java” 文件,导入 “fsdk.jar” 中您需要使用的类。在这里,我们只导入以下的类:
import com.foxit.sdk.PDFException;
import com.foxit.sdk.common.Bitmap;
import com.foxit.sdk.common.Image;
import com.foxit.sdk.common.Library;
import com.foxit.sdk.common.Renderer;
import com.foxit.sdk.common.fxcrt.Matrix2D;
import com.foxit.sdk.pdf.PDFDoc;
import com.foxit.sdk.pdf.PDFPage;
6)初始化Foxit PDF SDK。在调用任何APIs之前,应用程序必须使用license授权码初始化Foxit PDF SDK 库。试用license文件在 “lib” 文件夹下。
// The value of "sn" can be got from "gsdk_sn.txt" (the string after "SN=").
// The value of "key" can be got from "gsdk_key.txt" (the string after "Sign=").
String sn = "";
String key = "";
int error_code = Library.initialize(sn, key);
if (error_code != e_ErrSuccess) {
       return;
}
备注:参数 “sn”的值在 “gsdk_sn.txt” 中 (“SN=”后面的字符串),“key” 的值在 “gsdk_key.txt“中 (“Sign=”后面的字符串)。
7)加载一个PDF文档,然后解析该文档的首页。假设您已经在 “test” 文件夹下放入了一个 “Sample.pdf” 文件。
// load a "Sample.pdf" document.
PDFDoc doc = new PDFDoc("Sample.pdf");
error_code = doc.load(null);
if (error_code != e_ErrSuccess) {
    return;
}

// Get the first page of the document.
PDFPage page = doc.getPage(0);

// Parse page.
page.startParse(e_ParsePageNormal, null, false);
8)将页面渲染成bitmap,然后将其另存为JPG图片。
int width = (int) page.getWidth();
int height = (int) page.getHeight();
Matrix2D matrix = page.getDisplayMatrix(0, 0, width, height, page.getRotation());

// Prepare a bitmap for rendering.
Bitmap bitmap = new Bitmap(width, height, e_DIBArgb, null, 0);
bitmap.fillRect(0xFFFFFFFF, null);

// Render page
Renderer render = new Renderer(bitmap, false);
render.startRender(page, matrix, null);

// Add the bitmap to image and save the image.
Image image = new Image();
image.addFrame(bitmap);
image.saveAs("testpage.jpg");
9)编译和运行工程。在package explorer中右击test 工程,选择 “Run as > Java Application” 运行工程,然后在 “test” 文件夹下将会生成 “testpage.jpg” (如Figure 2-5所示) 。
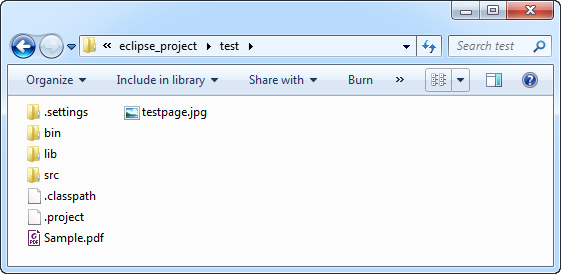
Figure 2-5
“test.java” 的完整内容如下:
package test;

import com.foxit.sdk.PDFException;
import com.foxit.sdk.common.Bitmap;
import com.foxit.sdk.common.Image;
import com.foxit.sdk.common.Library;
import com.foxit.sdk.common.Renderer;
import com.foxit.sdk.common.fxcrt.Matrix2D;
import com.foxit.sdk.pdf.PDFDoc;
import com.foxit.sdk.pdf.PDFPage;

import static com.foxit.sdk.common.Bitmap.e_DIBArgb;
import static com.foxit.sdk.common.Constants.e_ErrSuccess;
import static com.foxit.sdk.pdf.PDFPage.e_ParsePageNormal;

public class test {

    public static void main(String[] args) throws PDFException {

        // The value of "sn" can be got from "gsdk_sn.txt" (the string after "SN=").
        // The value of "key" can be got from "gsdk_key.txt" (the string after "Sign=").
    String sn = "";
    String key = "";
        int error_code = Library.initialize(sn, key);
        if (error_code != e_ErrSuccess) {
            return;
    }

        // load a "Sample.pdf" document.
    PDFDoc doc = new PDFDoc("Sample.pdf");
        error_code = doc.load(null);
        if (error_code != e_ErrSuccess) {
            return;
    }

        // Get the first page of the document.
    PDFPage page = doc.getPage(0);

        // Parse page.
        page.startParse(e_ParsePageNormal, null, false);

        int width = (int) page.getWidth();
        int height = (int) page.getHeight();
    Matrix2D matrix = page.getDisplayMatrix(0, 0, width, height, page.getRotation());

        // Prepare a bitmap for rendering.
    Bitmap bitmap = new Bitmap(width, height, e_DIBArgb, null, 0);
        bitmap.fillRect(0xFFFFFFFF, null);

        // Render page.
    Renderer render = new Renderer(bitmap, false);
        render.startRender(page, matrix, null);

        // Add the bitmap to image and save the image.
    Image image = new Image();
        image.addFrame(bitmap);
        image.saveAs("testpage.jpg");
}
}
备注:如果您计算机中没有安装Eclipse IDE,那么您可以创建一个Java文件,然后使用命令行来编辑和运行该Java文件。例如,使用上述Eclipse IDE中创建的 “test.java“ 文件,然后按照以下步骤操作:
- 创建一个名为 “test_cm“ 的文件夹。将 “test.java“拷贝到该文件夹下。(请注意:您需要删除 “test.java”中的第一行 “package test;“) 。
- 将SDK包中的 “lib“ 文件夹拷贝到 “test.java”同目录下 (test_cm)。
- 在 “test_cm” 文件夹下添加一个名为 “Sample.pdf“的PDF文档。
- 打开命令行终端,导航到 “test_cm” 文件夹,然后使用以下的命令编译和运行该Java文件。
For Windows,
javac -cp .;./lib/fsdk.jar *.java
java -Djava.library.path=lib -classpath .;lib/fsdk.jar test
For Linux,
javac -cp .:./lib/fsdk.jar *.java
java -Djava.library.path=lib -classpath .:lib/fsdk.jar test
使用 SDK API
在本节中,我们将介绍Foxit PDF SDK的主要功能,并列举相关示例来展示如何使用Foxit PDF SDK Java API将强大的PDF功能集成到您的应用程序中。您可以参阅API reference [2] 来获取示例中APIs更详细的使用说明。
初始化库
在调用任何API之前,都需要首先初始化Foxit PDF SDK。Library.initialize用来初始化Foxit PDF SDK,您需要购买正式的license来获取license key和序列号。当不再需要使用Foxit PDF SDK时,请调用Library.release将其释放。
备注:参数 “sn” 的值在 “gsdk_sn.txt” 中 (“SN=”后面的字符串),“key” 的值在 “gsdk_key.txt” 中 (“Sign=” 后面的字符串)。
Example:
如何初始化Foxit PDF SDK
import com.foxit.sdk.common.*;
import static com.foxit.sdk.common.Constants.e_ErrSuccess;

String sn = " ";
String key = " ";
int error_code = Library.initialize(sn, key);
if (error_code != e_ErrSuccess)
   return;
...
文档 (Document)
一个PDF document对象可以由一个已有的PDF文件从文件路径、内存缓冲区、自定义实现的ReaderCallback对象、输入文件流中构建。然后调用PDFDoc.load或者PDFDoc.startLoad加载文档内容。PDF document对象用于文档级操作,比如打开和关闭PDF文档,获取页面、metadata等。
Example:
如何从0开始创建一个PDF文档
import static com.foxit.sdk.pdf.PDFDoc.*;
...

PDFDoc doc = new PDFDoc();
备注:创建一个新的PDF文档,该文档没有任何页面。
如何通过文件路径加载一个现有的PDF文档
import static com.foxit.sdk.pdf.PDFDoc.*;
import static com.foxit.sdk.common.Constants.e_ErrSuccess;
...

PDFDoc doc = new PDFDoc("sample.pdf");
int error_code = doc.load(null);
if (error_code != e_ErrSuccess)
    return;
如何通过内存缓冲区加载一个现有的PDF文档
import static com.foxit.sdk.pdf.PDFDoc.*;
import static com.foxit.sdk.common.Constants.e_ErrSuccess;
import java.io.FileInputStream;
import java.io.BufferedInputStream;
...

BufferedInputStream bis = new BufferedInputStream(new FileInputStream("sample.pdf"));
byte[] b = new byte[bis.available()];
bis.read(b);
PDFDoc doc = new PDFDoc(b);
error_code = doc.load(null);
if (error_code != e_ErrSuccess)
   return;
如何通过自定义实现的ReaderCallback对象加载一个现有的PDF文档
import static com.foxit.sdk.pdf.PDFDoc.*;
import static com.foxit.sdk.common.Constants.e_ErrSuccess;
import java.io.IOException;
import com.foxit.sdk.common.fxcrt.FileReaderCallback;
import java.io.RandomAccessFile;
...

class FileReader extends FileReaderCallback {
    private RandomAccessFile file_ = null;
    FileReader() {
    }

    boolean LoadFile(String file_path) throws FileNotFoundException {
        file_ = new RandomAccessFile(file_path, "r");
        return true;
    }

    @Override
    public long getSize() {
        try {
            return this.file_.length();
        } catch (IOException e) {
            e.printStackTrace();
        }
        return 0;
    }

    @Override
    public boolean readBlock(byte[] buffer, long offset, long size) {

        try {
            file_.seek(offset);
            int read = file_.read(buffer, 0, (int) size);
            return read == size ? true : false;
        } catch (IOException e) {
            e.printStackTrace();
        }
        return false;
    }

    public void release() {
        try {
            this.file_.close();
        } catch (IOException e) {
            e.printStackTrace();
        }
    }
}

FileReader callback = new FileReader();
callback.LoadFile("sample.pdf");
PDFDoc doc = new PDFDoc(callback, false);
int error_code = doc.load(null);
if (error_code != e_ErrSuccess)
   return;
如何加载PDF文档以及获取文档的首页
import static com.foxit.sdk.pdf.PDFDoc.*;
import static com.foxit.sdk.pdf.PDFPage.*;
import static com.foxit.sdk.common.Constants.e_ErrSuccess;
import static com.foxit.sdk.pdf.PDFPage.e_ParsePageNormal;
...

PDFDoc doc = new PDFDoc("sample.pdf");
int error_code = doc.load(null);
if (error_code != e_ErrSuccess)
    return;

// Get the first page of the document.
PDFPage page = doc.getPage(0);
// Parse page.
page.startParse(e_ParsePageNormal, null, false);
如何将PDF文档另存为一个新的文档
import static com.foxit.sdk.pdf.PDFDoc.*;
import static com.foxit.sdk.pdf.PDFPage.*;
import static com.foxit.sdk.common.Constants.e_ErrSuccess;
import static com.foxit.sdk.pdf.PDFDoc.e_SaveFlagNoOriginal;
...

PDFDoc doc = new PDFDoc("sample.pdf");
int error_code = doc.load(null);
if (error_code != e_ErrSuccess)
    return;
doc.saveAs("new_Sample.pdf", e_SaveFlagNoOriginal);
如何通过FileWriterCallback将PDF文档保存到内存缓冲区
import static com.foxit.sdk.pdf.PDFDoc.*;
import static com.foxit.sdk.common.Constants.e_ErrSuccess;
import java.io.FileInputStream;
import java.io.BufferedInputStream;
...

class FileWriter extends FileWriterCallback {
    private ByteArrayOutputStream buf = new ByteArrayOutputStream();

    @Override
    public long getSize() {
        return buf.size();
    }

    @Override
    public boolean writeBlock(byte[] buffer, long offset, long size) {
        buf.write(buffer, (int)0, (int)size);
        return true;
    }

    @Override
    public void release() {
    }

    @Override
    public boolean flush() {
        return true;
    }
}

...
FileWriter filewriter = new FileWriter();

// Assuming PDFDoc doc has been loaded.
...

doc.startSaveAs(filewriter, e_SaveFlagNoOriginal,null);
...
页面 (Page)
PDF页面是PDF Document基础和重要的组成部分。PDFPage 使用函数PDFDoc.getPage从文档中获取PDFPage对象。页面级API提供了解析/渲染/编辑 (包括创建、删除、扁平化等) 页面、获取PDF注释、获取和设置页面属性等功能。对于大多数情况,在渲染和处理页面之前,需要先对页面进行解析。
Example:
如何获取页面的大小
import static com.foxit.sdk.pdf.PDFPage.*;
...

// Assuming PDFPage page has been loaded and parsed.
...
int width = (int) page.getWidth();
int height = (int) page.getHeight();
...
如何计算页面内容的边界框
import static com.foxit.sdk.pdf.PDFPage.*;
...

// Assuming PDFPage page has been loaded and parsed.
...
RectF calcRc = page.calcContentBBox(e_CalcContentsBox);
float fcalcRc = calcRc.width();
float fcalcRcHeight = calcRc.height();
如何创建一个PDF页面以及设置其页面大小
import static com.foxit.sdk.pdf.PDFPage.*;
...

// Assuming PDFDoc doc has been loaded.
// Insert a new blank PDF page to document, which will be inserted to the first page.
PDFPage newBlankPage = doc.insertPage(-1, 500, 800);
// Insert a new blank PDF page to document, which will be inserted at index 1.
PDFPage newBlankPage = doc.insertPage(1, 500, 800);
// Insert a new blank PDF page to document, which will be inserted to the end.
PDFPage newBlankPage = doc.insertPage(doc.getPageCount(), e_SizeLetter);
如何删除一个PDF页面
import static com.foxit.sdk.pdf.PDFDoc.*;
...

// Assuming PDFDoc doc has been loaded.

// Remove a PDF page by page index.
doc.removePage(index);

// Remove a specified PDF page.
doc.removePage(page);
...
如何扁平化一个PDF页面
import static com.foxit.sdk.pdf.PDFPage.*;
...

// Assuming PDFPage page has been loaded and parsed.

// Flatten all contents of a PDF page.
page.flatten(true, e_FlattenAll);

// Flatten a PDF page without annotations.
page.flatten(true, e_FlattenNoAnnot);

// Flatten a PDF page without form controls.
page.flatten(true, e_FlattenNoFormControl);

// Flatten a PDF page without annotations and form controls (Equals to nothing to be flattened).
page.flatten(true, e_FlattenNoAnnot | e_FlattenNoFormControl);
...
如何获取和设置PDF文档中的页面缩略图
import static com.foxit.sdk.pdf.PDFPage.*;
...

// Assuming PDFPage page has been loaded and parsed.
...
// Load the thumbnail bitmap. If the return value of function db.isEmpty() is true means no thumbnail can be found.
Bitmap db = page.loadThumbnail();
if (!db.isEmpty())
{
int dbWidth = db.getWidth();
int dbHeight = db.getHeight();
}
// Set page thumbnail, db should be a valid bitmap.
page.setThumbnail(db);
...
渲染 (Render)
PDF渲染是通过Foxit渲染引擎实现的,Foxit渲染引擎是一个图形引擎,用于将页面渲染到位图或平台设备上下文。 Foxit PDF SDK提供了APIs用来设置渲染选项/flags,例如设置 flag来决定是否渲染表单域和签名,是否绘制图像反锯齿 (anti-aliasing) 和路径反锯齿。可以使用以下APIs进行渲染:
- 渲染页面和注释时,首先使用Renderer.setRenderContentFlags接口来决定是否同时渲染页面和注释,然后使用Renderer.startRender接口进行渲染。Renderer.startQuickRender接口也可以用来渲染页面,但仅用于缩略图。
- 渲染单个annotation注释,使用Renderer.renderAnnot接口。
- 在位图上渲染,使用Renderer.startRenderBitmap接口。
- 渲染一个重排的页面,使用Renderer.startRenderReflowPage接口。
在Foxit PDF SDK中,Widget注释常与表单域和表单控件相关联。渲染widget注释,推荐使用如下的流程:
- 加载PDF页面后,首先渲染页面以及该页面上所有的注释 (包括widget注释)。
- 然后,如果使用com.foxit.sdk.pdf.interform.Filler对象来填表,则应使用pdf.interform.Filler.render接口来渲染当前获取到焦点的表单控件,而不是使用Renderer.renderAnnot接口。
Example:
如何将PDF页面渲染到bitmap
import com.foxit.sdk.pdf.PDFDoc;
import com.foxit.sdk.pdf.PDFPage;
import com.foxit.sdk.common.Bitmap;
import com.foxit.sdk.common.Renderer;
import com.foxit.sdk.common.fxcrt.Matrix2D;

import static com.foxit.sdk.common.Bitmap.e_DIBArgb;

// Assuming PDFPage page has been loaded and parsed.

int width = (int) page.getWidth();
int height = (int) page.getHeight();
Matrix2D matrix = page.getDisplayMatrix(0, 0, width, height, page.getRotation());

// Prepare a bitmap for rendering.
Bitmap bitmap = new Bitmap(width, height, e_DIBArgb, null, 0);
bitmap.fillRect(0xFFFFFFFF, null);

// Render page.
Renderer render = new Renderer(bitmap, false);
render.startRender(page, matrix, null);
...
如何渲染页面和注释
import com.foxit.sdk.pdf.PDFDoc;
import com.foxit.sdk.pdf.PDFPage;
import com.foxit.sdk.common.Bitmap;
import com.foxit.sdk.common.Renderer;
import com.foxit.sdk.common.fxcrt.Matrix2D;

import static com.foxit.sdk.common.Bitmap.e_DIBArgb;

// Assuming PDFPage page has been loaded and parsed.

int width = (int) page.getWidth();
int height = (int) page.getHeight();
Matrix2D matrix = page.getDisplayMatrix(0, 0, width, height, page.getRotation());

// Prepare a bitmap for rendering.
Bitmap bitmap = new Bitmap(width, height, e_DIBArgb, null, 0);
bitmap.fillRect(0xFFFFFFFF, null);

Renderer render(bitmap, false);
render.setRenderContentFlags(e_RenderAnnot | e_RenderPage);
render.startRender(page, matrix, null);
...
附件 (Attachment)
在Foxit PDF SDK中,attachments指的是文档附件而不是文件附件注释。它允许将整个文件封装在文档中,就像电子邮件附件一样。Foxit PDF SDK提供应用程序APIs来访问附件,例如加载附件,获取附件,插入/删除附件,以及访问附件的属性。
Example:
如何从PDF文档中导出嵌入的附件文件,并将其另存为单个文件
import com.foxit.sdk.PDFException;
import com.foxit.sdk.common.Library;
import com.foxit.sdk.pdf.Attachments;
import com.foxit.sdk.pdf.FileSpec;
import com.foxit.sdk.pdf.PDFDoc;
import com.foxit.sdk.pdf.objects.PDFNameTree;
...

PDFNameTree empty_nametree = new PDFNameTree();
{
    // Get information of attachments.
    Attachments attachments = new Attachments(doc, empty_nametree);
    int count = attachments.getCount();
    for (int i = 0; i < count; i++) {
        String key = attachments.getKey(i);

        FileSpec file_spec = attachments.getEmbeddedFile(key);
        if (!file_spec.isEmpty()) {
            String name = file_spec.getFileName();

            if (file_spec.isEmbedded()) {
                String export_file_path = output_path + name;
                file_spec.exportToFile(export_file_path);
            }
        }
     }
}
如何删除PDF文档中所有的附件文件
import com.foxit.sdk.PDFException;
import com.foxit.sdk.common.Library;
import com.foxit.sdk.pdf.Attachments;

import com.foxit.sdk.pdf.PDFDoc;
import com.foxit.sdk.pdf.objects.PDFNameTree;
...

// Assuming PDFDoc doc has been loaded.

PDFNameTree empty_nametree = new PDFNameTree();
{

    // Get information of attachments.
    Attachments attachments = new Attachments(doc, empty_nametree);
    attachments.removeAllEmbeddedFiles();
}
...
文本页面 (Text Page)
Foxit PDF SDK提供APIs来提取,选择,搜索和检索PDF文档中的文本。 PDF文本内容存储在与特定页面相关的TextPage对象中。TextPage类可用于获取PDF页面中文本的信息,例如单个字符,单个单词,指定字符范围或矩形内的文本内容等。它还可用于构造其他文本相关类的对象,用来对文本内容执行更多操作或从文本内容访问指定信息:
- 在PDF页面的文本内容中搜索文本,使用TextPage对象来构建TextSearch对象。
- 访问类似超文本链接的文本,使用TextPage对象来构建PageTextLinks对象。
Example:
如何从PDF页面中提取文本
import com.foxit.sdk.pdf.PDFDoc;
import com.foxit.sdk.pdf.TextPage;
...
// Assuming PDFPage page has been loaded and parsed.

// Get the text page object.
TextPage textpage = new TextPage(page, e_ParseTextNormal);
int nCharCount = textpage.getCharCount();
String texts = textpage.getChars(0, nCharCount);
...
如何在PDF文档中获取矩形区域中的文本
import com.foxit.sdk.pdf.PDFDoc;
import com.foxit.sdk.pdf.TextPage;
import com.foxit.sdk.common.fxcrt.RectF;
import com.foxit.sdk.common.fxcrt.RectFArray;
...
// Assuming PDFPage page has been loaded and parsed.
...

TextPage textpage = new TextPage(page, e_ParseTextNormal);
RectF selRc = new RectF(100,100,250,250);
String selText = textpage.getTextInRect(selRc);
...
文本搜索 (Text Search)
Foxit PDF SDK 提供APIs来搜索PDF文档、XFA文档、文本页面或者PDF注释中的文本。它提供了文本搜索和获取搜索结果的函数:
- 指定搜索模式和选项,使用TextSearch.setPattern、TextSearch.setStartPage (仅对PDF文档中的文本搜索有用)、TextSearch.setEndPage (仅对PDF文档中的文本搜索有用)、和TextSearch.setSearchFlags接口。
- 进行搜索,使用TextSearch.findNext和TextSearch.findPrev接口。
- 获取搜索结果,使用TextSearch.getMatchXXX() 接口。
Example:
如何在PDF文档中搜索指定的文本
import com.foxit.sdk.common.fxcrt.RectF;
import com.foxit.sdk.common.fxcrt.RectFArray;
import com.foxit.sdk.pdf.PDFDoc;
import com.foxit.sdk.pdf.TextSearch;
...

TextSearch search = new TextSearch(doc, null);
int start_index = 0, end_index = doc.getPageCount() - 1;
search.setStartPage(0);
search.setEndPage(doc.getPageCount() - 1);
String pattern = "Foxit";
search.setPattern(pattern);
int flags = e_SearchNormal;
// if want to specify flags, you can do it like this:
// flags |= TextSearch::e_SearchMatchCase;
// flags |= TextSearch::e_SearchMatchWholeWord;
// flags |= TextSearch::e_SearchConsecutive;
search.setSearchFlags(flags);
int match_count = 0;
while (search.findNext()) {
RectFArray rect_array = search.getMatchRects();
match_count++;
}
...
文本链接 (Text Link)
在PDF页面中,指向网站、网络资源以及电子邮件地址的超链接文本和普通文本一样。在处理文本链接之前,用户应首先调用PageTextLinks.getTextLink接口来获取一个textlink对象。
Example:
如何检索PDF页面中的超链接
import com.foxit.sdk.pdf.PDFPage;
import com.foxit.sdk.pdf.annots.*;
...

// Assuming PDFPage page has been loaded and parsed.
...

TextPage text_page = new TextPage(page, TextPage.e_ParseTextNormal);
PageTextLinks page_textlinks = new PageTextLinks(text_page);
TextLink text_link = page_textlinks.getTextLink(index); // specify an index.
String str_uri = text_link.getURI();
...
书签 (Bookmark)
Foxit PDF SDK提供了名为书签的导航工具,允许用户在PDF文档中快速定位和链接他们感兴趣的部分。PDF书签也称为大纲 (outline),每个书签包含一个目标位置或动作来描述它链接到的位置。它是一个树形的层次结构,因此在访问bookmark 树之前,必须首先调用接口pdf.PDFDoc.getRootBookmark以获取整个bookmark树的根节点。这里,”书签根节点” 是一个抽象对象,它只有一些子节点,没有兄弟节点, 也没有任何数据 (包括bookmark数据,目标位置数据和动作数据)。因为它没有任何数据,因此无法在应用程序界面上显示,能够调用的接口只有Bookmark.getFirstChild。
在获取书签根节点后,就可以调用以下的接口去访问其他的书签:
- 访问parent bookmark,使用Bookmark.getParent接口。
- 访问第一个child bookmark,使用Bookmark.getFirstChild接口。
- 访问next sibling bookmark,使用Bookmark.getNextSibling接口。
- 插入一个新的bookmark,使用Bookmark.insert接口。
- 移动一个bookmark,使用Bookmark.moveTo接口。
Example:
如何遍历PDF文档中所有的书签
import com.foxit.sdk.pdf.Bookmark;
import com.foxit.sdk.pdf.PDFDoc;
...

// Assuming PDFDoc doc has been loaded.
...
Bookmark root = doc.getRootBookmark();
if (root.isEmpty()) {
root = doc.createRootBookmark();
}

String titleStr = "";
Bookmark iterBookmark = root.getFirstChild ();
if (iterBookmark.isEmpty())
return;
while (!iterBookmark.isEmpty())
{
titleStr = iterBookmark.getTitle();
if (iterBookmark.hasChild())
{
Bookmark childBookmark = iterBookmark.getFirstChild();
titleStr = childBookmark.getTitle();
}
iterBookmark = iterBookmark.getNextSibling();
}
...
表单 (AcroForm)
PDF目前支持两种类型的form,用于以交互方式收集用户信息:AcroForms 和 XFA forms。Acroforms是基于PDF框架的原始的可填写表单。Foxit PDF SDK提供了以编程方式查看和编辑表单域的APIs。在PDF文档中,表单域通常用于收集数据。Form类提供了APIs用来获取表单域或表单控件,导入/导出表单数据,以及其他功能,例如:
- 获取表单域,使用Form.getFieldCount和Form.getField接口。
- 获取PDF页面中的表单控件,使用Form.getControlCount和Form.getControl接口。
- 从XML文件导入表单数据,使用Form.importFromXML接口;导出表单数据到XML文件,使用Form.exportToXML接口。
- 获取form filler对象,使用Form.getFormFiller接口。
从FDF/XFDF文件中导入表单数据,或者导出数据到FDF/XFDF文件,请参考pdf.PDFDoc.importFromFDF 和 pdf.PDFDoc.exportToFDF 接口。
Example:
如何加载PDF中的表单
import com.foxit.sdk.pdf.interform.Form;
...

// Assuming PDFDoc doc has been loaded.
...

Boolean hasForm = doc.hasForm();
if(hasForm)
   Form form = new Form(doc);
...
如何获取表单域个数以及设置其属性
import com.foxit.sdk.pdf.interform.Form;
import com.foxit.sdk.pdf.interform.Control;
import com.foxit.sdk.pdf.interform.Field;
...

// Assuming PDFDoc doc has been loaded.
...

Form form = new Form(doc);
String filter = "";
int nControlCount = form.getFieldCount(filter);
for (int i=0; i<nControlCount; i++)
{
Field field = form.getField(i, filter);
String fdName = field.getName();
String fdValue = field.getValue();
String DefaultValue = field.getDefaultValue();
}
...
如何将PDF中的表单数据导出到XML文件
import com.foxit.sdk.pdf.interform.Form;
...

// Assuming PDFDoc doc has been loaded.
...

Form form = new Form(doc);
form.exportToXML("form.xml");
...
如何通过XML文件导入表单数据到PDF
import com.foxit.sdk.pdf.interform.Form;
...
Form form = new Form(doc);

form.importFromXML("form.xml");
...
XFA 表单
XFA (XML Forms Architecture) forms 是基于XML的表单,封装在PDF内。XFA提供了基于模板的语法和一系列处理规则,允许用户构建交互式表单。最简单的来说,基于模板的语法定义了用户数据的字段。
Foxit PDF SDK提供了APIs用来渲染XFA表单、填表、导出和导入表单数据。
备注:
- Foxit PDF SDK 提供了两个回调类com.foxit.sdk.addon.xfa.AppProviderCallback和com.foxit.sdk.addon.xfa.DocProviderCallback,分别将回调对象通过Library.registerXFAAppProviderCallback和XFADoc的构造函数注册到SDK中。这两个类中的所有函数都是纯虚函数,需要用户自己实现。
- 使用XFA form功能,请确保授权key文件中包含 ‘XFA’的权限。
Example:
如何加载XFADoc并且显示XFA交互式表单
import com.foxit.sdk.pdf.PDFDoc;
import com.foxit.sdk.pdf.PDFPage;
import com.foxit.sdk.PDFException;
import com.foxit.sdk.common.Library;
import com.foxit.sdk.common.WStringArray;
import com.foxit.sdk.common.Constants;
import com.foxit.sdk.addon.xfa.*;
import com.foxit.sdk.addon.xfa.XFADoc.*;
import com.foxit.sdk.common.fxcrt.*;
import com.foxit.sdk.common.WStringArray;
...

try {
       // Create com.foxit.sdk.addon.xfa.AppProviderCallback handler.
       XFAAppHandler xfa_app = new XFAAppHandler();
    // Register it in application.
       Library.registerXFAAppProviderCallback(xfa_app);

       String input_file = input_path + "xfa_dynamic.pdf";
       PDFDoc doc = new PDFDoc(input_file);
       int error_code = doc.load(null);
       if (error_code != e_ErrSuccess)
           return;

       // Create com.foxit.sdk.addon.xfa.DocProviderCallback handler.
       XFADocHandler xfa_dochandler = new XFADocHandler();
       // Load xfa document from pdf document.
       XFADoc xfa_doc = new XFADoc(doc, xfa_dochandler);
    xfa_doc.startLoad(null);

} catch (PDFException e) {
System.out.println(e.getMessage());
    return;
  }
...
如何导出和导入XFA表单数据
import com.foxit.sdk.pdf.PDFDoc;
import com.foxit.sdk.pdf.PDFPage;
import com.foxit.sdk.PDFException;
import com.foxit.sdk.common.Library;
import com.foxit.sdk.common.WStringArray;
import com.foxit.sdk.common.Constants;
import com.foxit.sdk.addon.xfa.*;
import com.foxit.sdk.addon.xfa.XFADoc.*;
import com.foxit.sdk.common.fxcrt.*;
import com.foxit.sdk.common.WStringArray;
...

// Assuming XFADoc xfa_doc has been loaded.

String output_xml = "xfa_form.xml";
xfa_doc.exportData(output_xml, XFADoc.e_ExportDataTypeXML);

xfa_doc.resetForm();
doc.saveAs("xfa_dynamic_resetform.pdf", PDFDoc.e_SaveFlagNormal);

xfa_doc.importData(output_xml);
doc.saveAs("xfa_dynamic_importdata.pdf", PDFDoc.e_SaveFlagNormal);

...
表单设计 (Form Design)
可填写的PDF表单 (AcroForm) 特别适用于各种应用程序表单设计,比如税收和其他政府部门表单。表单设计提供了APIs用来向PDF文件中添加表单域或者从PDF文档中移除表单域。从零开始设计一个表单允许开发人员创建他们需要的内容和布局的表单。
Example:
如何向PDF添加一个文本表单域
import com.foxit.sdk.pdf.interform.Form;
import com.foxit.sdk.pdf.interform.Control;
import com.foxit.sdk.pdf.PDFPage;
import com.foxit.sdk.common.fxcrt.RectF;
...

// Assuming PDFDoc doc has been loaded.
...

Form form = new Form(doc);
Control control = form.addControl(page, "Text Field0", Field.e_TypeTextField, new RectF(50, 600, 90, 640));
control.getField().setValue("3");
// Update text field's appearance.
control.getWidget().resetAppearanceStream();
...
如何从PDF中移除一个文本表单域
import com.foxit.sdk.pdf.interform.Form;
import com.foxit.sdk.pdf.interform.Control;
import com.foxit.sdk.pdf.interform.Field;
...

// Assuming PDFDoc doc has been loaded.
...

Form form = new Form(doc);
int nControlCount = form.getFieldCount("Text Field0");
if (nControlCount > 0)
{
Field field = form.getField(0, "Text Field0");
form.removeField(field);
}
...
注释 (Annotations)
常规注释
一个annotation注释将对象(如注释,线条和高亮)与PDF文档页面上的位置相关联。其提供了一种通过鼠标和键盘与用户进行交互的方式。PDF包括如Table 3-1中列出的各种标准注释类型。在这些注释类型中,许多被定义为标记注释,因为它们主要用于标记PDF文档。标记注释中作为其自身一部分的文本,可以在其他符合标准的阅读器中以其他方式显示,例如在Comments面板。Table 3-1中的 “Markup” 列用来说明是否为标记注释。
Foxit PDF SDK支持PDF Reference [1] 中定义的大多数注释类型。Foxit PDF SDK提供了注释创建,属性访问和修改,外观设置和绘制的APIs。
Table 3-1
| 注释类型 | 描述 | Markup | SDK是否支持 |
| Text(Note) | Text annotation | Yes | Yes |
| Link | Link Annotation | No | Yes |
| FreeText (TypeWriter/TextBox/Callout) |
Free text annotation | Yes | Yes |
| Line | Line annotation | Yes | Yes |
| Square | Square annotation | Yes | Yes |
| Circle | Circle annotation | Yes | Yes |
| Polygon | Polygon annotation | Yes | Yes |
| PolyLine | PolyLine annotation | Yes | Yes |
| Highlight | Highlight annotation | Yes | Yes |
| Underline | Underline annotation | Yes | Yes |
| Squiggly | Squiggly annotation | Yes | Yes |
| StrikeOut | StrikeOut annotation | Yes | Yes |
| Stamp | Stamp annotation | Yes | Yes |
| Caret | Caret annotation | Yes | Yes |
| Ink(pencil) | Ink annotation | Yes | Yes |
| Popup | Popup annotation | No | Yes |
| File Attachment | FileAttachment annotation | Yes | Yes |
| Sound | Sound annotation | Yes | No |
| Movie | Movie annotation | No | No |
| Widget* | Widget annotation | No | Yes |
| Screen | Screen annotation | No | Yes |
| PrinterMark | PrinterMark annotation | No | No |
| TrapNet | Trap network annotation | No | No |
| Watermark* | Watermark annotation | No | Yes |
| 3D | 3D annotation | No | No |
| Redact | Redact annotation | Yes | Yes |
备注:
- Widget和watermark注释类型是比较特殊的。’Annotation’ 模块不支持它们。Widget类型仅在 ‘form filler’ 模块中使用,watermark类型仅在 ‘watermark’ 模块中使用。
- Foxit SDK支持名为PSI (pressure sensitive ink,压感笔迹) 的自定义注释类型。在PDF Reference [1]中没有对该注释进行描述。通常,PSI用于手写签名功能,Foxit SDK将其视为PSI注释,以便其他PDF产品可以对其进行相关处理。
Example:
如何向PDF页面中添加link注释
import com.foxit.sdk.pdf.PDFPage;
import com.foxit.sdk.pdf.annots.Link;
...

// Assuming PDFPage page has been loaded and parsed.

// Add link annotation
Link link = new Link(page.addAnnot(Annot.e_Link, new RectF(350, 350, 380, 400)));
link.setHighlightingMode(Annot.e_HighlightingToggle);

// Appearance should be reset.
link.resetAppearanceStream();
...
如何向PDF页面中添加highlight注释,并且设置相关属性
import com.foxit.sdk.pdf.PDFPage;
import com.foxit.sdk.pdf.annots.Highlight;
import com.foxit.sdk.common.fxcrt.PointF;
import com.foxit.sdk.common.fxcrt.PointFArray;
import com.foxit.sdk.common.fxcrt.RectF;
import com.foxit.sdk.pdf.annots.QuadPoints;
import com.foxit.sdk.pdf.annots.QuadPointsArray;
...

// Assuming PDFPage page has been loaded and parsed.

// Add highlight annotation
Highlight highlight = new Highlight(page.addAnnot(Annot.e_Highlight, new RectF(10, 450, 100, 550)));
highlight.setContent("Highlight");
QuadPoints quad_points = new QuadPoints();
quad_points.setFirst(new PointF(10, 500));
quad_points.setSecond(new PointF(90, 500));
quad_points.setThird(new PointF(10, 480));
quad_points.setFourth(new PointF(90, 480));
QuadPointsArray quad_points_array = new QuadPointsArray();
quad_points_array.add(quad_points);
highlight.setQuadPoints(quad_points_array);
highlight.setSubject("Highlight");
highlight.setTitle("Foxit SDK");
highlight.setCreationDateTime(GetLocalDateTime());
highlight.setModifiedDateTime(GetLocalDateTime());
highlight.setUniqueID(RandomUID());

// Appearance should be reset.
highlight.resetAppearanceStream();
...
如何在创建markup注释时设置popup信息
import com.foxit.sdk.pdf.PDFPage;
import com.foxit.sdk.pdf.annots.Note;
import com.foxit.sdk.pdf.annots.Popup;
import com.foxit.sdk.common.fxcrt.RectF;
...

// Assuming PDFPage page has been loaded and parsed.

// Add note annotation
Note note = new Note(page.addAnnot(Annot.e_Note, new RectF(10, 350, 50, 400)));
note.setIconName("Comment");
note.setSubject("Note");
note.setTitle("Foxit SDK");
note.setContent("Note annotation.");
note.setCreationDateTime(GetLocalDateTime());
note.setModifiedDateTime(GetLocalDateTime());
note.setUniqueID(RandomUID());

// Add popup to note annotation
Popup popup = new Popup(page.addAnnot(Annot.e_Popup, new RectF(300, 450, 500, 550)));
popup.setBorderColor(0x00FF00);
popup.setOpenStatus(false);
popup.setModifiedDateTime(GetLocalDateTime());
note.setPopup(popup);

// Appearance should be reset.
note.resetAppearanceStream();
...
如何获取PDF页面坐标和渲染设备坐标之间的页面转换矩阵
import com.foxit.sdk.pdf.PDFPage;
import com.foxit.sdk.common.fxcrt.RectF;
import com.foxit.sdk.common.fxcrt.Matrix2D;
// Assuming PDFDoc doc has been loaded.
// Assuming PDFPage page has been loaded and parsed.
...

Matrix2D mtx = page.getDisplayMatrix(0, 0, width, height, page.getRotation());
RectF srcRc = new RectF(100, 200, 200, 100);
RectF pageRc = new RectF(100, 200, 200, 100);
mtx.transformRect(pageRc);
RectF devRc = new RectF(pageRc.getLeft(), pageRc.getBottom(), pageRc.getRight(), pageRc.getTop());
Matrix2D reverse_mtx = new Matrix2D();
reverse_mtx.setReverse(mtx);
reverse_mtx.transformRect(devRc);
...
如何提取text markup annotation中的文本内容
import com.foxit.sdk.PDFException;
import com.foxit.sdk.common.Library;
import com.foxit.sdk.pdf.PDFDoc;
import com.foxit.sdk.pdf.PDFPage;
import com.foxit.sdk.pdf.TextPage;
import com.foxit.sdk.pdf.annots.Annot;
import com.foxit.sdk.pdf.annots.TextMarkup;

import static com.foxit.sdk.common.Constants.e_ErrSuccess;
import static com.foxit.sdk.pdf.PDFPage.e_ParsePageNormal;

// Assuming PDFDoc doc has been loaded.

PDFPage page = doc.getPage(0);
// Parse the first page.
page.startParse(e_ParsePageNormal, null, false);
// Get a TextPage object.
TextPage text_page = new TextPage(page, TextPage.e_ParseTextNormal);

int annot_count = page.getAnnotCount();
for (int i = 0; i < annot_count; i++) {
    Annot annot = page.getAnnot(i);
    TextMarkup text_markup = new TextMarkup(annot);
    if (!text_markup.isEmpty()) {
        // Get the texts which intersect with a text markup annotation.
        String text = text_page.getTextUnderAnnot(text_markup);
    }
}
从FDF文件导入注释或者将注释导出到FDF文件
在Foxit PDF SDK中,可以使用来自应用程序或者FDF文件的数据来创建注释。同时,PDF SDK支持将注释导出到FDF文件。
Example:
如何从FDF文件导入注释,并将其添加到PDF文档的首页
import com.foxit.sdk.common.Range;
import com.foxit.sdk.fdf.FDFDoc;
import com.foxit.sdk.pdf.PDFDoc;
import static com.foxit.sdk.pdf.PDFDoc.e_Annots;
// Assuming PDFDoc doc has been loaded.
...

Range empty_range = new Range();

{
String input_file = input_path + "AboutFoxit.pdf";
String fdf_file = input_path + "AnnotationData.fdf";
PDFDoc pdf_doc = new PDFDoc(input_file);
error_code = pdf_doc.load(null);
if (error_code != e_ErrSuccess) {
System.out.println("The Doc " + input_file + " Error: " + error_code);
return;
}

FDFDoc fdf_doc = new FDFDoc(fdf_file);
pdf_doc.importFromFDF(fdf_doc, e_Annots, empty_range);

}
...
图片转换 (Image Conversion)
Foxit PDF SDK提供了PDF文件和图片之间进行转换的APIs. 应用程序可以轻松地实现图片创建和图片转换等功能,支持如下的图片格式:BMP、TIFF、PNG、JPX、JPEG和 GIF。通过Foxit PDF SDK,PDF文件和支持的图片格式 (除了GIF) 之间可以互相转换。Foxit PDF SDK只支持将GIF图片转换为PDF文件。
Example:
如何将PDF页面转换为位图文件
import com.foxit.sdk.common.Bitmap;
import com.foxit.sdk.common.Image;
import com.foxit.sdk.common.Renderer;
import com.foxit.sdk.common.fxcrt.Matrix2D;
import com.foxit.sdk.pdf.PDFDoc;
import com.foxit.sdk.pdf.PDFPage;
import static com.foxit.sdk.common.Bitmap.e_DIBArgb;
import static com.foxit.sdk.pdf.PDFPage.e_ParsePageNormal;

// Assuming PDFDoc doc has been loaded.
...

Image image = new Image();

// Get page count
int nPageCount = doc.getPageCount();
for (int i = 0; i < nPageCount; i++) {
    PDFPage page = doc.getPage(i);
    // Parse page.
    page.startParse(e_ParsePageNormal, null, false);

    int width = (int) page.getWidth();
    int height = (int) page.getHeight();
    Matrix2D matrix = page.getDisplayMatrix(0, 0, width, height, page.getRotation());

    // Prepare a bitmap for rendering.
    Bitmap bitmap = new Bitmap(width, height, e_DIBArgb, null, 0);
    bitmap.fillRect(0xFFFFFFFF, null);

    // Render page.
    Renderer render = new Renderer(bitmap, false);
    render.startRender(page, matrix, null);
    image.addFrame(bitmap);
}
...
如何将图片转换为PDF文件
import com.foxit.sdk.common.Image;
import com.foxit.sdk.common.fxcrt.PointF;
import com.foxit.sdk.pdf.PDFDoc;
import com.foxit.sdk.pdf.PDFPage;
import static com.foxit.sdk.pdf.PDFPage.e_ParsePageNormal;
import static com.foxit.sdk.pdf.PDFPage.e_SaveFlagNoOriginal;

Image image = new Image(input_file);
int count = image.getFrameCount();

PDFDoc doc = new PDFDoc();
for (int i = 0; i < count; i++) {
    PDFPage page = doc.insertPage(i, PDFPage.e_SizeLetter);
    page.startParse(e_ParsePageNormal, null, false);
    // Add image to page.
    page.addImage(image, i, new PointF(0, 0), page.getWidth(), page.getHeight(), true);
    }

doc.saveAs("convertedPDF.pdf", e_SaveFlagNoOriginal);
...
水印 (Watermark)
水印是一种PDF注释,广泛用于PDF文档。水印是文档上嵌入的可见叠加层,包含文本、logo或版权声明。水印的目的是对作者工作成果的保护,防止其未经授权而被他人使用。Foxit PDF SDK提供了允许应用程序创建、插入和删除水印的APIs。
Example:
如何创建一个文本水印,并将其插入到PDF文档的第一页
import com.foxit.sdk.common.Font;
import com.foxit.sdk.pdf.*;
import com.foxit.sdk.pdf.Watermark;
import com.foxit.sdk.pdf.WatermarkSettings;
import com.foxit.sdk.pdf.WatermarkTextProperties;

import com.foxit.sdk.common.Constants;

import static com.foxit.sdk.common.Constants.e_AlignmentCenter;
import static com.foxit.sdk.common.Font.e_StdIDTimesB;
import static com.foxit.sdk.pdf.WatermarkSettings.*;
import static com.foxit.sdk.pdf.WatermarkTextProperties.e_FontStyleNormal;
...

// Assuming PDFDoc doc has been loaded.

WatermarkSettings settings = new WatermarkSettings();
settings.setFlags(e_FlagASPageContents | e_FlagOnTop);
settings.setOffset_x(0);
settings.setOffset_y(0);
settings.setOpacity(90);
settings.setPosition(Constants.e_PosTopRight);
settings.setRotation(-45.f);
settings.setScale_x(1.f);
settings.setScale_y(1.f);

WatermarkTextProperties text_properties = new WatermarkTextProperties();
text_properties.setAlignment(e_AlignmentCenter);
text_properties.setColor(0xF68C21);
text_properties.setFont_size(e_FontStyleNormal);
text_properties.setLine_space(1);
text_properties.setFont_size(12.f);
text_properties.setFont(new Font(e_StdIDTimesB));

Watermark watermark = new Watermark(doc, "Foxit PDF SDK\nwww.foxitsoftware.com", text_properties, settings);
watermark.insertToPage(page);

// Save document to file
...
如何创建一个图片水印,并将其插入到PDF文档的第一页
import com.foxit.sdk.common.Bitmap;
import com.foxit.sdk.common.Image;
import com.foxit.sdk.pdf.*;
import com.foxit.sdk.pdf.Watermark;
import com.foxit.sdk.pdf.WatermarkSettings;

import com.foxit.sdk.common.Constants;

import static com.foxit.sdk.common.Constants.e_AlignmentCenter;
import static com.foxit.sdk.common.Font.e_StdIDTimesB;
import static com.foxit.sdk.pdf.WatermarkSettings.*;
import static com.foxit.sdk.pdf.WatermarkTextProperties.e_FontStyleNormal;
...

// Assuming PDFDoc doc has been loaded.

WatermarkSettings settings = new WatermarkSettings();
settings.setFlags(e_FlagASPageContents | e_FlagOnTop);
settings.setOffset_x(0.f);
settings.setOffset_y(0.f);
settings.setOpacity(20);
settings.setPosition(Constants.e_PosCenter);
settings.setRotation(0.0f);

Image image = new Image(image_file);
Bitmap bitmap = image.getFrameBitmap(0);
settings.setScale_x(page.getWidth() * 0.618f / bitmap.getWidth());
settings.setScale_y(settings.getScale_x());

Watermark watermark = new Watermark(doc, image, 0, settings);
watermark.insertToPage(page);

// Save document to file.
...
如何从PDF页面中删除所有的水印
import com.foxit.sdk.pdf.PDFPage;
...
// Assuming PDFPage page has been loaded and parsed.
...
page.removeAllWatermarks();
...
// Save document to file
...
条形码 (Barcode)
条形码用于表示与某个对象相关的数据,该数据可通过光学机器进行读取。最初的条形码系统是通过平行线间宽度和间距的不同来表示数据,可称为线性条形码或一维条形码(1D)。后来条形码逐渐演变成矩形、点、六边形等2D几何图案。虽然2D系统使用了一系列符号,但是它们通常也被称为条形码。条形码最初由特定的光学扫描器进行扫描,该光学扫面器被称为条形码读取器。后来扫描器和解释软件成功应用于桌面打印机和智能手机等设备。Foxit PDF SDK提供了从给定字符串生成条形码位图的应用程序。Table 3-2列出了Foxit PDF SDK支持的条形码类型。
Table 3-2
| 条形码类型 | Code39 | Code128 | EAN8 | UPCA | EAN13 | ITF | PDF417 | QR |
| 维度 | 1D | 1D | 1D | 1D | 1D | 1D | 2D | 2D |
Example:
如何从字符串生成条形码位图
import com.foxit.sdk.common.Barcode;
...

// Strings used as barcode content.
String codeStr = "TEST-SHEET"

// Barcode format types.
int codeFormat = Barcode.e_FormatCode39;

// Format error correction level of QR code.
int qrLevel = Barcode.e_QRCorrectionLevelLow;

// Image names for the saved image files for QR code.
String bmpQrName = "/QR_CODE_TestForBarcodeQrCode_L.bmp";

// Unit width for barcode in pixels, preferred value is 1-5 pixels.
int unitWidth = 2;

// Unit height for barcode in pixels, preferred value is >= 20 pixels.
int unitHeight = 120;

Barcode barcode = new Barcode();
Bitmap bitmap = barcode.generateBitmap(codeStr, codeFormat, unitWidth, unitHeight, qrLevel);
...
安全 (Security)
Foxit PDF SDK提供了一系列加密和解密功能,以满足不同级别的文档安全保护。用户可以使用常规密码加密和证书驱动加密,或使用自己的安全处理机制来自定义安全实现。另外,Foxit PDF SDK还提供了APIs用于集成第三方安全技术 (Microsoft RMS),允许开发人员使用Microsoft RMS SDK加密和解密PDF文档。
备注:有关RMS加密和解密更详细的信息,请参考SDK包中 “\examples\simple_demo” 文件夹下的 “security” demo。
Example:
如何使用证书加密PDF文件
import com.foxit.sdk.pdf.CertificateEncryptData;
import com.foxit.sdk.pdf.CertificateSecurityCallback;
import com.foxit.sdk.pdf.CertificateSecurityHandler;
import java.io.File;
import java.io.UnsupportedEncodingException;
import java.security.MessageDigest;
import java.util.ArrayList;
import java.util.Random;
import java.io.ByteArrayOutputStream;
import java.io.FileInputStream;
import java.util.Enumeration;
import java.security.Key;
import java.security.KeyStore;
import java.security.cert.CertificateFactory;
import javax.crypto.Cipher;
...
// Assuming PDFDoc doc has been loaded.
...

public static Key getPublicKey(String cerPath) {
    try {
        CertificateFactory certificateFactory = CertificateFactory.getInstance("X.509");
        FileInputStream stream = new FileInputStream(cerPath);
        java.security.cert.Certificate certificate = certificateFactory.generateCertificate(stream);
        stream.close();
        return certificate.getPublicKey();
    } catch (Exception e) {
        e.printStackTrace();
    }
    return null;
}

private static byte[] cryptByKey(byte[] inputData, Key key, int opmode) {
    if (inputData == null) return null;
    // The max length of decrypted byte array: 128
    final int max_crypt_block = 128;
    try {
        Cipher cipher = Cipher.getInstance(key.getAlgorithm());
        cipher.init(opmode, key);
        int len = inputData.length;
        ByteArrayOutputStream stream = new ByteArrayOutputStream();
        int offSet = 0;
        byte[] data;
        // Decrypt data segment by segment
        while (len > offSet) {
              data = cipher.doFinal(inputData, offSet,
                     (len - offSet > max_crypt_block) ? max_crypt_block : (len - offSet));
              stream.write(data, 0, data.length);
              offSet += max_crypt_block;
        }
        byte[] outputData = stream.toByteArray();
        stream.close();
        return outputData;
    } catch (Exception e) {
            e.printStackTrace();
      }
    return null;
}

public static byte[] encryptByKey(byte[] plainData, Key key) {
        return cryptByKey(plainData, key, Cipher.ENCRYPT_MODE);
}

public class CertificateSecurityEvent extends CertificateSecurityCallback {
    private String filePath;
    private String password;

    public CertificateSecurityEvent(String filePath, String password) {
        this.filePath = filePath;
        this.password = password;
    }

    @Override
    public void release() {}

    @Override
    public byte[] getDecryptionKey(byte[] arg0) {
        return CryptUtil.decryptByKey(arg0, CryptUtil.getPrivateKey(filePath, password));
    }
}

Random rand = new Random(23);
byte[] seed = new byte[24];
rand.nextBytes(seed);
for (int i = 20; i < 24; i++) {
    seed[i] = (byte) 0xFF;
}

PDFDoc doc = new PDFDoc(input_file);
int error_code = doc.load(null);
if (error_code != e_ErrSuccess) {
    System.out.println("The Doc " + input_file + " Error: " + error_code);
    return;
}

// Do encryption.
String cert_file_path = input_path + "foxit.cer";
ArrayList<byte[]> envelopes = new ArrayList<byte[]>();
byte[] bytes=null;
try {
    bytes = CryptUtil.encryptByKey(seed, CryptUtil.getPublicKey(cert_file_path));
    envelopes.add(bytes);
} catch (Exception e) {
  System.out.println("[Failed] Cannot get certificate information from " + cert_file_path);
  return;
}
byte[] data=new byte[20+bytes.length];
System.arraycopy(seed, 0, data, 0, 20);
System.arraycopy(bytes, 0, data, 20, bytes.length);
MessageDigest messageDigest = MessageDigest.getInstance("SHA1");
messageDigest.update(data);
byte[] initial_key = new byte[16];
System.arraycopy(messageDigest.digest(),0,initial_key,0,16);
CertificateSecurityHandler handler = new CertificateSecurityHandler();
CertificateEncryptData encrypt_data = new CertificateEncryptData(true, SecurityHandler.e_CipherAES, envelopes);
handler.initialize(encrypt_data, initial_key);

doc.setSecurityHandler(handler);
String output_file = output_directory + "certificate_encrypt.pdf";
doc.saveAs(output_file, PDFDoc.e_SaveFlagNoOriginal);
...
如何使用Foxit DRM加密PDF文件
import com.foxit.sdk.pdf.DRMSecurityCallback;
import com.foxit.sdk.pdf.PDFDoc;
import com.foxit.sdk.pdf.SecurityHandler;
...

public class DRMSecurityEvent extends DRMSecurityCallback {
private String fileID;
private byte[] initialKey;
public DRMSecurityEvent(String fileID, byte[] initialKey) {
this.fileID = fileID;
this.initialKey = initialKey;
}

@Override
public void release() {}

@Override
public int getCipherType(PDFDoc arg0, String arg1) {
return SecurityHandler.e_CipherAES;
}

@Override
public String getFileID(PDFDoc arg0, String arg1) {
return fileID;
}

@Override
public byte[] getInitialKey(PDFDoc arg0, String arg1) {
return initialKey;
}
@Override
public int getKeyLength(PDFDoc arg0, String arg1) {
return 16;
}

@Override
public int getUserPermissions(PDFDoc arg0, String arg1) {
return 0xFFFFFFFC;
}

@Override
public boolean isOwner(PDFDoc arg0, String arg1) {
return true;
}
}

PDFDoc doc = new PDFDoc(input_file);
int error_code = doc.load(null);

if (error_code != e_ErrSuccess) {
return;
}

// Do encryption.

DRMSecurityHandler handler = new DRMSecurityHandler();
String file_id = "Simple-DRM-file-ID";
String initialize_key = "Simple-DRM-initialize-key";
DRMEncryptData encrypt_data = new DRMEncryptData(true, "Simple-DRM-filter", SecurityHandler.e_CipherAES, 16, true, 0xfffffffc);
handler.initialize(encrypt_data, file_id, initialize_key);
doc.setSecurityHandler(handler);
String output_file = output_directory + "foxit_drm_encrypt.pdf";
doc.saveAs(output_file, PDFDoc.e_SaveFlagNoOriginal);
...
页面重排 (Reflow)
页面重排功能是在页面大小发生变化时自动重排页面内容。该功能对那些需要在不同尺寸的输出设备上显示PDF文档的应用程序具有很大的利用价值。页面重排让应用程序无需考虑设备的不同尺寸。Foxit PDF SDK提供了APIs用来创建、渲染、释放Reflow页面,以及访问Reflow页面的属性。
Example:
如何创建一个Reflow页面,并将其渲染为位图文件
import com.foxit.sdk.common.Bitmap;
import com.foxit.sdk.common.Image;
import com.foxit.sdk.common.Renderer;
import com.foxit.sdk.common.fxcrt.Matrix2D;
import com.foxit.sdk.common.fxcrt.PointF;
import com.foxit.sdk.common.fxcrt.RectF;
import com.foxit.sdk.common.fxcrt.RectI;
import com.foxit.sdk.pdf.PDFDoc;
import com.foxit.sdk.pdf.PDFPage;
import com.foxit.sdk.pdf.ReflowPage;

import static com.foxit.sdk.common.Bitmap.e_DIBArgb;
import static com.foxit.sdk.common.Constants.e_ErrSuccess;
import static com.foxit.sdk.pdf.PDFPage.e_ParsePageNormal;
import static com.foxit.sdk.pdf.ReflowPage.e_Normal;
import static com.foxit.sdk.pdf.ReflowPage.e_WithImage;
...

public static void SaveBitmap(Bitmap bitmap, int index, String file_name) throws PDFException {
    RectF margin = new RectF(50, 30, 30, 30);
    PointF size = new PointF(480, 800);
    RectI rect = new RectI(0, 0, (int) size.getX(), (int) margin.getTop());
    bitmap.fillRect(0xFFFFFFFF, rect);
    rect = new RectI(0, (int) size.getY() - (int) margin.getBottom(), (int) size.getX(), (int) size.getY());
    bitmap.fillRect(0xFFFFFFFF, rect);
    Image image = new Image();
    image.addFrame(bitmap);

    String save_path;
    String sIndex;
    sIndex = "" + index;
    save_path = output_path + "reflow" + file_name + sIndex + ".bmp";
    image.saveAs(save_path);
}
RectF margin = new RectF(50, 30, 30, 30);
PointF size = new PointF(480, 800);
int nCount = doc.getPageCount();
for (int i = 0; i < nCount; i++) {
    PDFPage page = doc.getPage(i);
    // Parse PDF page.
    page.startParse(e_ParsePageNormal, null, false);

    ReflowPage reflow_page = new ReflowPage(page);
    // Set some arguments used for parsing the relfow page.
    reflow_page.setLineSpace(0);
    reflow_page.setScreenMargin((int) margin.getLeft(), (int) margin.getTop(), (int) margin.getRight(), (int) margin.getBottom());
    reflow_page.setScreenSize(size.getX(), size.getY());
    reflow_page.setZoom(100);
    reflow_page.setParseFlags(e_Normal);

    // Parse reflow page.
    reflow_page.startParse(null);

    // Get actual size of content of reflow page. The content size does not contain the margin.
    float content_width = reflow_page.getContentWidth();
    float content_height = reflow_page.getContentHeight();

    // Create a bitmap for rendering the reflow page. The bitmap size contains the margin.
    Bitmap bitmap = new Bitmap((int) (content_width + margin.getLeft() + margin.getRight()),
         (int) (content_height + margin.getTop() + margin.getBottom()), e_DIBArgb, null, 0);
    bitmap.fillRect(0xFFFFFFFF, null);

    // Render reflow page.
    Renderer renderer = new Renderer(bitmap, false);
    Matrix2D matrix = reflow_page.getDisplayMatrix(0, 0);
    renderer.startRenderReflowPage(reflow_page, matrix, null);
    String file_name = "_single_";
    SaveBitmap(bitmap, i, file_name);
}
...
异步加载PDF (Asynchronous PDF)
异步加载PDF技术是一种在文档加载需要花费很长时间时,可以不用加载整个文档就可以对PDF页面进行访问的方法。该方法专为访问互联网上的PDF文件而设计。使用异步PDF技术,应用程序无需等待下载整个PDF文件就可以对其进行访问,可以打开任何已经下载加载的PDF页面。该技术为Web阅读类的应用程序提供了一种方便和有效的方式。关于如何使用异步模式打开和解析PDF页面,请参考SDK包中 “\examples\simple_demo” 文件夹下的 “async_load” demo。
压感笔迹 (Pressure Sensitive Ink)
压感笔迹 (PSI) 是一种获取变化电力输出以响应作用于压力感应设备元件上的各种变化压力或受力的技术。在PDF中,PSI通常被用于手写签名,通过捕捉手指或触控笔的压力变化来收集PSI数据。PSI数据包含操作区域的坐标和画布,并用其来绘制PSI的外观。Foxit PDF SDK允许应用程序创建PSI、访问其属性、操作ink笔迹和画布、以及释放PSI。
Example:
如何创建PSI并设置相关属性
import com.foxit.sdk.pdf.PSI;
import com.foxit.sdk.common.fxcrt.PointF;
...

PSI psi = new PSI(480, 180, true);

// Set ink diameter.
psi.setDiameter(9);

// Set ink color.
psi.setColor(0x434236);

// Set ink opacity.
psi.setOpacity(0.8f);

// Add points to pressure sensitive ink.
float x = 121.3043f;
float y = 326.6846f;
float pressure = 0.0966f;
int type = 1;
PointF point = new PointF(x, y);
psi.addPoint(point, type, pressure);
...
Wrapper
Wrapper为用户提供了一种保存与PDF文档相关的数据的方法。例如,在打开一个加密未授权的PDF文档,用户会看到错误信息提示其没有权限访问该文档。在这种情况下,使用wrapper,用户即使无法访问PDF中的内容,但仍然可以访问该文档的wrapper数据。Wrapper数据可用来提供信息给用户,比如文档的解密方法。
Example:
如何打开包含wrapper数据的PDF文档
import com.foxit.sdk.common.fxcrt.FileReaderCallback;

import com.foxit.sdk.pdf.PDFDoc;
import com.foxit.sdk.pdf.WrapperData;
...

PDFDoc doc = new PDFDoc(file_name);
int code = doc.load(null);

if (code != e_ErrSuccess) {
return;
}

if (!doc.isWrapper()) {
return;
}

int offset = doc.getWrapperOffset();
FileReader file_reader = new FileReader(offset);
file_reader.LoadFile(file_name);
PDFDoc doc_real = new PDFDoc(file_reader, false);
code = doc_real.load(null);
if (code != e_ErrSuccess) {
return;
}
...
PDF对象 (PDF Objects)
PDF中有八种类型的对象:布尔对象、数字对象、字符串对象、名称对象、数组对象、字典对象、流对象和空对象。 PDF对象是文档级文档,与页面对象(见3.23)不同,每个页面对象都与特定的页面相关联。Foxit PDF SDK提供了APIs用来创建、修改、检索和删除文档中的这些对象。
Example:
如何从目录字典中删除指定的属性
import com.foxit.sdk.pdf.PDFDoc;
import com.foxit.sdk.pdf.objects.PDFDictionary;
...

PDFDictionary catalog = document.getCatalog();
if (null == catalog) {
return;
}

String[] key_strings = {"Type", "Boolean", "Name", "String", "Array", "Dict"};

int count = key_strings.length;
for (int i = 0; i < count; i++) {
if (catalog.hasKey(key_strings[i])) {
catalog.removeAt(key_strings[i]);
}
}
...
页面对象 (Page Object)
页面对象可以帮助对PDF对象 (关于PDF对象更详细的介绍,见3.22) 知识了解有限的开发人员能够处理PDF文档中的文本、路径、图像和画布等对象。Foxit PDF SDK提供APIs用以在页面中添加和删除PDF对象并设置特定属性。使用页面对象,用户可以从对象内容创建PDF页面。页面对象的其他可能用法包括向PDF文档添加页眉和页脚,向每个页面添加图片logo,或者根据需要生成PDF模板。
Example:
如何在PDF页面中创建一个文本对象
import com.foxit.sdk.common.fxcrt.Matrix2D;
import com.foxit.sdk.common.fxcrt.PointF;
import com.foxit.sdk.common.fxcrt.RectF;
import com.foxit.sdk.pdf.PDFDoc;
import com.foxit.sdk.pdf.PDFPage;
import com.foxit.sdk.pdf.graphics.*;
import com.foxit.sdk.common.Font;
import static com.foxit.sdk.common.Font.*;
...

long position = page.getLastGraphicsObjectPosition(e_TypeText);
TextObject text_object = TextObject.create();
text_object.setFillColor(0xFFFF7F00);

// Prepare text state
TextState state = new TextState();
state.setFont_size(80.0f);
state.setFont(new Font("Simsun", e_StylesSmallCap, e_CharsetGB2312, 0));
state.setTextmode(e_ModeFill);
text_object.setTextState(page, state, false, 750);

// Set text.
text_object.setText("Foxit Software");
long last_position = page.insertGraphicsObject(position, text_object);
RectF rect = text_object.getRect();
float offset_x = (page.getWidth() - (rect.getRight() - rect.getLeft())) / 2;
float offset_y = page.getHeight() * 0.8f - (rect.getTop() - rect.getBottom()) / 2;
text_object.transform(new Matrix2D(1, 0, 0, 1, offset_x, offset_y), false);

// Generate content
page.generateContent();
...
如何向PDF页面中插入一个图片logo
import com.foxit.sdk.pdf.PDFDoc;
import com.foxit.sdk.pdf.PDFPage;
import com.foxit.sdk.pdf.graphics.*;
import com.foxit.sdk.common.Font;
import static com.foxit.sdk.common.Font.*;
import com.foxit.sdk.common.Image;
...

long position = page.getLastGraphicsObjectPosition(e_TypeImage);
Image image = new Image(image_file);
ImageObject image_object = ImageObject.create(page.getDocument());
image_object.setImage(image, 0);

float width = image.getWidth();
float height = image.getHeight();
float page_width = page.getWidth();
float page_height = page.getHeight();

// Please notice the matrix value.
image_object.setMatrix(new Matrix2D(width, 0, 0, height, (page_width - width) / 2.0f, (page_height - height) / 2.0f));
page.insertGraphicsObject(position, image_object);
page.generateContent();
...
标记内容 (Marked content)
在PDF文档中,可以将一部分内容标记为标记内容元素。标记内容功能有助于管理PDF文档的逻辑结构信息并且可以用于生成加标记的PDF (tagged PDF) 。加标记的PDF具有标准的结构类型和属性,有助于提取和再利用页面内容。有关标记内容的更多详细信息,请参阅PDF reference 1.7 [1] 的第10.5章。
Example:
如何获取页面中的标记内容以及tag名称
import com.foxit.sdk.pdf.graphics.GraphicsObject;
import com.foxit.sdk.pdf.graphics.MarkedContent;
...

long position = page.getFirstGraphicsObjectPosition(e_TypeText);
GraphicsObject text_obj = page.getGraphicsObject(position);
MarkedContent content = text_obj.getMarkedContent();
int nCount = content.getItemCount();

// Get marked content property
for (int i = 0; i < nCount; i++) {
String tag_name = content.getItemTagName(i);
int mcid = content.getItemMCID(i);
}
...
PDF 图层 (PDF Layer)
Foxit PDF SDK支持PDF图层,也称为可选内容组 (Optional Content Groups,OCG) 。用户可以选择性地查看或隐藏多图层PDF文档的不同层中的内容。多图层广泛用于许多应用领域,如CAD制图、地图、分层艺术品以及多语言文档等。
在Foxit PDF SDK中,PDF图层与图层节点相关联。要获取图层节点,用户应首先构建PDF LayerTree对象,然后调用函数LayerTree.getRootNode以获取整个图层树的根图层节点。另外,您可以从根图层节点开始枚举图层树中的所有节点。Foxit PDF SDK提供APIs用来获取/设置图层数据,查看或隐藏不同图层中的内容,设置图层名称,添加或删除图层,以及编辑图层。
Example:
如何创建一个PDF图层
import static com.foxit.sdk.pdf.LayerTree;
import static com.foxit.sdk.pdf.LayerNode;
...
LayerTree layertree = new LayerTree(doc);
LayerNode root = layertree.getRootNode();
如何设置所有图层节点的信息
import com.foxit.sdk.pdf.*;
...

static void setAllLayerNodesInformation(LayerNode layer_node) throws PDFException {

if (layer_node.hasLayer()) {
layer_node.setDefaultVisible(true);
layer_node.setExportUsage(e_StateUndefined);
layer_node.setViewUsage(e_StateOFF);
LayerPrintData print_data = new LayerPrintData("subtype_print", e_StateON);
layer_node.setPrintUsage(print_data);
LayerZoomData zoom_data = new LayerZoomData(1, 10);
layer_node.setZoomUsage(zoom_data);
String new_name = String.format("[View_OFF_Print_ON_Export_Undefined]") + layer_node.getName();
layer_node.setName(new_name);
}

int count = layer_node.getChildrenCount();
for (int i = 0; i < count; i++) {
LayerNode child = layer_node.getChild(i);
setAllLayerNodesInformation(child);
}
}
...
如何编辑图层树
import com.foxit.sdk.pdf.*;
...

LayerTree layertree = new LayerTree(doc);
LayerNode root = layertree.getRootNode();

int children_count = root.getChildrenCount();
root.removeChild(children_count -1);
LayerNode child = root.getChild(children_count - 2);
LayerNode child0 = root.getChild(0);
child.moveTo(child0, 0);
child.addChild(0, "AddedLayerNode", true);
child.addChild(0, "AddedNode", false);
...
签名 (Signature)
PDF签名可用于创建和签署PDF文档的数字签名,从而保护文档内容的安全性并避免文档被恶意篡改。它可以让接收者确保其收到的文档是由签名者发送的,并且文档内容是完整和未被经篡的。Foxit PDF SDK提供APIs用来创建数字签名,验证签名的有效性,删除现有的数字签名,获取和设置数字签名的属性,显示签名和自定义签名表单域的外观。
备注:Foxit PDF SDK提供了默认签名回调函数,支持如下两种类型的signature filter 和 subfilter:
(1) filter: Adobe.PPKLite subfilter: adbe.pkcs7.detached
(2) filter: Adobe.PPKLite subfilter: adbe.pkcs7.sha1
如果您使用以上任意一种的signature filter 和 subfilter,您可以直接签名PDF文档和验证签名的有效性,而不需要注册自定义回调函数。
Example:
如何对PDF文档进行签名
import com.foxit.sdk.pdf.*;
...

String filter = "Adobe.PPKLite";
String sub_filter = "adbe.pkcs7.detached";

PDFPage pdf_page = pdf_doc.getPage(0);
// Add a new signature to first page.
com.foxit.sdk.pdf.Signature new_signature = AddSiganture(pdf_page, sub_filter);
// Set filter and subfilter for the new signature.
new_signature.setFilter(filter);
new_signature.setSubFilter(sub_filter);
boolean is_signed = new_signature.isSigned();
int sig_state = new_signature.getState();
String signed_pdf_path = output_directory + "signed_newsignature.pdf";
String cert_file_path = input_path + "foxit_all.pfx";
String cert_file_password = "123456";

// Cert file path will be passed back to application through callback function SignatureCallback::Sign().
// In this demo, the cert file path will be used for signing in callback function SignatureCallback::Sign().
new_signature.startSign(cert_file_path, cert_file_password.getBytes(), e_DigestSHA1, signed_pdf_path, null, null);
...
如何实现签名的回调函数
import com.foxit.sdk.pdf.*;
...

// Implementation of SignatureCallback
class SignatureCallbackImpl extends SignatureCallback {
    private String sub_filter_;
    private DigestContext digest_context_ = null;
    byte[] arrall = null;

SignatureCallbackImpl(String subfilter) {
    sub_filter_ = subfilter;
}

    @Override
    public boolean startCalcDigest(FileReaderCallback var1, int[] var2,
        com.foxit.sdk.pdf.Signature var3, Object var4) {
    digest_context_ = new DigestContext(var1, var2, var2.length);
        return true;
}

    @Override
    public int continueCalcDigest(Object var1, PauseCallback var2) {
        return com.foxit.sdk.common.Progressive.e_Finished;
}

    @Override
    public byte[] getDigest(Object var1) {
        return arrall;
}

    @Override
    public byte[] sign(byte[] digest, String cert_path, byte[] cert_password, int digest_algorithm, java.lang.Object client_data){
    String encryptStr = null;

        try {
            try {
            FileReaderCallback filehandler = digest_context_.file_read_callback_;
            {
                    long size = filehandler.getSize();
                    byte[] arr1 = new byte[digest_context_.byte_range_array_[1]];
                filehandler.readBlock(arr1,
                        digest_context_.byte_range_array_[0],
                        digest_context_.byte_range_array_[1]);
                    byte[] arr2 = new byte[digest_context_.byte_range_array_[3]];
                filehandler.readBlock(arr2,
                        digest_context_.byte_range_array_[2],
                        digest_context_.byte_range_array_[3]);
                size = 0;
                arrall = new byte[(int) digest_context_.byte_range_array_[1]
                        + (int) digest_context_.byte_range_array_[3]];
                System.arraycopy(arr1, 0, arrall, 0, arr1.length);
                System.arraycopy(arr2, 0, arrall, arr1.length, arr2.length);
            }

        } catch (Exception e) {
                // TODO Auto-generated catch block
            e.printStackTrace();
        }

        encryptStr = CertUtil.SignMsg(arrall, signature.input_path
                + "foxit_all.pfx", "123456");
            return encryptStr.getBytes();

    } catch (Exception e) {
            // TODO Auto-generated catch block
        e.printStackTrace();
    }
        return null;
}

    @Override
    public int verifySigState(byte[] var1, byte[] var2, Object var3) {
        byte[] arrall_verify = null;
        boolean verify_state = false;
        try {
        verify_state = CertUtil.VerifyMsg(new String(var2).toLowerCase(), arrall,
                signature.input_path + "foxit.cer");
    } catch (Exception e) {
            // TODO Auto-generated catch block
        e.printStackTrace();
    }
        return verify_state ? com.foxit.sdk.pdf.Signature.e_StateVerifyNoChange : com.foxit.sdk.pdf.Signature.e_StateVerifyChange;
}

    @Override
    public boolean isNeedPadData() {return false;}
}
...
长期签名验证(LTV,Long term validation)
从7.0版本开始,Foxit PDF SDK提供了API接口进行长期签名验证,主要用于解决已经过期的签名的验证问题。LTV需要DSS(Document Security Store),其包含了签名的验证信息,以及需要文档时间戳签名DTS (Document Timestamp Signature),其是time stamp类型的signature。
为了支持LTV,Foxit PDF SDK提供了:
- 支持添加time stamp类型的signature,以及提供了sub filter “ETSI.RFC3161” 的默认签名回调。
- TimeStampServerMgr 和 TimeStampServer 类,用于time stamp的server设置和管理等。sub filter “ETSI.RFC3161” 的默认签名回调将会使用默认的time stamp server。
- LTVVerifier类,其提供了验证签名和向文档中添加DSS信息的功能。同时,也提供了LTVVerifier所需的一个基本默认的回调函数RevocationCallback。
以下仅以使用SDK默认的sub filter “ETSI.RFC3161” 签名回调及默认的RevocationCallback 为例来说明如何进行长期签名验证。有关更详细的信息,请参阅下载包中 “\examples\simple_demo”目录下的 “ltv” demo。
Example:
如何使用SDK默认的sub filter “ETSI.RFC3161” 签名回调及默认的RevocationCallback进行长期签名验证
// Initialize time stamp server manager, add and set a default time stamp server, which will be used by default signature callback for time stamp signature.
TimeStampServerMgr.initialize();
TimeStampServer timestamp_server = TimeStampServerMgr.addServer(server_name, server_url, server_username, server_password);
TimeStampServerMgr.setDefaultServer(timestamp_server);

// Assume that "signed_pdf_path" represents a signed PDF document which contains signed signature.
PDFDoc pdf_doc = new PDFDoc(signed_pdf_path);
pdf_doc.startLoad(null, false, null);
{
   // Use LTVVerifier to verify and add DSS.
   LTVVerifier ltv_verifier = new LTVVerifier(pdf_doc, true, false, false, LTVVerifier.e_SignatureTSTTime);
   // Set verifying mode which is necessary.
   ltv_verifier.setVerifyMode(LTVVerifier.e_VerifyModeETSI);
   SignatureVerifyResultArray sig_verify_result_array = ltv_verifier.verify();
   for (long i = 0; i < sig_verify_result_array.getSize(); i++) {
    // ltv state would be e_LTVStateNotEnable here.
    int ltv_state =  sig_verify_result_array.getAt(i).getLTVState();
    if ((sig_verify_result_array.getAt(i).getSignatureState() & Signature.e_StateVerifyValid) == Signature.e_StateVerifyValid)
    ltv_verifier.addDSS(sig_verify_result_array.getAt(i));
}
   }

// Add a time stamp signature as DTS and sign it. "saved_ltv_pdf_path" represents the newly saved signed PDF file.
PDFPage pdf_page = pdf_doc.getPage(0);
// The new time stamp signature will have default filter name "Adobe.PPKLite" and default subfilter name "ETSI.RFC3161".
Signature timestamp_signature = pdf_page.addSignature(new RectF(), "", Signature.e_SignatureTypeTimeStamp);
Progressive sign_progressive = timestamp_signature.startSign("", empty_str.getBytes(), Signature.e_DigestSHA256, saved_ltv_pdf_path, null, null);
if (sign_progressive.getRateOfProgress() != 100)
   sign_progressive.resume();

// Then use LTVVeirfier to verify the new signed PDF file.
PDFDoc check_pdf_doc = new PDFDoc(saved_ltv_pdf_path);
check_pdf_doc.startLoad(null, false, null);
{
   // Use LTVVeirfier to verify.
   LTVVerifier ltv_verifier = new LTVVerifier(pdf_doc, true, false, false, LTVVerifier.e_SignatureTSTTime);
   // Set verifying mode which is necessary.
   ltv_verifier.setVerifyMode(LTVVerifier.e_VerifyModeETSI);
   SignatureVerifyResultArray sig_verify_result_array = ltv_verifier.verify();
   for (long i = 0; i < sig_verify_result_array.getSize(); i++) {
    // ltv state would be e_LTVStateEnable here.
    int ltv_state =  sig_verify_result_array.getAt(i).getLTVState();
... // User can get other information from SignatureVerifyResult.
   }
}

// Release time stamp server manager when everything is done.
TimeStampServerMgr::Release();
PAdES
从7.0版本开始,Foxit PDF SDK支持PAdES (PDF Advanced Electronic Signature),其是CAdES签名在PDF中的应用。CAdES是高级数字签名的一种新标准,其默认subfilter是”ETSI.CAdES.detached”。PAdES 签名分为四个等级:B-B, B-T, B-LT, 和 B-LTA。
- B-B: 包含基本的必须出现的属性。
- B-T: 在B-B的基础上,包含文档时间戳或者签名时间戳,来为存在的签名提供可信的时间。
- B-LT: 在B-T的基础上,包含DSS/VRI,来提供证书和吊销信息。
- B-LTA: 在B-LT的基础上,为存在的吊销信息提供可信时间DTS。
Foxit PDF SDK提供了subfilter 为 “ETSI.CAdES.detached” 的默认签名回调,可用来签名和验证subfilter 为 “ETSI.CAdES.detached” 的签名。还提供了TimeStampServerMgr 和 TimeStampServer类,用于设置和管理time stamp server。subfilter “ETSI.CAdES.detached” 的默认签名回调将会使用默认的time stamp server。
Foxit PDF SDK 提供了从签名中获取PAdES不同等级的方法,应用层面也可以根据各个等级的要求来判定所属等级。有关如何在PDF文档中添加、签名、和验证PAdES签名的更详细信息,请参阅下载包中 “\examples\simple_demo”目录下的 “pades” demo。
PDF 行为 (PDF Action)
PDF Action代表PDF操作类的基类。Foxit PDF SDK提供了APIs用来创建一系列行为,并获取行为句柄,比如embedded goto action, JavaScript action, named action 和 launch action等。
Example:
如何创建一个URI 行为并将其插入到link注释
import com.foxit.sdk.pdf.actions.Action;
import com.foxit.sdk.pdf.actions.URIAction;
import com.foxit.sdk.pdf.annots.Link;
...

// Assuming PDFPage page has been loaded and parsed.
// Assuming the annnots in the page have been loaded.
// Add link annotation
Link link = new Link(page.addAnnot(Annot.e_Link, new RectF(350, 350, 380, 400)));
link.setHighlightingMode(Annot.e_HighlightingToggle);

// Add action for link annotation
Action action = Action.create(page.getDocument(), Action.e_TypeURI);
URIAction uriAction = new URIAction(action);
uriAction.setTrackPositionFlag(true);
uriAction.setURI("www.foxitsoftware.com");
link.setAction(uriAction);
// Appearance should be reset.
link.resetAppearanceStream();
...
如何创建一个GoTo 行为并将其插入到link注释
import com.foxit.sdk.common.fxcrt.RectF;
import com.foxit.sdk.pdf.actions.Action;
import com.foxit.sdk.pdf.actions.GotoAction;
import com.foxit.sdk.pdf.annots.Link;
...

// Assuming PDFPage page has been loaded and parsed.
// Assuming the annnots in the page have been loaded.
Link link = new Link(page.addAnnot(Annot.e_Link, new RectF(350, 350, 380, 400)));
link.setHighlightingMode(Annot.e_HighlightingToggle);

// Add action for link annotation
Action action = Action.create(page.getDocument(), Action.e_TypeGoto);
GotoAction gotoAction = new GotoAction(action);
Destination dest = Destination.createFitPage(doc, 0);
gotoAction.setDestination(dest);
...
JavaScript
创建JavaScript是为了将Web页面的相关处理从服务器转移到基于Web的应用程序的客户端上。 Foxit PDF SDK JavaScript以JavaScript语言的形式实现新对象及其附带方法和属性的扩展。其使开发人员能够管理文档安全性,与数据库通信,处理文件附件以及操作PDF文件,因此其表现为交互式、web表单等。
JavaScript action是一种由JavaScript解释器编译和执行脚本的动作。类com.foxit.sdk.pdf.actions.JavaScriptAction派生自Action,并提供接口用来获取/设置JavaScript action数据。
在附录中可以查看Foxit PDF SDK 支持的JavaScript方法和属性列表。
Example:
如何添加文档级的JavaScript 动作
import com.foxit.sdk.pdf.actions.Action;
import com.foxit.sdk.pdf.actions.JavaScriptAction;
...

// Load Document doc.
...
JavaScriptAction javascipt_action = new JavaScriptAction(Action.create(doc, Action.e_TypeJavaScript));
javascipt_action.setScript("app.alert(\"Hello Foxit \");");
AdditionalAction aa = new AdditionalAction(doc);
aa.setAction(AdditionalAction.e_TriggerDocWillClose, javascipt_action);
aa.doJSAction(AdditionalAction.e_TriggerDocWillClose);
...
如何添加注释级的JavaScript 动作
import com.foxit.sdk.pdf.actions.Action;
import com.foxit.sdk.pdf.actions.JavaScriptAction;
...

// Load Document and get a widget annotation.
...
JavaScriptAction javascipt_action = new JavaScriptAction(Action.create(page.getDocument(), Action.e_TypeJavaScript));
javascipt_action.setScript("app.alert(\"Hello Foxit \");");
AdditionalAction aa = new AdditionalAction(annot);
aa.setAction(AdditionalAction.e_TriggerAnnotMouseButtonPressed, javascipt_action);
aa.doJSAction(AdditionalAction.e_TriggerAnnotMouseButtonPressed);
...
如何添加表单级的JavaScript 动作
import com.foxit.sdk.pdf.actions.Action;
import com.foxit.sdk.pdf.actions.JavaScriptAction;
import com.foxit.sdk.pdf.interform.Form;
import com.foxit.sdk.pdf.interform.Control;
import com.foxit.sdk.pdf.interform.Field;
...

// Load Document and get a form field.
...

// Add text field.
Control control = form.addControl(page, "Text Field0", Field.e_TypeTextField, new RectF(50, 600, 90, 640));
control.getField().setValue("3");
// Update text field's appearance.
control.getWidget().resetAppearanceStream();

Control control1 = form.addControl(page, "Text Field1", Field.e_TypeTextField, new RectF(100, 600, 140, 640));
control1.getField().setValue("23");
// Update text field's appearance.
control1.getWidget().resetAppearanceStream();

Control control2 = form.addControl(page, "Text Field2", Field.e_TypeTextField, new RectF(150, 600, 190, 640));
Field field2 = control2.getField();
JavaScriptAction javascipt_action = new JavaScriptAction(Action.create(form.getDocument(), Action.e_TypeJavaScript));
javascipt_action.setScript("AFSimple_Calculate(\"SUM\", new Array (\"Text Field0\", \"Text Field1\"));");
AdditionalAction aa = new AdditionalAction(field2);
aa.setAction(AdditionalAction.e_TriggerFieldRecalculateValue, javascipt_action);
// Update text field's appearance.
control2.getWidget().resetAppearanceStream();
...
如何使用JavaScript向PDF页面添加一个新的注释
import com.foxit.sdk.pdf.actions.Action;
import com.foxit.sdk.pdf.actions.JavaScriptAction;
...

// Load Document and get form field, construct a Form object and a Filler object.
...

JavaScriptAction javascipt_action = new JavaScriptAction(Action.create(form.getDocument(), Action.e_TypeJavaScript));
javascipt_action.setScript("var annot = this.addAnnot({ page : 0, type : \"Square\", rect : [ 0, 0, 100, 100 ], name : \"UniqueID\", author : \"A. C. Robat\", contents : \"This section needs revision.\" });");
AdditionalAction aa = new AdditionalAction(field);
aa.setAction(AdditionalAction.e_TriggerAnnotCursorEnter, javascipt_action);
aa.doJSAction(AdditionalAction.e_TriggerAnnotCursorEnter);
...
如何使用JavaScript获取/设置注释的属性 (strokeColor, fillColor, readOnly, rect, type等)
import com.foxit.sdk.pdf.actions.Action;
import com.foxit.sdk.pdf.actions.JavaScriptAction;
...

// Load Document and get form field, construct a Form object and a Filler object.
...

// Get properties of annotations.
JavaScriptAction javascipt_action = new JavaScriptAction(Action.create(form.getDocument(), Action.e_TypeJavaScript));
javascipt_action.setScript("var ann = this.getAnnot(0, \" UniqueID \"); if (ann != null) { console.println(\"Found it! type: \" + ann.type); console.println(\"readOnly: \" + ann.readOnly); console.println(\"strokeColor: \" + ann.strokeColor);console.println(\"fillColor: \" + ann.fillColor); console.println(\"rect: \" + ann.rect);}");
AdditionalAction aa = new AdditionalAction(field);
aa.setAction(AdditionalAction.e_TriggerAnnotCursorEnter, javascipt_action);
aa.doJSAction(AdditionalAction.e_TriggerAnnotCursorEnter);

// Set properties of annotations (only take strokeColor as an example).
JavaScriptAction javascipt_action1 = new JavaScriptAction(Action.create(form.getDocument(), Action.e_TypeJavaScript));
javascipt_action1.setScript("var ann = this.getAnnot(0, \"UniqueID\"); if (ann != null) { ann.strokeColor = color.blue; }");
AdditionalAction aa1 = new AdditionalAction(field1);
aa1.setAction(AdditionalAction.e_TriggerAnnotCursorEnter, javascipt_action1);
aa1.doJSAction(AdditionalAction.e_TriggerAnnotCursorEnter);
...
如何使用JavaScript销毁注释
import com.foxit.sdk.pdf.actions.Action;
import com.foxit.sdk.pdf.actions.JavaScriptAction;
...

// Load Document and get form field, construct a Form object and a Filler object.
...

JavaScriptAction javascipt_action = new JavaScriptAction(Action.create(form.getDocument(), Action.e_TypeJavaScript));
javascipt_action.setScript("var ann = this.getAnnot(0, \" UniqueID \"); if (ann != null) { ann.destroy(); } ");
AdditionalAction aa = new AdditionalAction(field);
aa.setAction(AdditionalAction.e_TriggerAnnotCursorEnter, javascipt_action);
aa.doJSAction(AdditionalAction.e_TriggerAnnotCursorEnter);
...
密文 (Redaction)
密文是一种在保持文档布局的同时删除文档中敏感信息的功能。它可以帮助用户永久删除PDF文档中的可见文本和图片,以保护一些保密信息,如社会安全号码、信用卡信息、产品发布日期等等。
密文是一种标记注释,用于标记PDF文件的某些内容,标记的内容在注释被应用后会被删除。
执行密文,您可以使用如下的APIs:
- 调用com.foxit.sdk.addon.Redaction.Redaction 创建一个redaction模块。如果在函数common.Library.initialize 中使用的license授权信息没有定义”Redaction”,则表示用户没有权限使用redaction相关的函数,并且构造函数会抛出com.foxit.sdk.common.Constants.e_ErrInvalidLicense异常。
- 然后调用com.foxit.sdk.addon.Redaction.markRedactAnnot创建一个redaction对象,对需要进行redaction的页面内容 (文本对象、图片对象和路径对象) 进行标记。
- 最后调用com.foxit.sdk.addon.Redaction.apply在标记区域应用redaction:永久删除标记区域的文本和图形。
备注:要使用redaction功能,请确保授权key文件中包含 ‘Redaction’ 模块。
Example:
如何将PDF文档第一页中的文本 “PDF” 设置为密文
import com.foxit.sdk.common.fxcrt.RectFArray;
import com.foxit.sdk.pdf.PDFDoc;
import com.foxit.sdk.pdf.PDFPage;
import com.foxit.sdk.pdf.TextPage;
import com.foxit.sdk.pdf.TextSearch;
import com.foxit.sdk.addon.Redaction;
import com.foxit.sdk.pdf.annots.Redact;
...

// Assuming PDFDoc doc has been loaded.
...

Redaction redaction = new Redaction(doc);
PDFPage page = doc.getPage(0);
// Parse PDF page.
page.startParse(PDFPage.e_ParsePageNormal, null, false);
TextPage text_page = new TextPage(page, TextPage.e_ParseTextNormal);
TextSearch text_search = new TextSearch(text_page);
text_search.setPattern("PDF");
RectFArray matched_rect_array = new RectFArray();
while (text_search.findNext()) {
    RectFArray temp_rect_array = text_search.getMatchRects();
    for (int z=0; z<temp_rect_array.getSize(); z++)
        matched_rect_array.add(temp_rect_array.getAt(z));
}
if (matched_rect_array.getSize()>0) {
    Redact redact = redaction.markRedactAnnot(page, matched_rect_array);
    redact.resetAppearanceStream();
    doc.saveAs(output_path + "AboutFoxit_redected_default.pdf", PDFDoc.e_SaveFlagNormal);

    // set border color to Green
    redact.setBorderColor((long)0x00FF00);
    // set fill color to Blue
    redact.setFillColor((long)0x0000FF);
    // set rollover fill color to Red
    redact.setApplyFillColor((long)0xFF0000);
    redact.resetAppearanceStream();
    doc.saveAs(output_path + "AboutFoxit_redected_setColor.pdf", PDFDoc.e_SaveFlagNormal);

    redact.setOpacity((float)0.5);
    redact.resetAppearanceStream();
    doc.saveAs(output_path+"AboutFoxit_redected_setOpacity.pdf", PDFDoc.e_SaveFlagNormal);

    redaction.apply();
}
...
对比 (Comparison)
对比功能可以帮助用户查看两个版本的PDF文档之间的差异。Foxit PDF SDK提供APIs用以逐页比较两个PDF文档,并返回文档间的差异。目前,仅支持比较PDF文档中的文本,在之后的版本中,会支持更多的PDF元素。
差异可以定义为三种类型:删除、插入和替换。您可以将这些差异保存为PDF文件并标记为注释。
备注:要使用对比功能,请确保授权key文件中包含 ‘Comparison’ 模块。
Example:
如何对比两个PDF文档,并将差异保存到一个PDF文件中
import com.foxit.sdk.common.fxcrt.RectF;
import com.foxit.sdk.common.fxcrt.PointF;
import com.foxit.sdk.common.fxcrt.RectFArray;
import com.foxit.sdk.common.Image;
import com.foxit.sdk.pdf.PDFDoc;
import com.foxit.sdk.pdf.PDFPage;
import com.foxit.sdk.addon.comparison.CompareResultInfo;
import com.foxit.sdk.addon.comparison.CompareResultInfoArray;
import com.foxit.sdk.addon.comparison.CompareResults;
import com.foxit.sdk.addon.comparison.Comparison;
import com.foxit.sdk.common.DateTime;
import com.foxit.sdk.pdf.annots.Annot;
import com.foxit.sdk.pdf.annots.Highlight;
import com.foxit.sdk.pdf.annots.Stamp;
import com.foxit.sdk.pdf.annots.QuadPoints;
import com.foxit.sdk.pdf.annots.QuadPointsArray;

...
PDFDoc base_doc = new PDFDoc("input_base_file");
error_code = base_doc.load(null);
if (error_code != e_ErrSuccess) {
    return;
}

PDFDoc compared_doc = new PDFDoc("input_compared_file");
error_code = compared_doc.load(null);
if (error_code != e_ErrSuccess) {
    return;
}

Comparison comparison = new Comparison(base_doc, compared_doc);

// Start comparing.
CompareResults result = comparison.doCompare(0, 0, Comparison.e_CompareTypeText);
CompareResultInfoArray oldInfo = result.getResults_base_doc();
CompareResultInfoArray newInfo = result.getResults_compared_doc();
long oldInfoSize = oldInfo.getSize();
long newInfoSize = newInfo.getSize();
PDFPage page = compared_doc.getPage(0);
for (int i=0; i<newInfoSize; i++)
{
    CompareResultInfo item = newInfo.getAt(i);
    int type = item.getType();
    if (type == CompareResultInfo.e_CompareResultTypeDeleteText)
    {
        String res_string;
        res_string = String.format("\"%s\"", item.getDiff_contents());

        // Add stamp to mark the "delete" type differences between the two documents.
        CreateDeleteTextStamp(page, item.getRect_array(), 0xff0000, res_string, "Compare : Delete", "Text");
    }
    else if (type == CompareResultInfo.e_CompareResultTypeInsertText)
    {
        String res_string;
        res_string = String.format("\"%s\"", item.getDiff_contents());

        // Highlight the "insert" type differences between the two documents.
        CreateHighlightRect(page, item.getRect_array(), 0x0000ff, res_string, "Compare : Insert", "Text");
    }
    else if (type == CompareResultInfo.e_CompareResultTypeReplaceText)
    {
        String res_string;
        res_string = String.format("[Old]: \"%s\"\r\n[New]: \"%s\"", oldInfo.getAt(i).getDiff_contents(), item.getDiff_contents());

        // Highlight the "replace" type differences between the two documents.
        CreateHighlightRect(page, item.getRect_array(), 0xe7651a, res_string, "Compare : Replace", "Text");
    }

}

// Save the comparison result to a PDF file.
compared_doc.saveAs(output_path + "result.pdf", PDFDoc.e_SaveFlagNormal);
备注:对于CreateDeleteTextStamp 和 CreateHighlightRect函数,请参考SDK包中“\examples\simple_demo”文件夹下的 “pdfcompare” demo。
光学字符识别 (OCR)
光学字符识别 (OCR) 能够将打印的文本图像翻译成机器可读的文本。OCR 普遍应用于将纸质文档扫描并创建成电子文档,也可用于现有的电子文档 (如PDF文档)。
本节将介绍如何使用Foxit PDF SDK for Windows (Java) 设置OCR功能模块的使用环境。
系统需求
平台: Windows
开发语言: C++, Java, C#
License key: license key中包含 ‘OCR’ 模块的权限
SDK 版本: Foxit PDF SDK for Windows (C++, Java, C#) 6.4或更高版本
OCR模块的试用限制
对于试用版本,您需要注意如下的三条限制要求:
- 允许从第一次初始化OCREngine开始,连续试用30个自然日。
- 允许从第一次初始化OCREngine开始,对累计不超过5000页的PDF页面可以使用OCR。
- PDF页面会生成试用水印。此限制用于所有SDK模块。
OCR资源文件
请联系Foxit支持团队或者销售团队以获取OCR资源文件包。
下载并解压包后(比如,将其解压到一个名为 “ocr_addon”的目录),您可以看到OCR的资源文件如下:
- debugging_files: 用于调试OCR工程的资源文件。这些文件不能随应用程序发布。
- language_resource_CJK: CJK语言资源文件,包括Chinese-Simplified, Chinese-Traditional, Japanese, 和 Korean。
- language_resources_noCJK: 除去CJK以外的语言资源文件,包括Basque, Bulgarian, Catalan, Croatian, Czech, Danish, Dutch, English , Estonian, Faeroese, Finnish, French, Galician, German, Greek, Hebrew, Hungarian, Icelandic, Italian, Latvian(Lettish), Lithuanian, Macedonian, Maltese, Norwegian, Polish, Portuguese, Romanian, Russian, Serbian, Slovak, Slovenian, Spanish, Swedish, Thai, Turkish, Ukrainian。
- win32_lib: Win32的库资源文件。
- win64_lib: Win64的库资源文件。
- readme.txt: 介绍该目录下各个文件夹的作用,以及如何使用这些资源文件构建一个OCR的资源目录。
如何运行OCR demo
Foxit PDF SDK for Windows (Java) 提供了一个OCR demo用来展示如何使用Foxit PDF SDK对PDF页面或者PDF文档进行OCR,该demo位于 “\examples\simple_demo\ocr” 文件夹下。
构建一个OCR资源目录
在运行OCR demo之前,您需要首先构建一个OCR资源目录,然后将该目录的路径传给OCREngine.initialize接口用来初始化OCR引擎。
构建一个OCR资源目录,请按照如下的步骤:
1)新建一个文件夹作为OCR的资源目录。比如,”D:/ocr_resources”。
2)根据要编译的平台架构,选择相应的库资源。
- 如果使用win32,则将 “ocr_addon/win32_lib” 文件夹下的所有文件拷贝到”D:/ocr_resources”。
- 如果使用win64,则将 “ocr_addon/win64_lib” 文件夹下的所有文件拷贝到”D:/ocr_resources”。
3)选择需要使用的语言资源。
- 如果只需要使用CIJ语言 (Chinese-Simplified, Chinese-Traditional, Japanese, 和 Korean),则将 “ocr_addon/language_resource_CJK” 文件夹下的所有文件拷贝到 “D:/ocr_resources”。
- 如果只需要使用除CIJ以外所支持的语言,则将 “ocr_addon/language_resources_noCJK” 文件下的所有文件拷贝到 “D:/ocr_resources”。
- 如果需要使用所有支持的语言,则将 “ocr_addon/language_resource_CJK” 和 “ocr_addon/language_resources_noCJK” 文件夹下所有的文件拷贝到”D:/ocr_resources”。
4)(可选) 如果需要调试demo,请根据平台架构,选择相应的调试资源文件。
- 如果使用win32,则将 “ocr_addon/debugging_files/win32” 文件夹下的文件拷贝到”D:/ocr_resources”。
- 如果使用win64,则将 “ocr_addon/debugging_files/win64” 文件夹下的文件拷贝到”D:/ocr_resources”。
备注:“ocr_addon/debugging_files” 文件夹下的文件只用于调试,请不要随产品发布。
配置demo
构建OCR资源目录后,在 “\examples\simple_demo\ocr\ocr.java” 文件中配置demo。
指定OCR资源目录
如下所示,添加OCR资源目录,用以初始化OCR引擎。

设置语言
设置需要被OCR引擎识别的语言。使用OCREngine.setLanguages接口设置语言,默认是英语。
![]()
(可选) 设置 OCREngine日志文件
如果您添加调试资源文件到OCR资源目录,并且需要打印OCR引擎的整个日志记录,请取消注释OCREngine.setLogFile 函数,如下所示:
![]()
运行demo
成功运行demo后,控制台将默认打印以下内容:
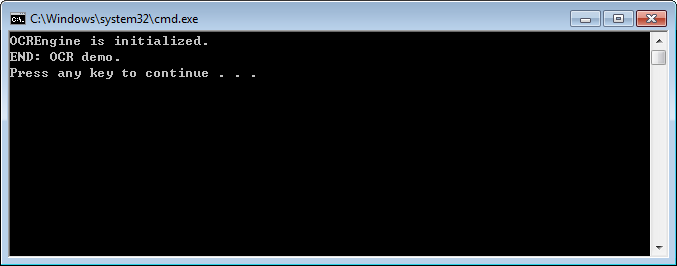
该demo将以四种不同的方式对默认的文档(“\examples\simple_demo\input_files\ocr\AboutFoxit_ocr.pdf”) 进行OCR,并在输出文件夹(“\examples\simple_demo\output_files\ocr”) 下输出四个不同的PDF文档:
- OCR Editable PDF – ocr_doc_editable.pdf
- OCR Searchable PDF – ocr_doc_searchable.pdf
- OCR Editable PDF Page – ocr_page_editable.pdf
- OCR Searchable PDF Page – ocr_page_searchable.pdf
Compliance
PDF Compliance
Foxit PDF SDK 支持PDF版本标准化转换,当前支持的版本有PDF 1.3, PDF 1.4, PDF 1.5, PDF 1.6 和 PDF 1.7。当转换到PDF 1.3版本时,如果源文档含有透明度的数据,则其会被转换到PDF 1.4版本而不是PDF 1.3版本 (PDF 1.3版本不支持透明度);如果源文档不含有任何透明度的数据,则会按预期转换到PDF 1.3版本。
PDF/A Compliance
PDF/A是一种ISO标准的PDF文件格式版本,用于电子文档的存档和长期保存。PDF/A与PDF的不同之处在于PDF/A禁用了PDF中不适合长期存档的特性,比如字体链接 (与嵌入字体相对)、加密、JavaScript、音频和视频等。
Foxit PDF SDK提供APIs用以将PDF转换为符合PDF/A标准的文档,或验证PDF是否符合PDF/A标准。支持的PDF/A标准包括PDF/A-1a、PDF/A-1b、PDF/A-2a、PDF/A-2b、PDF/A-2u、PDF/A-3a、PDF/A-3b、PDF/A-3u (ISO 19005- 1, 19005 -2 和 19005-3)。
本节将介绍如何设置相关环境以运行 ‘compliance’ demo。
系统需求
平台: Windows, Linux, Mac
开发语言: C++, Java, C#, Objective-C
License Key: ‘Compliance’ module permission in the license key
SDK 版本: Foxit PDF SDK 6.4或更高版本 (对于 PDF Compliance,则需要Foxit PDF SDK 7.1或更高版本)
Compliance 资源文件
请联系Foxit支持团队或者销售团队以获取Compliance资源文件包。
获取到资源文件包后,将其解压到所需目录 (比如,Windows解压到 “compliance/win“,Linux解压到 “compliance/linux“),然后您将看到Compliance的资源文件如下:
For Windows:
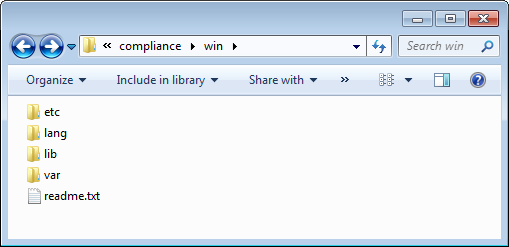
For Linux:
如何运行compliance demo
Foxit PDF SDK提供了一个compliance demo用来展示如何使用Foxit PDF SDK验证PDF文档是否符合PDF/A标准,如何将PDF转换为符合PDF/A标准的文档,以及如何进行PDF版本标准化转换。该demo位于 “\examples\simple_demo\compliance” 文件夹下。
构建一个compliance资源目录
在运行compliance demo之前,您需要首先构建一个compliance资源目录,然后将该目录的路径传给ComplianceEngine.initialize接口用来初始化compliance引擎。
Windows
在Windows平台构建一个compliance资源目录,请按照如下的步骤:
1)新建一个文件夹作为compliance的资源目录。比如,”D:/compliance _resources”。
2)将 “compliance/win” 目录下的 “ect“、”lang“、”var” 文件夹拷贝到”D:/compliance_resources”。
3)根据要编译的平台架构,选择相应的库资源。
- 如果使用win32,则将 “compliance/win/lib/x86” 文件夹下的所有文件拷贝到”D:/compliance_resources”。
- 如果使用win64,则将 “compliance/win/lib/x64” 文件夹下的所有文件拷贝到”D:/compliance_resources”。
例如,使用win32 平台架构,则compliance资源目录如下所示:
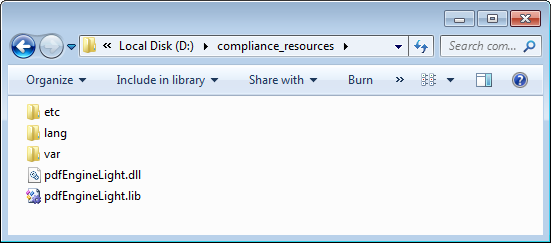
Linux
在Linux平台构建一个compliance资源目录,请按照如下的步骤:
1)新建一个文件夹作为compliance的资源目录。比如,”/root/Desktop/compliance_resources”。
2)将 “compliance/linux” 目录下的 “bin“、”ect“、”lang“、”var” 文件夹拷贝到”D:/compliance_resources”。
3)根据要编译的平台架构,选择相应的库资源。
- 如果使用linux32,则将 “compliance/linux/lib/x86” 文件夹下的所有文件拷贝到”/root/Desktop/compliance_resources”。
- 如果使用linux64,则将 “compliance/linux/lib/x64” 文件夹下的所有文件拷贝到”/root/Desktop/compliance_resources”。
例如,使用linux32平台架构,则compliance资源目录如下所示:
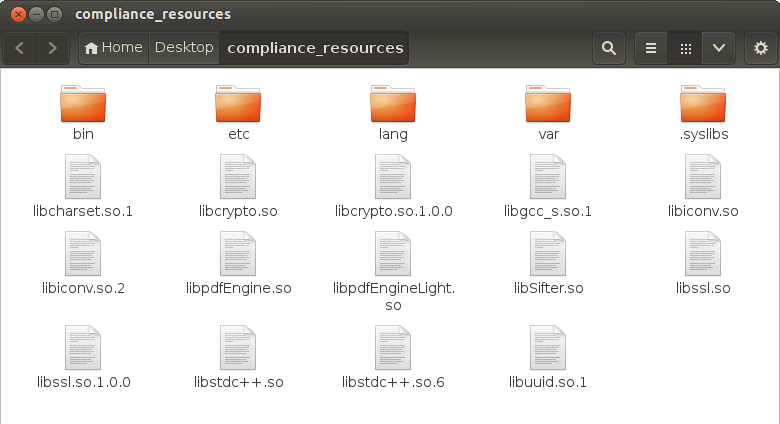
备注:对于Linux平台,在运行demo之前,您需要将compliance资源目录加入到系统共享库目录的查找路径中,否则ComplianceEngine.initialize会执行失败。
例如,在运行demo之前,您可以通过命令 (export LD_LIBRARY_PATH=${LD_LIBRARY_PATH}: /root/Desktop/compliance_resources) 将compliance资源目录临时加入到LD_LIBRARY_PATH。
配置demo
构建compliance资源目录后,在 “\examples\simple_demo\compliance\compliance.java” 文件中配置demo。
本节以Windows平台为例,展示如何在 “compliance.java” 文件中进行demo配置。对于Linux平台,其配置操作与Windows平台相同。
指定compliance资源目录
在 “compliance.java” 文件中,如下所示,添加compliance资源目录,用以初始化compliance引擎。

备注:如果您已经购买了授权的license key (包含 ‘Compliance’ 模块的权限),Foxit销售团队会给您额外发送一个unlock code,用以初始化compliance引擎。
(可选) 为compliance engine设置语言
ComplianceEngine.setLanguage 函数用来为compliance引擎设置语言。默认的语言是英语,所有支持的语言如下所示:
“Czech”, “Danish”, “Dutch”, “English”, “French”, “Finnish”, “German”, “Italian”, “Norwegian”, “Polish”, “Portuguese”, “Spanish”, “Swedish”, “Chinese-Simplified”, “Chinese-Traditional”, “Japanese”, “Korean”.
例如,取消注释 ComplianceEngine.setLanguage 函数,并将语言设置为 “Chinese-Simplified”。
![]()
(可选) 为compliance 引擎设置临时文件夹
ComplianceEngine.setTempFolderPath 函数用于设置一个临时文件夹以存储处理过程 (如验证或转换) 中生成的文件。如果此函数未设置自定义的临时文件夹,则将使用系统中默认的临时文件夹。
例如,取消注释 ComplianceEngine.setTempFolderPath 函数,并将路径设置为”D:/compliance_temp” (必须为一个有效的路径)。
![]()
运行demo
定位到 “\examples\simple_demo\compliance” 目录,运行 “RunDemo.bat”,然后控制台将默认打印以下内容:
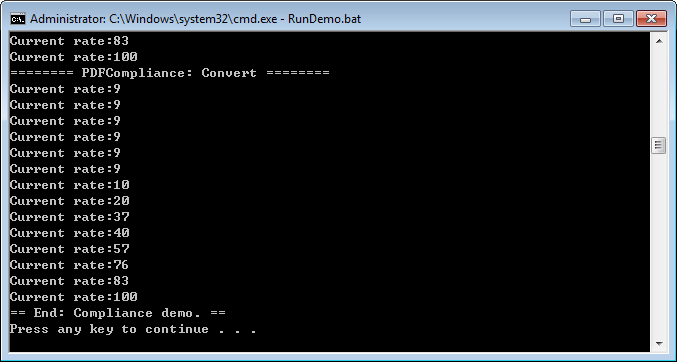
该demo
- 验证PDF (“\examples\simple_demo\input_files\AboutFoxit.pdf”) 是否符合PDF/A-1a标准,并将此文档转换为符合PDF/A-1a标准的文档。
- 将PDF (“\examples\simple_demo\input_files\AF_ImageXObject_FormXObject.pdf”) 分别转换为PDF-1.4和PDF-1.7版本。
输出文档位于”\examples\simple_demo\output_files\compliance” 文件夹下。
优化 (Optimization)
优化功能可以通过压缩PDF文件中的图片、删除冗余数据,以及丢弃无用的用户数据等方式有效地减少PDF文件的大小,从而节省磁盘空间以及便于PDF文件的传输和存储。从7.0版本开始,优化模块提供了压缩PDF文件中彩色、灰度和黑白图像的方法,用于减少PDF文件的大小。
备注:要使用优化功能,请确保授权key文件中包含 ‘Optimization’模块。
Example:
如何通过压缩PDF文件中的彩色、灰度和黑白图像来减少PDF文件的大小
import com.foxit.sdk.common.Progressive;
import com.foxit.sdk.common.Constants;
import com.foxit.sdk.common.fxcrt.PauseCallback;
import com.foxit.sdk.pdf.PDFDoc;
import com.foxit.sdk.pdf.PDFPage;
import com.foxit.sdk.addon.*;
import com.foxit.sdk.addon.optimization.*;
import com.foxit.sdk.addon.optimization.Optimizer;

import java.io.File;
import static com.foxit.sdk.common.Constants.e_ErrSuccess;
import static com.foxit.sdk.pdf.PDFDoc.e_SaveFlagRemoveRedundantObjects;
PDFDoc doc = new PDFDoc("input_pdf_file");
error_code = doc.load(null);
if (error_code != e_ErrSuccess) {
    System.out.println(" Error: " + error_code);
    return;
}
PauseUtil pause = new PauseUtil();
OptimizerSettings settings = new OptimizerSettings();
System.out.println("Optimized Start.");
Progressive progressive = Optimizer.optimize(doc, settings, pause);
int state = Progressive.e_ToBeContinued;
while (state == Progressive.e_ToBeContinued) {
    state = progressive.resume();
    int rate = progressive.getRateOfProgress();
    System.out.println("Optimize progress percent: " +  rate + "%");
}
if(state == Progressive.e_Finished)
{
    doc.saveAs("ImageCompression_Optimized.pdf", e_SaveFlagRemoveRedundantObjects);
}
System.out.println("Optimized Finish.");
HTML 转PDF
对于一些内容比较多的HTML大文件或者网页,直接进行打印或者存档不太容易。Foxit PDF SDK提供API接口将在线网页或者本地HTML文件转换为PDF文件,比如发票,报告等,使其更容易打印或者存档。在HTML转PDF的过程中,Foxit PDF SDK支持在基于HTML的组织结构的基础上创建和添加PDF Tag。
本节主要介绍如何配置运行 ‘html2pdf’ demo所需的环境。
系统需求
平台: Windows, Mac
开发语言: C++, Java, C#, Objective-C
License Key: license key中包含 ‘Conversion’ 模块的权限
SDK版本: Foxit PDF SDK 7.0 或更高版本
HTML转PDF引擎资源
请联系Foxit支持团队或者销售团队以获取HTML转PDF引擎文件包。
当获取到引擎文件包后,将其解压到所需目录 (比如,Windows解压到 “D:/htmltopdf/win“)。
如何运行html2pdf demo
Foxit PDF SDK提供了一个html2pdf demo用来展示如何使用Foxit PDF SDK将html文件转换为PDF文件。该demo位于 “\examples\simple_demo\html2pdf” 文件夹下。
配置demo
对于html2pdf demo,您可以在”\examples\simple_demo\html2pdf\html2pdf.java“文件中配置demo,或者您可以在命令行窗口中直接使用参数来对demo进行配置。以下将在Windows平台下,在 “html2pdf.java” 文件中配置demo。
指定html2pdf引擎资源目录
在 “html2pdf.java” 文件中,如下所示,添加 “fxhtml2pdf.exe” 引擎文件的路径,用以将html文件转换为PDF文件。
![]()
(可选) 指定cookies文件路径
添加cookies文件路径,该文件是从您需要转换的web页面中导出的。比如,
![]()
运行demo
运行demo (不带参数)
定位到 “\examples\simple_demo\html2pdf”,运行 “RunDemo.bat”,然后控制台将默认打印以下内容:
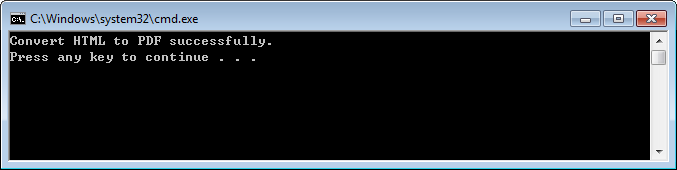
运行demo (带参数)
首先定位到 “\examples\simple_demo\html2pdf”,运行 “RunDemo.bat”。
然后,打开一个命令行窗口,导航到 “\examples\simple_demo\html2pdf”,输入”java -Djava.library.path=../../../lib -classpath .;../../../lib/fsdk.jar html2pdf –help” 命令查看如何使用参数来运行demo。
例如,将 “www.foxitsoftware.com” 网页转换为PDF文件,并且设置转换后的PDF页面的宽度为900 points,高度为300 points。
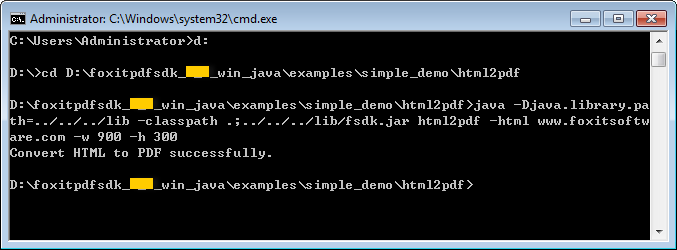
输出文档位于”\examples\simple_demo\output_files\html2pdf” 文件夹下。
参数描述
基本语法:
html2pdf <-html <the url or html path>> <-o <output pdf path>> <-engine <htmltopdf engine path>>
[-w <page width>] [-h <page height>] [-ml <margin left>] [-mr <margin right>]
[-mt <margin top>] [-mb <margin bottom>] [-r <page rotate degree>] [-mode <page mode>]
[-scale <whether scale page>] [-link <whether convert link>] [-tag <whether generate tag>]
[-cookies <cookies file path>] [-timeout <timeout>]
html2pdf –help
备注:
- <> 必选
- [ ] 可选
| 参数 | 描述 |
| –help | 参数用法的帮助信息。 |
| -html | URL或者html文件的路径。比如’-html www.foxitsoftware.com’。 |
| -o | 输出PDF文件的路径。 |
| -engine | “fxhtml2pdf.exe” 引擎文件的路径。 |
| -w | 输出PDF文件页面的宽度,单位是points。 |
| -h | 输出PDF文件页面的高度,单位是points。 |
| -r | 输出PDF文件页面的旋转度。
|
| -ml | 输出PDF文件页面的左边距。 |
| -mr | 输出PDF文件页面的右边距。 |
| -mt | 输出PDF文件页面的上边距。 |
| -mb | 输出PDF文件页面的下边距。 |
| -mode | 输出PDF文件的页面模式。
|
| -scale | 是否缩放页面。
|
| -link | 是否转换链接。
|
| -tag | 是否生成tag.
|
| -cookies | cookies文件路径,该文件是从您需要转换的web页面中导出的。 |
| -timeout | 加载web页面的超时时间。 |
FAQ
1. 如何获取PDF文件中指定位置的文本对象,以及更改文本对象的内容?
使用Foxit PDF SDK获取PDF文件中指定位置的文本对象以及修改文本对象的内容,请按照如下的步骤:
1)打开一个PDF文件。
2)加载PDF页面并获取该页面中的页面对象。
3)使用PDFPage.getGraphicsObjectAtPoint获取指定位置的文本对象。注意:使用页面对象获取矩形来查看文本对象的位置。
4)更改文本对象的内容并保存PDF文档。
以下是示例代码:
import com.foxit.sdk.PDFException;
import com.foxit.sdk.common.fxcrt.PointF;
import com.foxit.sdk.pdf.PDFDoc;
import com.foxit.sdk.pdf.PDFPage;
import com.foxit.sdk.pdf.graphics.*;

import static com.foxit.sdk.common.Constants.*;
import static com.foxit.sdk.pdf.PDFDoc.*;
import static com.foxit.sdk.pdf.graphics.GraphicsObject.*;
...

public class graphics_objects {
  ...
  static bool ChangeTextObjectContent() throws PDFException {

    String input_file = input_path + "AboutFoxit.pdf";
    PDFDoc doc = new PDFDoc(input_file);
    int error_code = doc.load(null);
    if (error_code != e_ErrSuccess) {
      System.out.println(String.format("The Doc [%s] Error: %d\n", input_file, error_code);
      return false;
    }
    // Get original shading objects from the first PDF page.
    PDFPage original_page = doc.getPage(0);
    original_page.startParse((e_ParsePageNormal, null, false);
    PointF pointf = new PointF(92, 762);
    GraphicsObjectArray arr = original_page.getGraphicsObjectsAtPoint(pointf, 10, e_TypeText);
    for(int i = 0; i<arr.getSize(); i++) {
      GraphicsObject graphobj = arr.getAt(i);
      TextObject textobj = graphobj.getTextObject();
      textobj.setText("Foxit Test");
    }
    original_page.generateContent();

    String output_directory = output_path + "graphics_objects/";
    String output_file = output_directory + "After_revise.pdf";
    doc.saveAs(output_file, e_SaveFlagNormal);

    return true;
  }
  ...
}
2. 是否可以改变嵌入TIFF图像的DPI?
无法改变。PDF中图像的DPI是静态的,如果图像已经存在,Foxit PDF SDK没有更改图像DPI的功能。
解决办法是您可以使用第三方库来更改图像的DPI,然后将其添加到PDF中。
备注:Foxit PDF SDK提供了一个函数 “Image.setDPIs”,可以用来设置图片对象的DPI属性,但是它仅支持使用Foxit PDF SDK创建或者使用 “Image.addFrame”函数创建的图像,不支持JPX, GIF 和 TIF格式。
附录
Foxit PDF SDK支持的JavaScript列表
对象的属性或者方法
| 对象 | 属性/方法名称 | 支持的最低SDK版本 |
| annotation properties | alignment | V7.0 |
| author | V7.0 | |
| contents | V7.0 | |
| creationDate | V7.0 | |
| fillColor | V7.0 | |
| hidden | V7.0 | |
| modDate | V7.0 | |
| name | V7.0 | |
| opacity | V7.0 | |
| page | V7.0 | |
| readOnly | V7.0 | |
| rect | V7.0 | |
| richContents | V7.1 | |
| rotate | V7.0 | |
| strokeColor | V7.0 | |
| textSize | V7.0 | |
| type | V7.0 | |
| annotation method | destroy | V7.0 |
| app properties | activeDocs | V4.0 |
| calculate | V4.0 | |
| formsVersion | V4.0 | |
| fs | V4.0 | |
| fullscreen | V4.0 | |
| language | V4.2 | |
| platform | V4.0 | |
| runtimeHighlight | V4.0 | |
| viewerType | V4.0 | |
| viewerVariation | V4.0 | |
| viewerVersion | V4.0 | |
| app methods | alert | V4.0 |
| beep | V4.0 | |
| browseForDoc | V4.0 | |
| clearInterval | V4.0 | |
| clearTimeOut | V4.0 | |
| launchURL | V4.0 | |
| mailMsg | V4.0 | |
| response | V4.0 | |
| setInterval | V4.0 | |
| setTimeOut | V4.0 | |
| popUpMenu | V4.0 | |
| color properties | black | V4.0 |
| blue | V4.0 | |
| cyan | V4.0 | |
| dkGray | V4.0 | |
| gray | V4.0 | |
| green | V4.0 | |
| ltGray | V4.0 | |
| magenta | V4.0 | |
| red | V4.0 | |
| transparent | V4.0 | |
| white | V4.0 | |
| yellow | V4.0 | |
| color methods | convert | V4.0 |
| equal | V4.0 | |
| document properties | author | V4.0 |
| baseURL | V4.0 | |
| bookmarkRoot | V7.0 | |
| calculate | V4.0 | |
| Collab | V4.0 | |
| creationDate | V4.0 | |
| creator | V4.0 | |
| delay | V4.0 | |
| dirty | V4.0 | |
| documentFileName | V4.0 | |
| external | V4.0 | |
| filesize | V4.0 | |
| icons | V4.0 | |
| info | V4.0 | |
| keywords | V4.0 | |
| modDate | V4.0 | |
| numFields | V4.0 | |
| numPages | V4.0 | |
| pageNum | V4.0 | |
| path | V4.0 | |
| producer | V4.0 | |
| subject | V4.0 | |
| title | V4.0 | |
| document methods | addAnnot | V7.0 |
| addField | V4.0 | |
| addIcon | V4.0 | |
| calculateNow | V4.0 | |
| createDataObject | V6.2 | |
| deletePages | V4.0 | |
| exportAsFDF | V4.0 | |
| flattenPages | V7.1 | |
| getAnnot | V7.0 | |
| getAnnots | V7.0 | |
| getField | V4.0 | |
| getIcon | V4.0 | |
| getNthFieldName | V4.0 | |
| getOCGs | V4.0 | |
| getPageBox | V4.0 | |
| getPageNthWord | V4.0 | |
| getPageNthWordQuads | V4.0 | |
| getPageNumWords | V4.0 | |
| getPageRotation | V7.0 | |
| getPrintParams | V4.0 | |
| getURL | V4.0 | |
| importAnFDF | V4.0 | |
| insertPages | V6.2 | |
| mailForm | V4.0 | |
| V4.0 | ||
| removeField | V4.0 | |
| replacePages | V6.2 | |
| resetForm | V4.0 | |
| submitForm | V4.0 | |
| mailDoc | V4.0 | |
| event properties | change | V4.0 |
| changeEx | V4.0 | |
| commitKey | V4.0 | |
| fieldFull | V4.0 | |
| keyDown | V4.0 | |
| modifier | V4.0 | |
| name | V4.0 | |
| rc | V4.0 | |
| selEnd | V4.0 | |
| selStart | V4.0 | |
| shift | V4.0 | |
| source | V4.0 | |
| target | V4.0 | |
| targetName | V4.0 | |
| type | V4.0 | |
| value | V4.0 | |
| willCommit | V4.0 | |
| event methods | – | – |
| field properties | alignment | V4.0 |
| borderStyle | V4.0 | |
| buttonAlignX | V4.0 | |
| buttonAlignY | V4.0 | |
| buttonFitBounds | V4.0 | |
| buttonPosition | V4.0 | |
| buttonScaleHow | V4.0 | |
| buttonScaleWhen | V4.0 | |
| calcOrderIndex | V4.0 | |
| charLimit | V4.0 | |
| comb | V4.0 | |
| commitOnSelChange | V4.0 | |
| currentValueIndices | V4.0 | |
| defaultValue | V4.0 | |
| doNotScroll | V4.0 | |
| doNotSpellCheck | V4.0 | |
| delay | V4.0 | |
| display | V4.0 | |
| doc | V4.0 | |
| editable | V4.0 | |
| exportValues | V4.0 | |
| hidden | V4.0 | |
| fileSelect | V4.0 | |
| fillColor | V4.0 | |
| lineWidth | V4.0 | |
| highlight | V4.0 | |
| multiline | V4.0 | |
| multipleSelection | V4.0 | |
| name | V4.0 | |
| numItems | V4.0 | |
| page | V4.0 | |
| password | V4.0 | |
| V4.0 | ||
| radiosInUnison | V4.0 | |
| readonly | V4.0 | |
| rect | V4.0 | |
| required | V4.0 | |
| richText | V4.0 | |
| rotation | V4.0 | |
| strokeColor | V4.0 | |
| style | V4.0 | |
| textColor | V4.0 | |
| textFont | V4.0 | |
| textSize | V4.0 | |
| type | V4.0 | |
| userName | V4.0 | |
| value | V4.0 | |
| valueAsString | V4.0 | |
| field methods | browseForFileToSubmit | V4.0 |
| buttonGetCaption | V4.0 | |
| buttonGetIcon | V4.0 | |
| buttonSetCaption | V4.0 | |
| buttonSetIcon | V4.0 | |
| checkThisBox | V4.0 | |
| clearItems | V4.0 | |
| defaultIsChecked | V4.0 | |
| deleteItemAt | V4.0 | |
| getArray | V4.0 | |
| getItemAt | V4.0 | |
| insertItemAt | V4.0 | |
| isBoxChecked | V4.0 | |
| isDefaultChecked | V4.0 | |
| setAction | V4.0 | |
| setFocus | V4.0 | |
| setItems | V4.0 | |
| global methods | setPersistent | V4.0 |
| Icon properties | name | V4.0 |
| util methods | printd | V4.0 |
| printf | V4.0 | |
| printx | V4.0 | |
| scand | V4.0 | |
| identity properties | loginName | V4.2 |
| Name | V4.2 | |
| corporation | V4.2 | |
| V4.2 | ||
| collab properties | user | V6.2 |
| ocg properties | name | V6.2 |
| ocg methods | setAction | V6.2 |
全局方法
| 方法名称 | 支持的最低SDK版本 |
| AFNumber_Format | V4.0 |
| AFNumber_Keystroke | V4.0 |
| AFPercent_Format | V4.0 |
| AFPercent_Keystroke | V4.0 |
| AFDate_FormatEx | V4.0 |
| AFDate_KeystrokeEx | V4.0 |
| AFDate_Format | V4.0 |
| AFDate_Keystroke | V4.0 |
| AFTime_FormatEx | V4.0 |
| AFTime_KeystrokeEx | V4.0 |
| AFTime_Format | V4.0 |
| AFTime_Keystroke | V4.0 |
| AFSpecial_Format | V4.0 |
| AFSpecial_Keystroke | V4.0 |
| AFSpecial_KeystrokeEx | V4.0 |
| AFSimple | V4.0 |
| AFMakeNumber | V4.0 |
| AFSimple_Calculate | V4.0 |
| AFRange_Validate | V4.0 |
| AFMergeChange | V4.0 |
| AFParseDateEx | V4.0 |
| AFExtractNums | V4.0 |
引用
[1] PDF reference 1.7
http://www.iso.org/iso/iso_catalogue/catalogue_tc/catalogue_detail.htm?csnumber=51502
[2] PDF reference 2.0
https://www.iso.org/standard/63534.html
[3] Foxit PDF SDK API reference
sdk_folder/doc/Foxit PDF SDK Java API Reference.html
备注: sdk_folder 是SDK包解压后的目录。
技术支持
您可以直接联系Foxit,请使用以下的联系方式:
线上支持:
联系销售:
- 电话: 1-866-680-3668
- 邮箱: sales@foxitsoftware.com
联系技术支持团队:
- 电话: 1-866-MYFOXIT or 1-866-693-6948
- 邮箱: support@foxitsoftware.com